9. Integrated Video Tutorials
This guide explains how to use our Integrated Video Tutorials plugin to embed all the high-quality videos from our WordPress for Beginners training library. Video playlists can be embedded in the Contextual Help box anywhere in your admin area, or anywhere on the frontend of your site, or both.
You can also create and add your own custom training videos and even custom playlists. The plugin is a powerful tool for onboarding new users, improving admin skills, and reducing support requests.
Wanting a quick overview of all the features that Integrated Video Tutorials offers? Check out our blog on how to Get the Most Out of Integrated Video Tutorials.
Use the Index on the left to quickly locate usage guidance on specific features.
If you haven’t installed the Integrated Video Tutorials plugin yet, then you should visit the plugin page, where you can explore the plugin’s many features, and where WPMU Dev members can install Integrated Video Tutorials directly to any connected site.
9.1 Dashboard
Copy chapter anchor to clipboardThe Integrated Video Tutorials Dashboard screen gives you an overview of recently added videos and playlists, as well as handy buttons to jump to the corresponding admin screens where you can add your own custom videos and/or playlists. Click the gear icon for any video or playlist to reveal quick links to options for each. See the Videos or Playlists sections below for more info on those options.
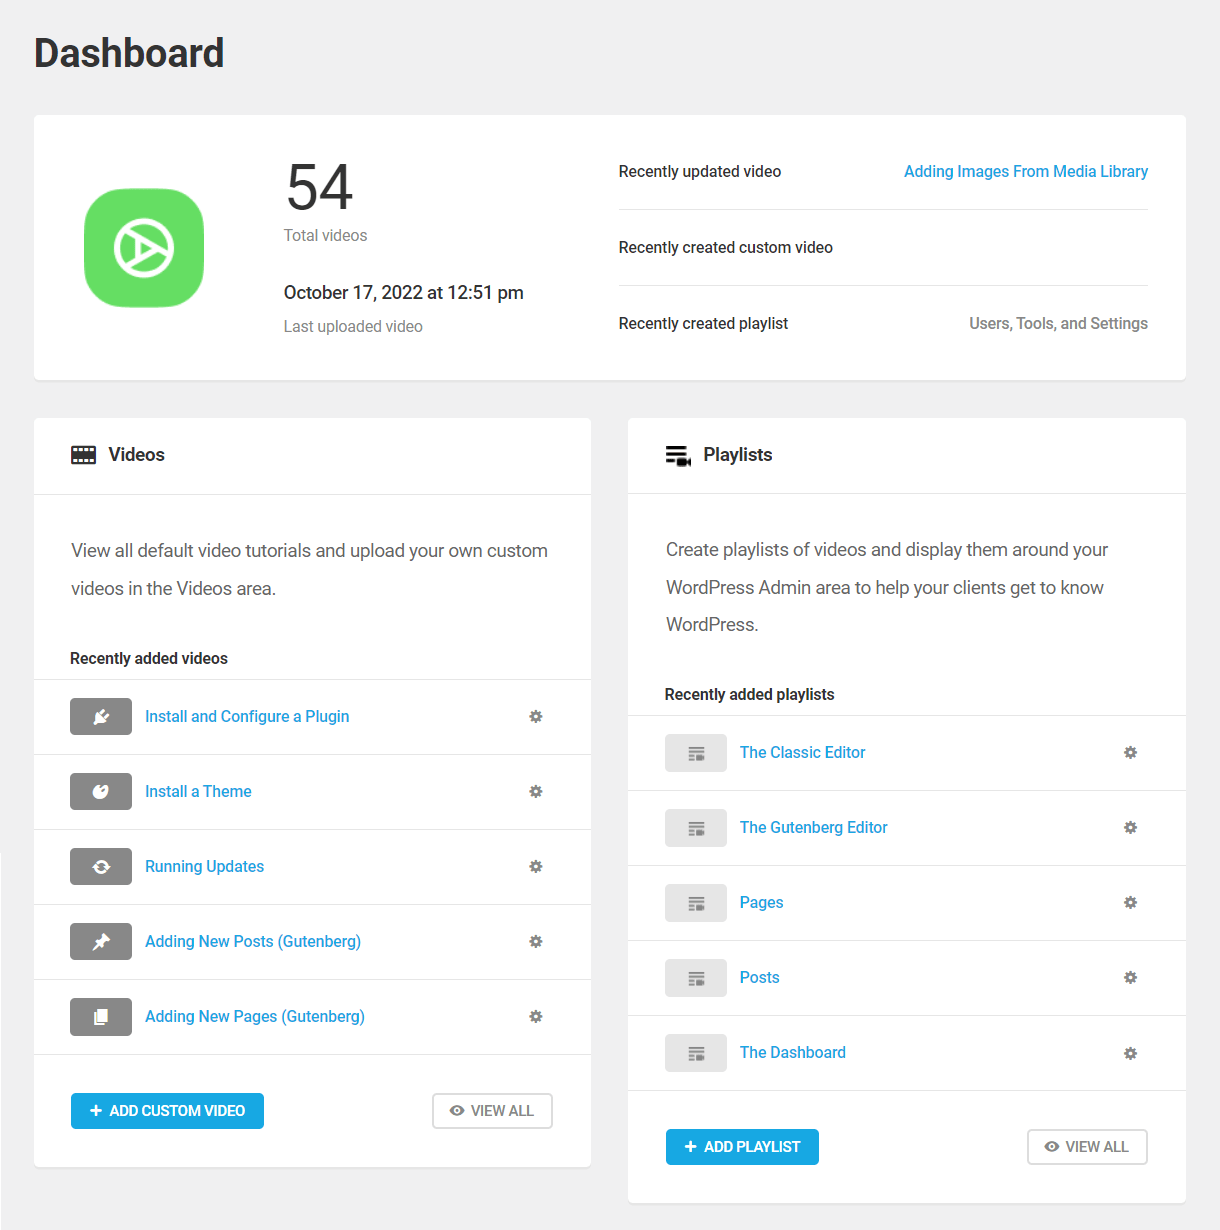
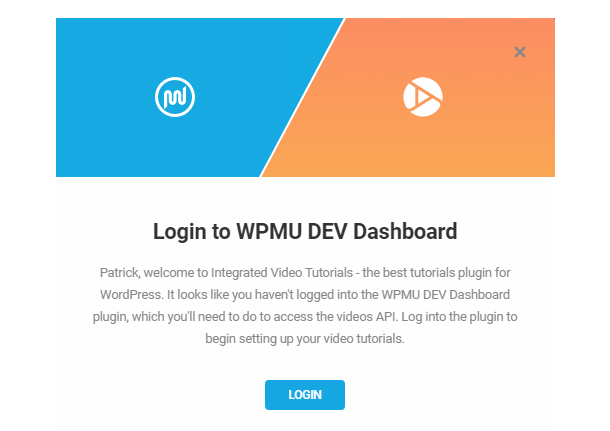
Note that the first time you visit this screen, you will be prompted to install and/or log into the WPMU DEV Dashboard plugin if you haven’t already. This is required as the Integrated Video Tutorials work through our API which is only available with the WPMU DEV Dashboard plugin installed.

9.2 Videos
Copy chapter anchor to clipboardThe Videos screen is where you’ll manage all the videos you make available to your users in your playlists. The overview section at the top of this screen provides quick info about the total number of videos available, the most recently updated video, most recently used video host and most recent custom video. There’s also a search box so you can quickly locate a specific video without having to scroll through the entire list.

9.2.1 Available Videos
Link to chapter 2The Available Videos section lists all videos currently available to use in your playlists, including any custom videos you may have added.

Use the quick edit buttons next to any video title to add it to an existing playlist, edit the video title or copy the video shortcode to embed it anywhere on the frontend of your site.

To preview a video, click on its title. You’ll find the same editing options there as well.

9.2.2 Add to playlist
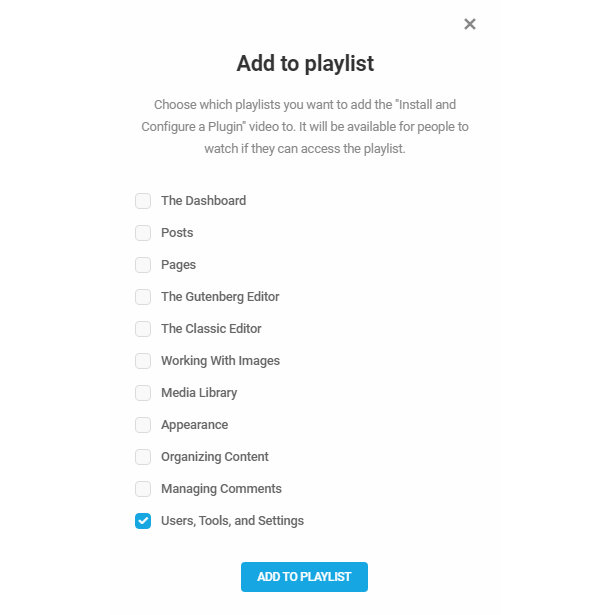
Link to chapter 2Clicking the Add to Playlist button in either of the options above will open a modal where you can select the playlist(s) where you want to include the video. Any custom playlists you create in the next section will appear in this modal as well. Select the playlist(s) you want and click Add to Playlist to finish.
9.2.3 Edit Title
Link to chapter 2Clicking the Edit Title button in either option above will open a modal where you can edit the video title that appears beneath the video wherever the video appears in your admin area. Note that when a video is embedded on the frontend, this title does not appear with the video, so you’ll want to keep that in mind if embedding on frontend pages.

9.2.4 Copy Shortcode (Videos)
Link to chapter 2The Copy Shortcode option does exactly that; it simply copies the video shortcode to your clipboard so you can embed the video anywhere you like on the frontend of your site wherever shortcodes can be used. So you can create frontend pages with tutorial videos, or even have them embedded in popups wherever appropriate if you like.
Each video shortcode is unique and specific to that video, and would look like this example:
[wpmudev-video video="install-plugin"]
Note that if you have added custom videos, their shortcodes would include the video ID instead of the name and would look like this example instead:
[wpmudev-video video="253"]
If you need to resize the videos to better fit your site layout, you can optionally specify the width and/or height of the video in the shortcode. You can use either percentage or fixed pixel values. For example:
[wpmudev-video video="install-plugin" width="50%" height="50%"]
[wpmudev-video video="install-plugin" width="300" height="200"]
9.2.5 Add a Custom Video
Link to chapter 2To add your own custom video, start by clicking the Add Custom Video button at the top-left of the Videos screen.
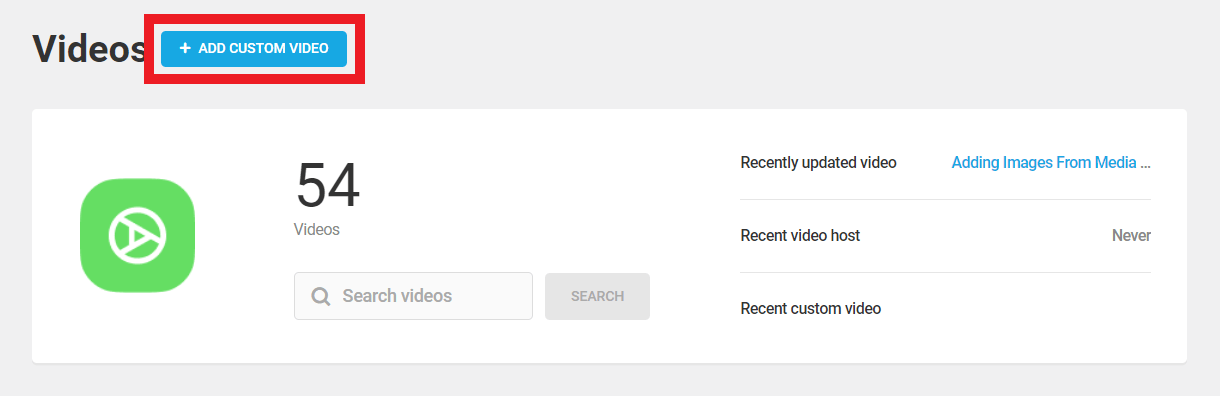
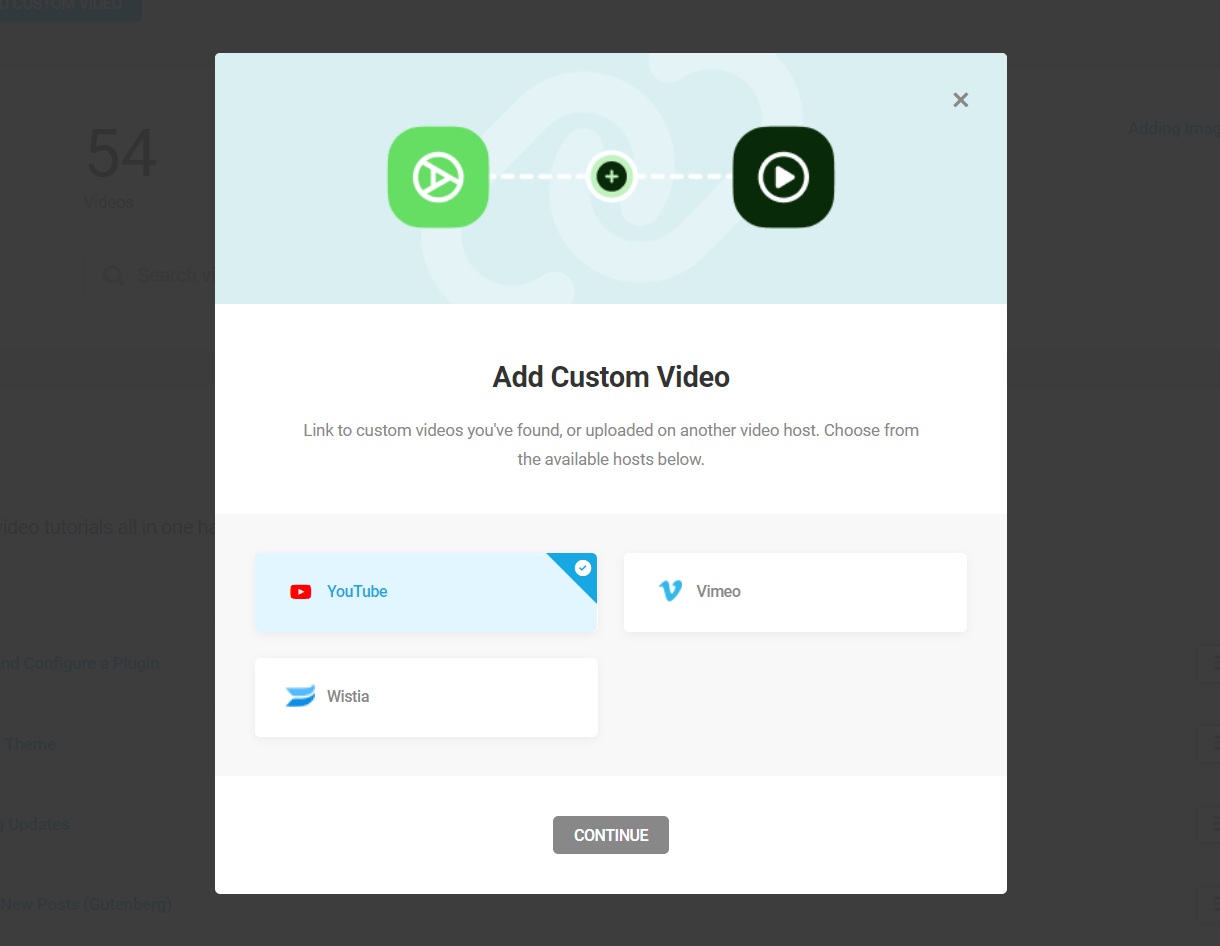
That will open a modal where you’ll first select the source where your custom video is hosted. At this time, only YouTube, Vimeo and Wistia are supported as hosts for your custom videos. Select the source and click the Continue button.
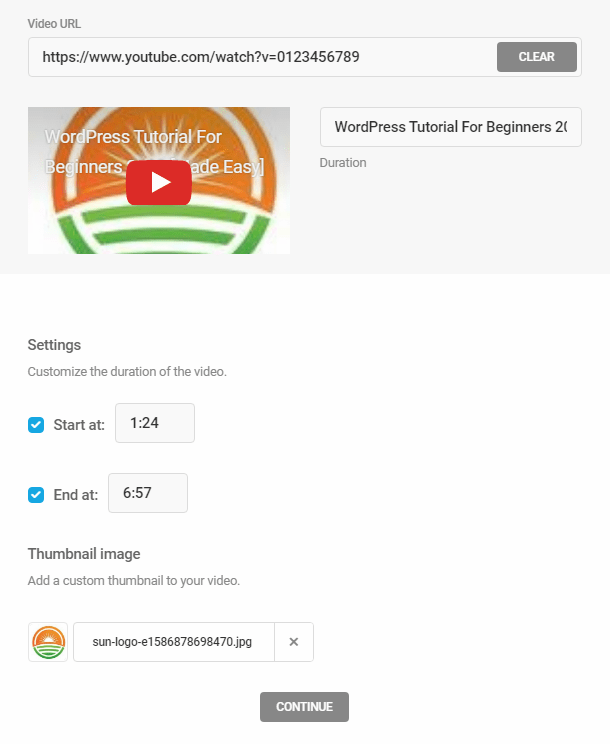
Enter the URL to the video as provided by the host and click the Add Video button. You can either copy the URL directly from your browser’s address bar, or use the Share option at the video host to use the shortlink they provide.

You should then see the preview of your custom video with a few additional options below. Configure the options you need and click the Continue button.
- Settings – Optionally select the time the video should start and/or end at.
- Thumbnail image – Optionally upload a custom image to use as the video thumbnail instead of the one provided with the video.
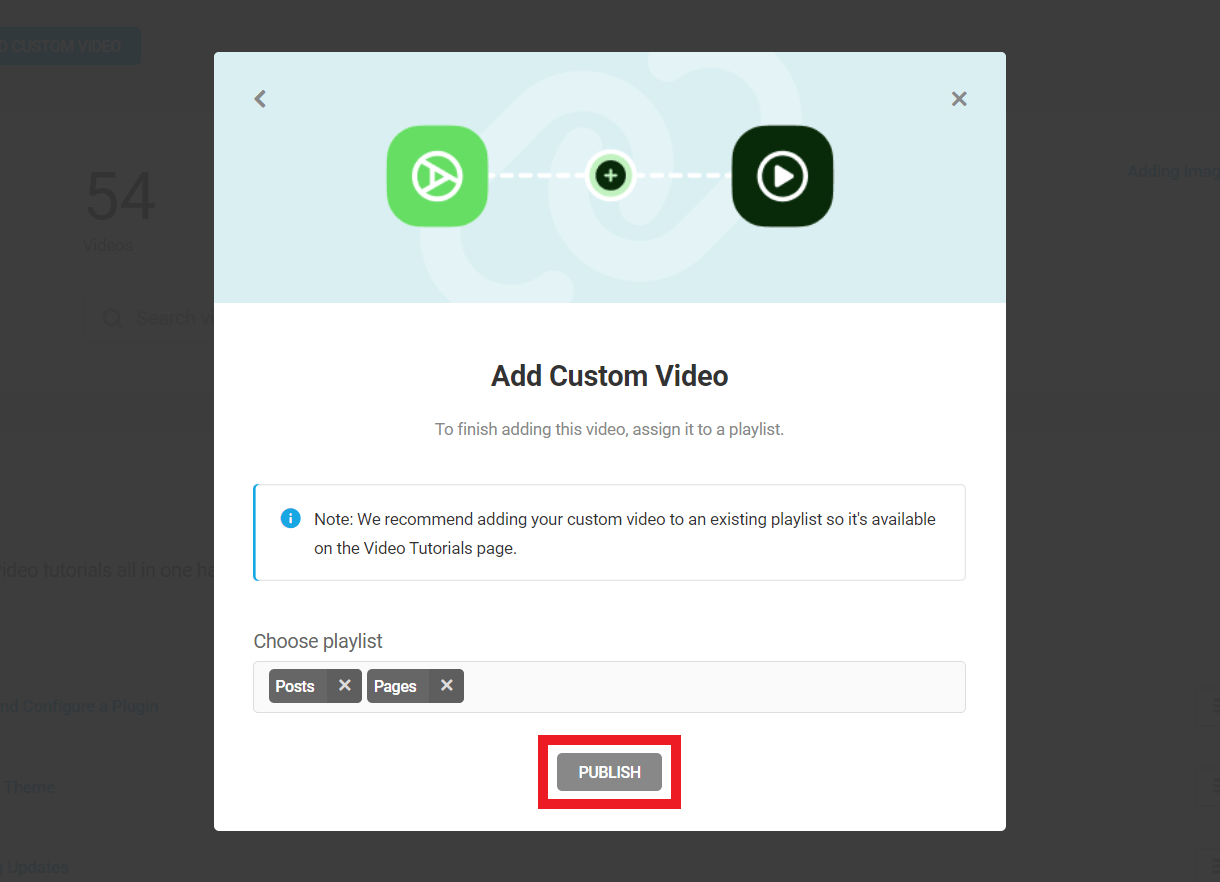
The final screen of this modal will give you the option to add your custom video to any existing playlist(s) right away, including any custom playlist(s) you may have already created.
Click in the Choose Playlist field and select the playlist(s) you want add your custom video to, and click the Publish button to finish. If you don’t want to add your custom video to any playlist at this time, just click the Publish button without selecting any playlists.
You’ll then see your custom video successfully added to the list of Available Videos along with all the ones we provide.

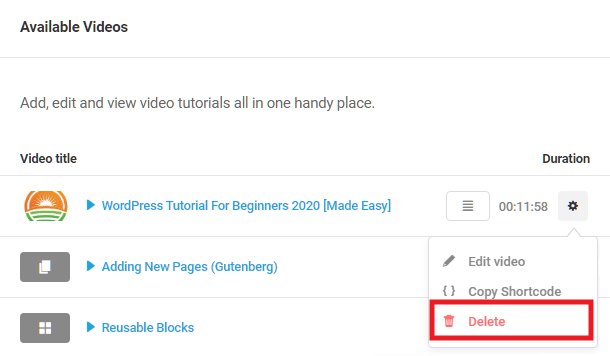
Once added, your custom video can be edited in the same manner as any default video by selecting the appropriate option under the gear icon for that video.
To delete any custom video you have added, click the Delete option under the gear icon for that video. Note that only custom videos you have added can be deleted; the default videos included with the plugin cannot be deleted.
9.3 Playlists
Copy chapter anchor to clipboardThe Playlists screen is where you’ll manage all your video playlists. This is also where you assign playlists to various areas in your admin so they appear in the Contextual Help box wherever you want them. The overview section at the top of this screen provides quick info about the total number of playlists, as well as the most recently created and most recently updated playlists.

You’ll see there are a number of pre-configured playlists for your convenience that you can start using right away, customize to your preference, or delete. You can also add your own custom playlists here. All of which can easily be re-ordered by dragging and dropping each row. Hover over the dotted icon to make use of the drag-and-drop feature.
![]()
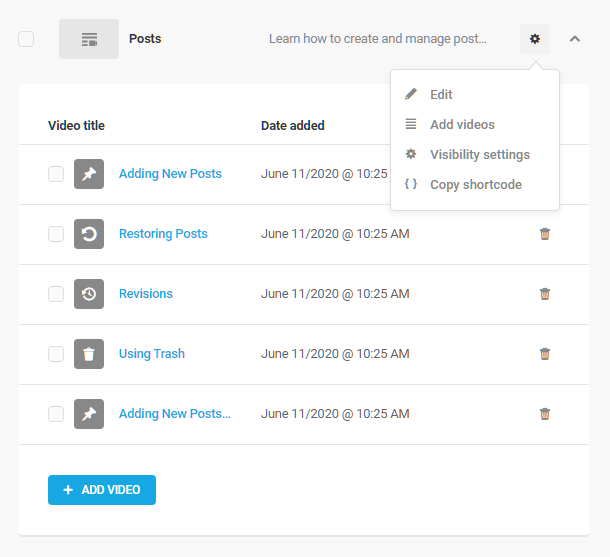
Click the title of any playlist to reveal the videos currently included in it, or click the gear icon of any one to reveal options for that playlist.
9.3.1 Edit a playlist
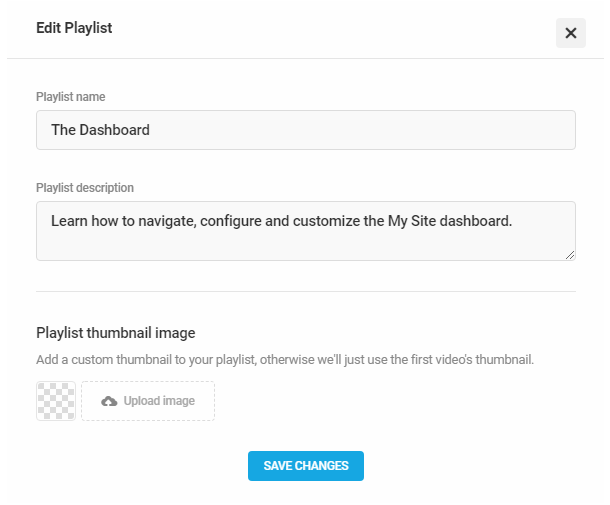
Link to chapter 3Click the Edit option to pop open a modal where you can customize the playlist name, description and thumbnail image if desired. Click the Save Changes button when you’re done editing.
9.3.2 Add videos to a playlist
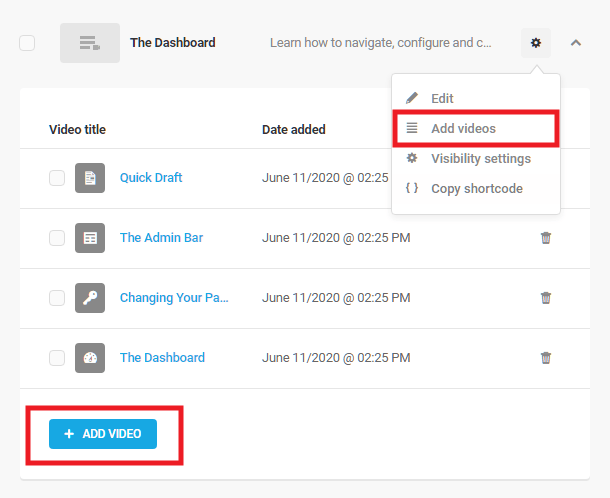
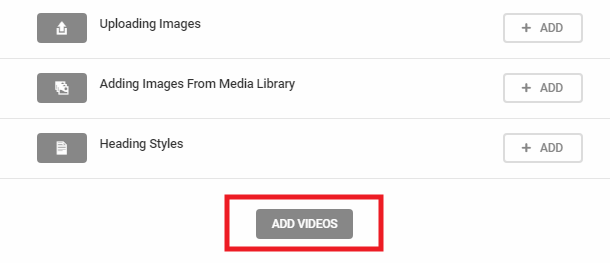
Link to chapter 3To add a new video to a playlist, click the Add Videos option under the gear icon, or the Add Video button at the bottom of the playlist.
That will open a modal where you need only click the Add button for any video(s) you want to add to the playlist. You can use the search box at the top to search for any video without having to scroll through the entire list. Videos already in the playlist will appear with an Added button next to them.
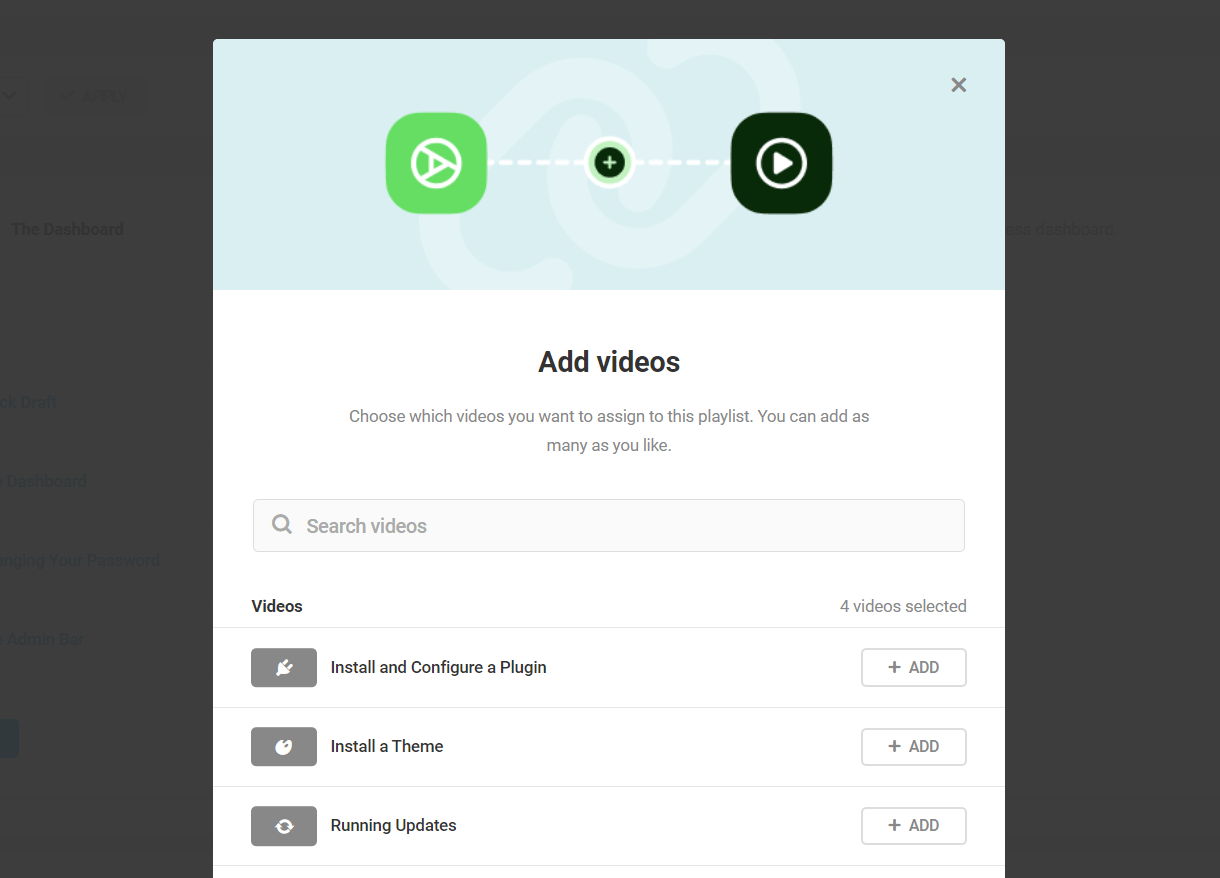
You can also quickly remove any video from the playlist here by hovering your mouse over any Added button to change it to Remove, then click it.

Once you’re done adding or removing videos from the playlist, scroll to the bottom of the modal and click the Add Videos button there to save your changes.
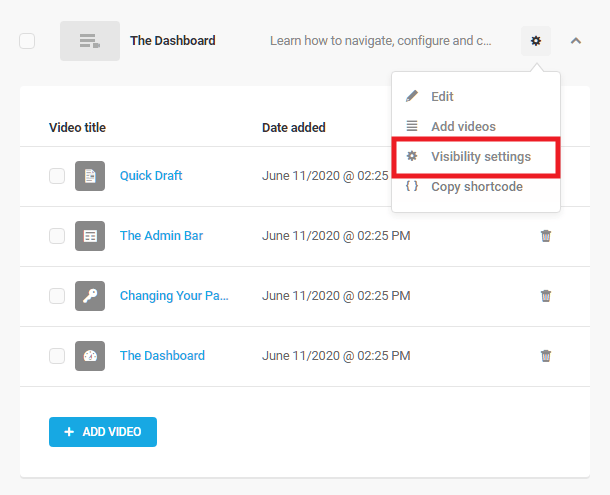
9.3.3 Visibility settings
Link to chapter 3The visibility settings in each playlist enable you to set which user roles can view that playlist, and where that playlist appears in the Contextual Help box in your admin area. To adjust these settings, click the Visibility settings option under the gear icon.
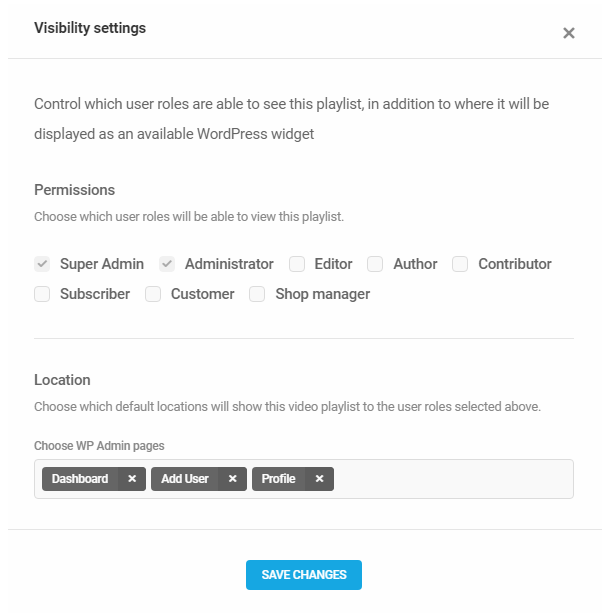
That will open a modal where you’ll see visibility Permissions and Location options.
- Permissions – The Permissions section lists all the user roles available on your site. Check the roles you wish to have access to view the playlist. By default, the Administrator role is pre-selected and cannot be de-selected (in multisite installs, the Super-Admin role is also pre-selected).
- Location – Click in the Locations field and select the admin area screens where you want this playlist to appear in the Contextual Help box.
Click the Save Changes button to finish.
9.3.4 Copy Shortcode (Playlists)
Link to chapter 3The Copy Shortcode button does exactly that; it simply copies the playlist shortcode to your clipboard so you can embed the playlist anywhere you like on the frontend of your site wherever shortcodes can be used. So you can create frontend pages with the all videos in your playlist included by adding just one shortcode.
Each playlist shortcode is unique and specific to that playlist, and would look like this example:
[wpmudev-video group="gutenberg"]
If you need to resize the videos in your playlist to better fit your site layout, you can optionally specify the width and/or height of the videos in the playlist shortcode. You can use either percentage or fixed pixel values. For example:
[wpmudev-video group="gutenberg" width="50%" height="50%"]
[wpmudev-video group="gutenberg" width="300" height="200"]
9.3.5 Add a Custom Playlist
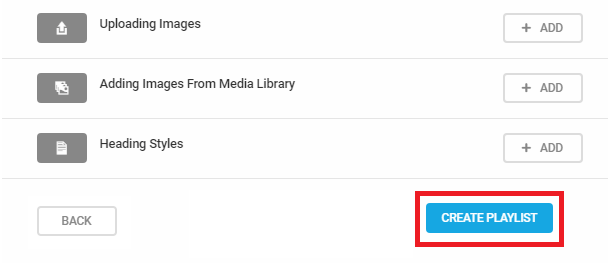
Link to chapter 3To add your own custom playlist, start by clicking the Create Playlist button at the top-left of the Playlists screen.

That will open a modal where you’ll see the following options:
- Playlist name – Enter the name you wish to appear when embedding your custom playlist.
- Playlist description – Optionally enter the playlist description.
- Playlist thumbnail image – You can upload a custom image to use as the playlist thumbnail. If no image is uploaded, the plugin’s default playlist image will be used.
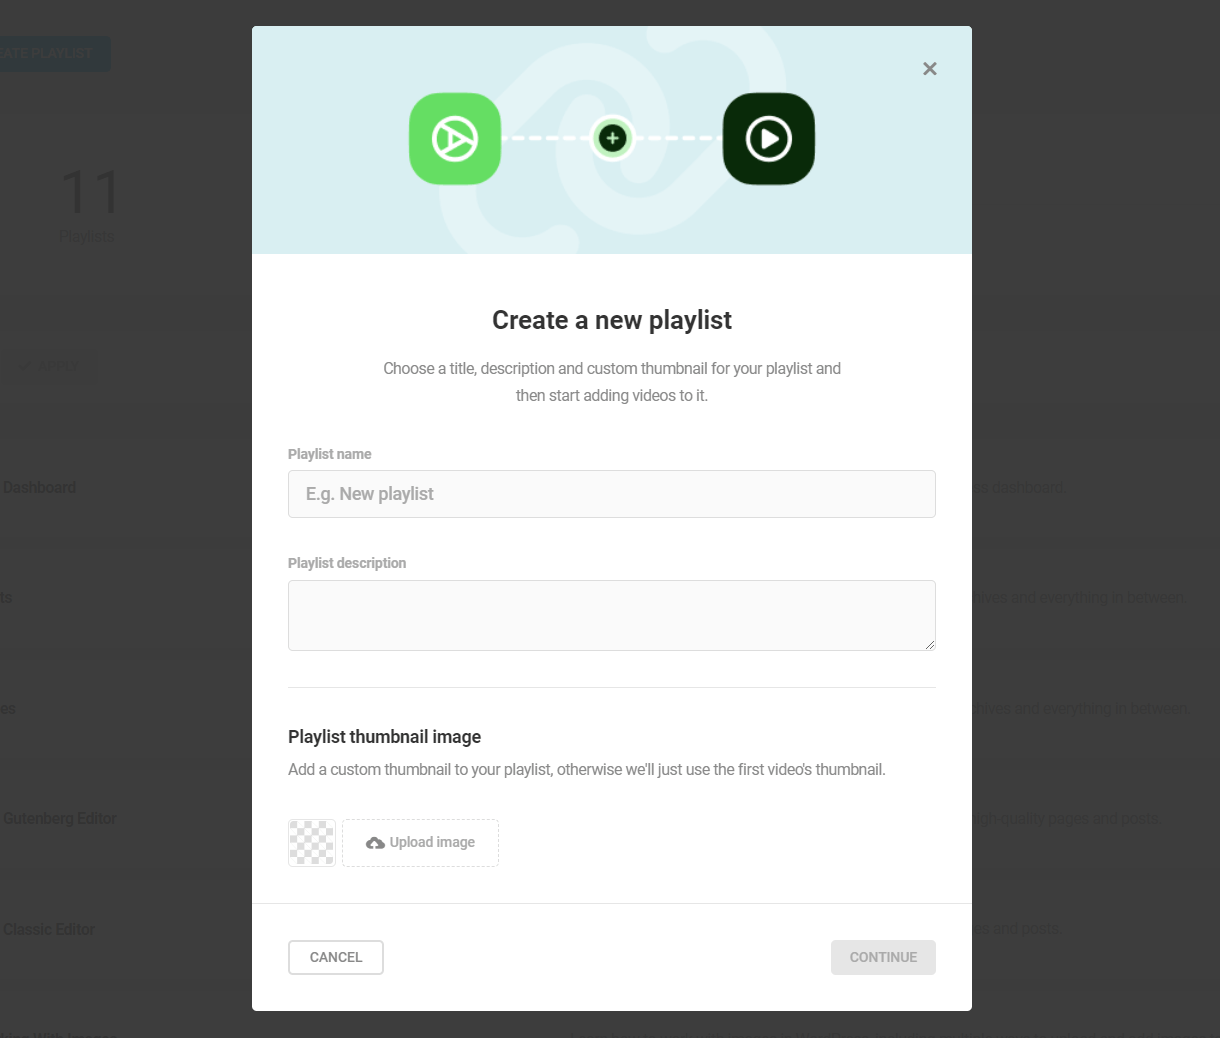
Click the Continue button to proceed to the next step where you’ll see that adding videos to your custom playlist is just like adding them to an existing default playlist.
Click the Add button for any video(s) you want to add to the playlist. You can use the search box at the top to search for any video without having to scroll through the entire list. Videos already in the playlist will appear with an Added button next to them.

You can also quickly remove any video from the playlist here by hovering your mouse over any Added button to change it to Remove, then click it.
Once you’re done adding or removing videos from the playlist, scroll to the bottom of the modal and click the Create Playlist button there to save your new custom playlist. (If you’re editing an existing custom playlist, this button will say Add Videos.)
Once added, your custom playlist can be edited in the same manner as any default playlist by selecting the appropriate option under the gear icon for that playlist.
To delete any custom playlist you have added, click the Delete option under the gear icon for that playlist. Note that only custom playlists you have added can be deleted; the default playlists included with the plugin cannot be deleted.

9.4 Settings
Copy chapter anchor to clipboardThe Settings section is where you’ll find all the options that apply to the plugin interface itself.
9.4.1 Display Settings
Link to chapter 4These settings determine how your videos should display in the admin area of your site.
Tutorials Tab
Enable this option if you want all videos and playlists to be accessible on one screen in your admin area.
- Choose the location of the videos page in the admin menu – You can choose to display all videos either under the WordPress Dashboard menu item, or as its own top-level menu item.
- Show the tutorials tab in the WP Admin sidebar – For either of the above options, you can set the menu title that will appear as your tutorial videos menu item.
Help Videos
Enable this option to have the videos appear in the Contextual Help boxes according to the configurations you set in the Visibility settings for your playlists.
Note that you can both of the above options enabled so your videos appear both on their own screen and in the Contextual Help boxes wherever you want them.

9.4.2 Permissions
Link to chapter 4The Permissions settings enable you to select the user roles who can access and edit the plugin settings. By default, the Administrator role is pre-selected and cannot be de-selected, but you can grant permissions to any other role as well if desired.

Note that in a WordPress mutlisite install, there are no Permissions settings. That is because this plugin must be network-activated, and only the super-administrator role can access the network settings at any rate.
9.4.3 Import/Export
Link to chapter 4To save you time re-configuring the plugin on multiple sites, you can import the settings and data from any other site where you have the Integrated Video Tutorials plugin installed. You need only export a .json file containing all the data you want from one site, then upload that same file to another site.
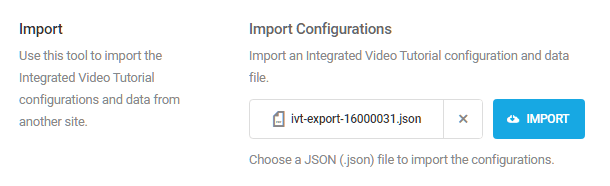
Import
To import, click the Upload File button and select the .json configuration file (see directions for that below) that you want to import from your computer, then click the Import button.
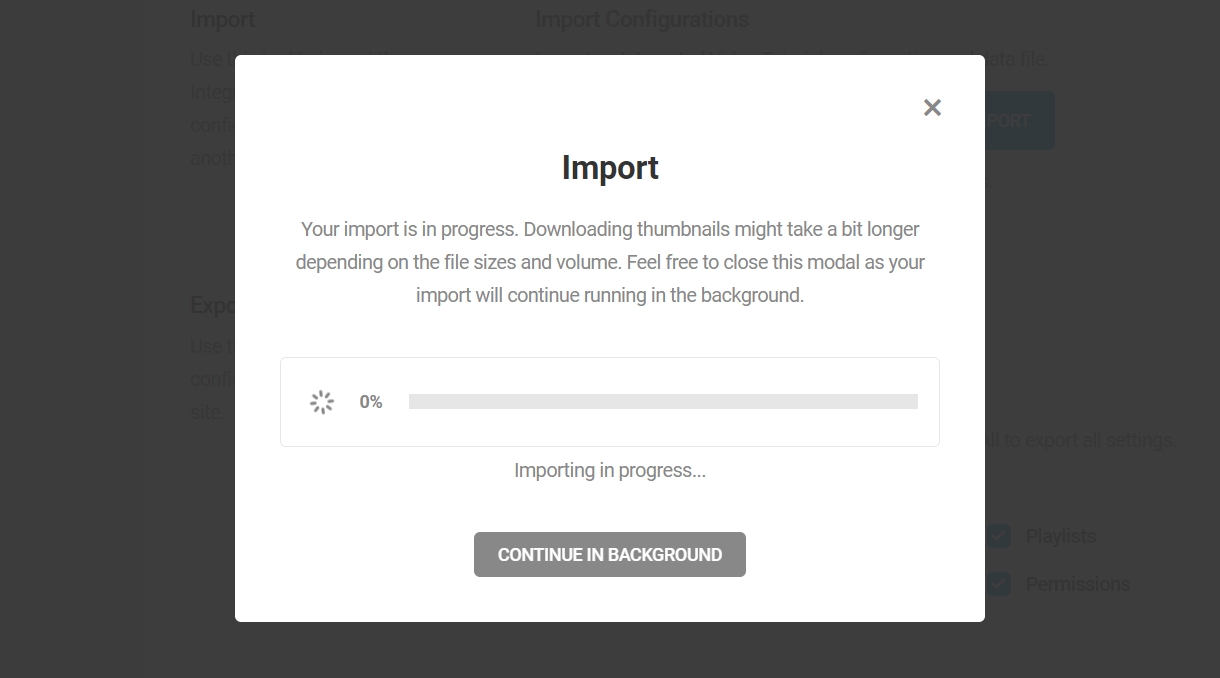
In the modal window that pops open, select the data and settings you want to import, and click the Import button there to start the process.

A progress indicator will appear showing you how far along the import is. You can close the modal if you like and the import will continue in the background.
Export
To create the .json file needed to export the current configuration to use on other sites, first select the content and settings you want to include in your export file, then click the Export button.
Save the file in a convenient location on your computer to use on any other site where you have the plugin installed.

9.4.4 Data
Link to chapter 4Uninstallation
In this section, you can choose whether to keep or discard your settings and/or data if you ever need to uninstall the plugin.
- Settings – Select the Preserve option if you want all your settings to be the same when you re-install the plugin, or select Reset if you want to start fresh the next time you install the plugin on your site.
- Data – Select the Keep option if you want all your video and playlist data to still be available when you re-install the plugin, or select the Remove option to start fresh next time.

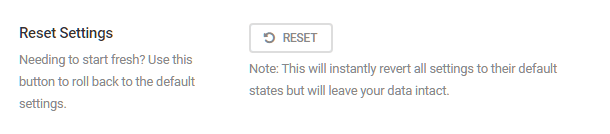
Reset
If you ever need to start over, click the Reset button here to reset all plugin settings to their defaults, but keep your video data intact.
9.5 Get Support
Copy chapter anchor to clipboardIf you still have questions or need assistance after reading this document, please don’t hesitate to contact our support superheroes using the available options under the Support tab in your Hub or via the Support tab in your WPMU DEV Dashboard.


