8. Staging
This document provides guidance on using the features of the Staging tool included with every WPMU DEV hosted site.
Please be sure to review the Staging Best Practices chapter below to ensure you’re aware of the limitations and recommended uses of a staging environment.
If you haven’t set up your WPMU DEV hosting account yet, visit our hosting page, where you can explore the features & pricing packages.
Already a Member? Visit your hosting dashboard to get started. More on getting started with WPMU DEV hosting can be found here.
Note that the Staging feature is not available for sites on the Quantum plan. See Quantum Plan Restrictions for details.
8.1 Staging Best Practices
Copy chapter anchor to clipboardA staging environment can be a very useful tool, but it does have its limitations. When considering using a staging environment for any reason, always keep this important point in mind:
- When you move your staging site to your production site, the changes you made on staging will not be merged with your live site. Rather, your live site will be overwritten with the staging data and/or contents.
As an example of the above, if you have an active e-commerce site and receive new orders or signups while you’re making changes on staging, you would lose those orders & signups when staging is pushed to production if you select to move both Files & Database.
However, if you only made changes to some theme or plugin files on staging, and selected to move only Files when pushing staging to production, then your new orders & signups would be preserved in the production database. See Move Staging to Production below for more info.
Here’s a quick breakdown of how to best leverage your staging environment, and when not to use it.
Recommended Uses of Staging
- Use staging to test themes & plugins for compatibility, layout & design issues, etc.
- Use to test theme & plugin updates before updating them on your live site.
- Use to test custom modifications to plugin & theme features & functionality before making such changes on your live site.
- Use to test custom CSS or code tweaks before making such changes on your live site.
- Use to check for PHP compatibility before updating the PHP version on your live site.
- Can be used to edit content or data stored in the database (posts, pages, products, etc, or widgets & various settings), as long as content is not being actively updated on your live site in the meantime.
When NOT to Use Staging
- Don’t use staging to edit any content or data stored in the database (posts, pages, products, product variations, orders, etc, or widgets & various settings) when content may be actively changing on your live site in the meantime (like an active e-commerce site, forum, or regularly updated blog with multiple authors).
- Don’t use staging as a backup of your production site. All WPMU DEV hosted sites are automatically and securely backed up every night, and you can download and save any backup from your Hub.
- Don’t use staging to test site performance. Staging resources are very limited and, as such, performance tests would not deliver reliable results.
- Don’t use staging for long-term development projects as the likelihood of encountering incompatibilities & conflicts increases with time. Such projects may be better suited to local development environments, or separate live sites that can simply be password-protected during development.
- Don’t use staging if you need to make changes to subsites in certain multisite configurations. See Multisite Staging below for more info.
What If I NEED to Merge Data Changes from Staging to an Active Site?
There may come a time when, for any reason, you absolutely do need to use staging to make edits to content for an active & regularly updated site, then merge those changes to the production site without losing new data.
In such a case, we recommend the following procedure to safeguard data on your live site:
Before Pushing to Production
- Once you have finished making all your edits on the staging site, temporarily put your production site into maintenance mode. Use the Website Mode module in Branda for that, or any other similar plugin if you prefer.
- If there are users currently logged into your live site, you may want to force them to log out so they can’t make any content changes while you’re updating the site. The easiest way to do that is to change the security salts in your wp-config.php file. You can do that manually by editing the file, or use the Update old security keys Security Recommendation in Defender.
- Export the data that you want to preserve from the live site, such as new e-commerce orders, new users, new forum topics, etc.. You can use the options under Tools > Export in your wp-admin, or a handy plugin like WP All Export for that.
Push Staging to Production
- Click the Go button to move your staging site to production.
After Pushing to Production
- Import the data contained in the file you exported in the previous step. You can use the options under Tools > Import, or a handy plugin like WP All Import for that.
- Deactivate maintenance mode on your live site.
8.2 Setting up a Staging Site
Copy chapter anchor to clipboardYou can create a Staging site by visiting the Staging tab of your Hosting Hub. Simply follow the prompts there to create and access your new Staging site, which is a full copy of your live site. Perfect for trying out new plugins or themes, proofing content changes, and other development work.
Staging sites do not have backups and can not be recovered after resyncing with Production. If you are working on a rewrite or long-term design project, consider local development or working from a password-protected Production environment with regular backups. If you absolutely do need a backup of your staging site, create one with Snapshot and download it for safekeeping.

To copy a website to Staging for the first time, visit the Staging module and click the Start button.

This will generate a copy of your live site with a modified URL, such as: yoursitename.staging.tempurl.host. When the Staging environment is created, a hotlink to the Staging environment will be available under the Domain field.

For security purposes, the Single Sign-on state of the production site is not copied to the staging site. Hence, If you created a staging site while the SSO feature is enabled on your production site, you will see the following error when using the hotlink to navigate to your staging site dashboard:
{"code":"invalid_sso_attempt_hmac","message":"Could not validate the hmac of the SSO attempt.","data":{"status":400}}
To overcome this issue, manually type in the URL of your staging site dashboard and log in using your production site credentials. Then go to WPMU DEV > Settings and disable SSO, enable it again, then click the Save Changes button.
If you have enabled Defender’s reCaptcha on your production site, ensure that you register the staging site domain to avoid getting an “Invalid domain for site key” error that blocks you from logging into the staging site.
8.3 Staging Options
Copy chapter anchor to clipboardThis section covers the three options available in the Staging module. Options include:
- Move Staging to Production
- Sync production to Staging
- Delete Staging
8.3.1 Move Staging to Production
Link to chapter 3When you are ready to make the contents of your Staging site live, move them to Production. This will replace your live, or Production site, with the contents of the staging site.
To move your Staging site to Production, click the Go button.

This will open a module where you can select to move the Staging Files or Files & Database to Production.
- Files – Selecting to move only files will only move the things you can see when you access your site’s file system via SFTP or the Manage Files option in your Hub. That includes your core WordPress files, as well as all your themes, plugins & media files.
- Files & Database – All of the above plus the entire database, which includes all content and revisions for all post types, navigation menus, widgets, users, comments, plugin & theme settings, e-commerce order data, and WordPress options.
Use the dropdown to select whether you wish to replace only your site files, or both the files and database. Click Move to Production to continue.

Choosing the Files option replaces the files on the production site only and preserves the current data stored in the production site database. On the other hand, selecting the File & Database option replaces both the files and the data stored in the production site database. Also, note that moving staging to production doesn’t affect anything on the production server; it only moves the content you specify.
Automatic Backups
When moving Staging to your live Production site, the Files or Files & Database of your current production site will be overwritten with the corresponding contents of the staging site.
In the unlikely event that something goes wrong and you need to restore your Production site, you’ll be happy to know that we automatically create a backup of your Production site before the push from staging. You’ll find this backup in your Hub under the Backups tab of your site, labeled pre-staging-push.

8.3.2 Sync production to Staging
Link to chapter 3This option will replace the current Staging environment with a fresh copy of Production. All of the Staging files and database will be overwritten.
Click Reset to open the Reset module.

Clicking Confirm Reset will automatically reset your Staging environment. Click cancel to close the module without resetting your Staging environment.
8.3.3 Delete Staging
Link to chapter 3This option will delete the current Staging environment completely. All of the Staging files and database will be lost.
Click Delete to access the pop-up and then Continue to immediately delete the Staging environment or cancel to close without deleting.

8.4 Settings
Copy chapter anchor to clipboardTo the right of the Staging Options module, you will find information about your Staging site, configuration options, and settings.
Domain
The domain is the URL created for accessing your Staging site. The domain section will display the URL and is hotlinked so you can quickly access the site.
Note that the links shown here are already encoded with the HTTP Auth username and password you set in the Password Protection section below. So when you click on either of them, you’ll automatically bypass the HTTP Auth. Of course, if anyone enters the plain URL in a browser, they would still need to provide those credentials to access your staging site.
WordPress
The current version of WordPress being run by your staging site is displayed here. If you are testing an update to core on your Staging site, and push to a different version, use the Refresh button next to the version number to verify the changes.
If you are running a different version of WordPress core on your Staging site when pushing back to your Production site, your Production site will be overwritten.
Last Sync
The Last Sync field is the date and time your Staging and Production sites were synced. This can be valuable if you are developing on a Staging site over a long period of time before syncing to Production and don’t want to lose changes in your Production environment.
PHP Version
The PHP Version is the version of PHP being used for your Staging site. This can be used to test your site when Upgrading or Downgrading your PHP version.
Click the pencil icon to switch between the list of supported versions of PHP.
We recommend using the latest available version of PHP on Production sites when possible for the fastest, most secure site.
Click Apply to save your changes or click the X or Cancel to close the PHP module without switching your PHP.

8.4.1 Password Protection
Link to chapter 4HTTP Auth Password Protection is enabled by default for all Staging sites. This is to help ensure that Staging sites aren’t indexed by search engines and that your Staging site is not visited by the public. The password is not the same as any WordPress user account and can be set from your Hosting Hub.

Use the toggle in the modal to turn site protection on or off.

Once active, add the username and password you wish to apply to this site. A strong password is automatically generated. If you wish to use a different password, you can add one in the password field.
Click the Save button to save your username and password or Close to close without making any changes.

Note that the staging Domain links in your Hub are already encoded with the username & password you set here, as seen in Settings above.
8.4.2 Manage Database
Link to chapter 4Get access to make changes to your Staging websites database. Click the Manage Database link to open the phpMyAdmin manager for your Staging site. This will not make changes to your Production site unless it is pushed live.

Detailed documentation for using phpMyAdmin can be found on the phpMyAdmin site.
8.4.3 Manage Files
Link to chapter 4Click the Manage Files link to pop open the WPMU DEV File Manager for your site in a new tab.
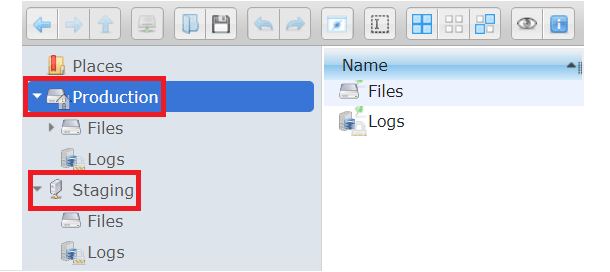
The left panel allows you to navigate through files and logs from both the Production server and the Staging server.
For more information about the File Manager, see the Files chapter in the WPMU DEV Hosting > Tools guide.
8.4.4 Reset WP
Link to chapter 4Use the Reset WP option if you ever need to revert your staging site to a fresh, default WordPress installation. This process will also pre-install SmartCrawl Pro, Forminator Pro, Hummingbird Pro, Smush Pro, and Defender Pro plugins for you.
The option here does not affect your live site; there is a separate Reset WP option for your live site under the Tools tab.
Note that this is very different than the Sync production to Staging option above which pulls in a fresh copy of your existing live site.
Click Reset to pop open a modal window and type RESET in the field provided. Then click Confirm and Reset to confirm the action.

This reset will delete the staging database and all files (including non-WordPress files) in the Staging directory of your staging site before the fresh re-install of WordPress. Unlike when resetting WP on your live site, a backup will not be created of your staging site.
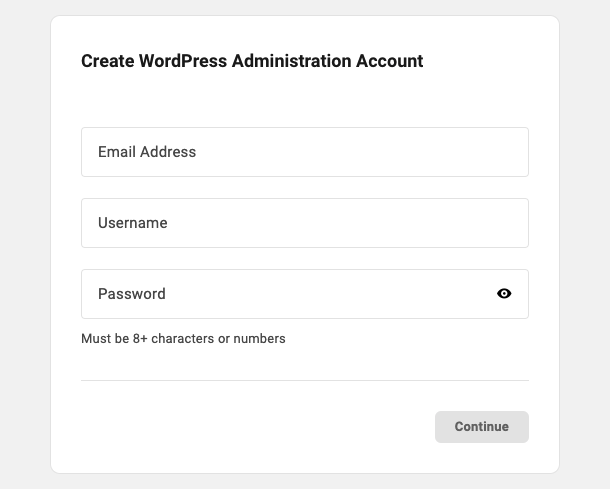
Once you click the Continue button, you’ll be prompted to create a new WordPress administrator account for the fresh install. You can use the same email, username and password as you had for your admin user before, or create a brand-new admin user.
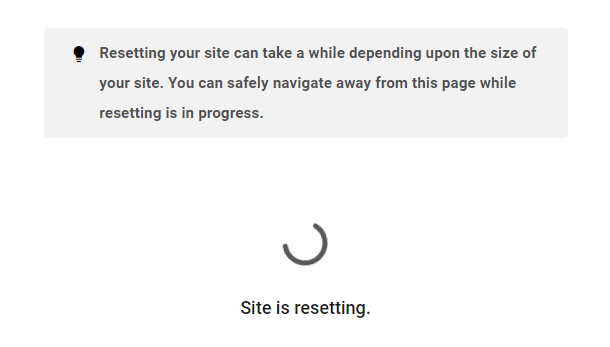
Click the Continue button and you’ll then see a screen indicating the reset is underway. Depending on the size of the site, it can take several minutes for this to complete.
When the reset process is complete, visit your staging site where you’ll see a brand new default install of WordPress for you to build on.
8.5 Troubleshooting & Notes
Copy chapter anchor to clipboardYou can sync a new copy of your Production site to your Staging site at any time by simply clicking the Reset button.
When you push a copy of the Staging site to your Production site, we will automatically make a backup of your Production site first. This helps with fast recovery should you need it.
If you notice valid URLs on your staging site returning 404 errors, go to Settings > Permalinks and click the Save Changes button to refresh the permalinks.
Occasionally, you may get an error message in your Hub saying the staging site creation failed. This can happen from time to time if our system is overloaded with requests. Please try the process again before contacting support.
Staging Resources
Staging uses an incremental clone of your Production file system. This means that it normally uses very little of your storage space. Only new/changed files on Staging or deleted files on Production will increase the amount of storage used by Staging and doing a fresh sync from Production will reset that to zero again.
Object Cache, Static Server Cache and Web Application Firewall (WAF) are not enabled on Staging sites. This will make Staging sites a bit slower than your Production sites but helps make development easier.
Staging is given limited server resources to prevent it from adversely affecting your Production site. This too can make Staging run slightly slower, and in rare cases cause errors with some plugins that demand lots of resources.
For example, staging sites only have 2 PHP workers (the processes that run PHP on the server), regardless of the hosting plan.
Multisite Staging
Depending on how your multisite is set up, creating a staging copy may or may not work as expected.
- Subsites in a staging environment of a subdirectory-based multisite will work just fine.
- Subsites in a staging environment of a subdomain-based multisite will work with one caveat: they will not be secured by SSL. So if any processes require HTTPS, you will need to bypass or ignore SSL errors on the staging subsites.
- Subsites in a staging environment of a multisite using a plugin for domain mapping (like WP-Ultimo), will work as above as long as you deactivate the domain-mapping plugin on the staging site so the subsites are accessed at their “normal” staging URLs.
- Subsites in a staging environment of a multisite that have been natively domain-mapped will not work at all. The domain-mapped subsites on staging will still point to their mapped domains. It would require significant manual effort to make such domain-mapped subsites work on staging. You would need to run a search & replace in the staging database to change all instances of the mapped domain URLs to what they would normally be on staging, then change them back again after edits, before and/or after pushing to live.
Images Are Missing on the Production Site
After moving your staging site to production, you might find the images missing on the production site. To resolve this issue, try the following:
- If you are using Elementor, make sure to regenerate the page builder assets.
- If you are using Divi Builder, clear the Divi Builder cache.
- If you enabled Smush CDN on your production site, go to Smush > CDN and click the Deactivate button; then enable it again by clicking on the Get Started button.
- Clear your site’s Object Cache and the Static Server Cache.
URL Issues When Pushing Staging to Production
When pushing staging to production, our system will automatically update all URLs from the staging site name to the production site name in the following database tables:
- {DB_PREFIX}blogs
- {DB_PREFIX}sitemeta
- {DB_PREFIX}options
- {DB_PREFIX}*options
If any URLs are stored in other tables, possibly by your page builder or other plugins, they would not be automatically updated, and you would need to take care of that manually.
There are 3 ways you can ensure that all URLs are updated correctly:
- WP-CLI
- A search & replace plugin
- Adding defines in wp-config.php
Replacing URLs with WP-CLI
Running the following command will update all URLs registered with the $wpdp object:
wp search-replace 'https://example.staging.tempurl.host' 'https://example.tempurl.host'
Replacing URLs with a plugin
Using a search & replace plugin, like this one, is an easy way to get the job done if you’re not comfortable with command line stuff.
Simply enter the URL you want to search for, for example: https://example.staging.tempurl.host
Then enter the URL you want to replace that with, for example: https://example.tempurl.host
With the plugin method, you can also do a “dry run” first to check and be sure only the changes you want will be made. Then run the process.
Adding defines in wp-config.php
Add the following defines to your wp-config.php file, before the line that says “That’s all, stop editing”. Be sure to change the URLs to your actual domain name.
define( 'WP_SITEURL', 'http://example.com’ );
define( 'WP_HOME', 'http://example.com' );
This will ensure that both WordPress files and your site will load from the domain you specify.
This can be an easy way to fix the issue. However, there is a drawback to this method: it does not actually change anything in the database. So if you remove these defines from the wp-config.php file, any incorrect URLs will still be there, and you’d need to use one of the other methods to fix them anyway.
8.6 Get Support
Copy chapter anchor to clipboardIf you still have questions or need assistance after reading this document, please don’t hesitate to contact our support superheroes using the available options under the Support tab in your Hub or via the Support tab in your WPMU DEV Dashboard.


