7. Webmail
The Webmail manager is where all WPMU DEV members can create, manage and access IMAP email accounts for any domain, right in The Hub, whether the domain is associated with a site in The Hub or not.

If you haven’t set up your WPMU DEV account yet, visit our home page, where you can explore the features and see pricing packages. Already a member, head over to your Hub > Webmail screen to get started.
Each IMAP email account that you create is billed to you as a separate paid add-on, and includes 5Gb of email storage. The ability to purchase additional storage for individual email accounts may be included in a future update to the feature. Note that members on our Agency membership benefit from reduced pricing for each email account created.
Hosting With Us?
If you do not need full IMAP email features for a site hosted with us, you can create POP3 email accounts that you can link to any email client you wish, and/or create email forwards to redirect emails to existing addresses. See our Hosting > Emails documentation for details. Not sure which protocol is best for your project? You’ll find a great explanation of the differences between IMAP and POP3 email on our blog.
7.1 Adding a New Webmail Domain
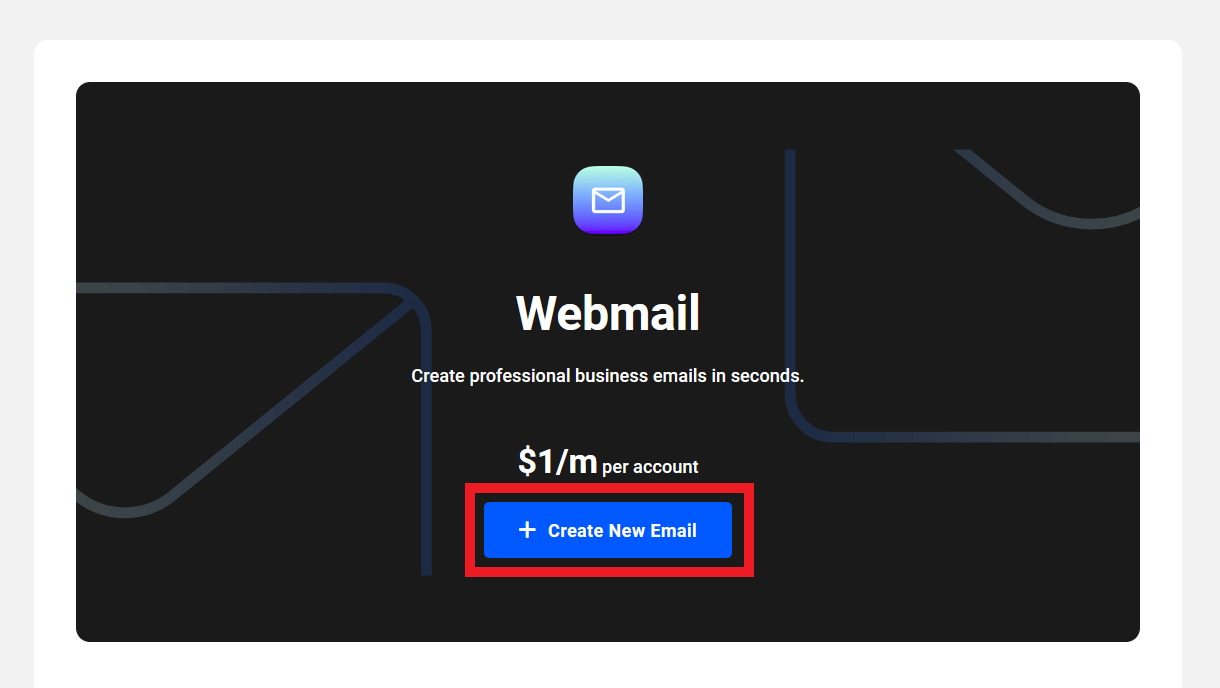
Copy chapter anchor to clipboardWhen you first visit the Webmail section in your Hub, you’ll be greeted by a prompt to create a new webmail domain & email account. Click the + Create New Email button to get started.
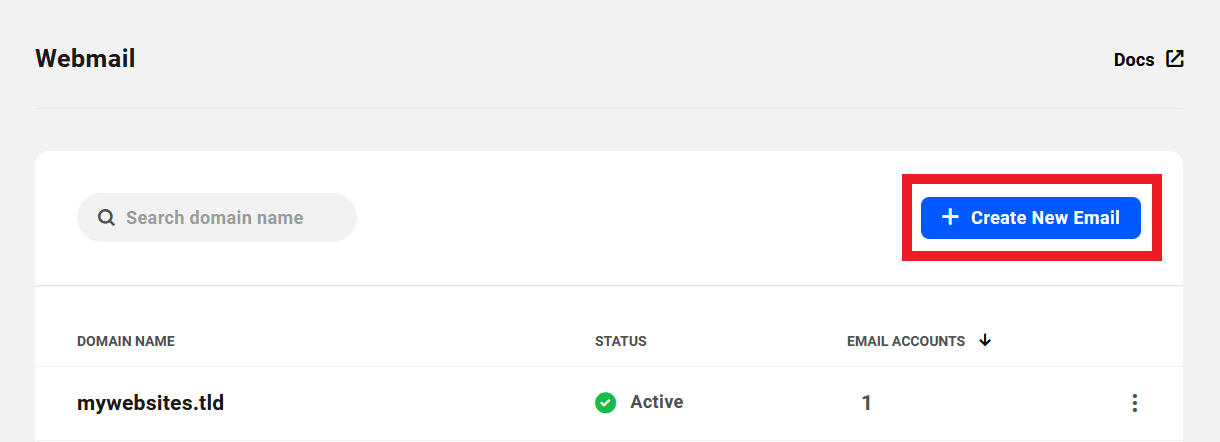
If you have already added one or more webmail domains, click the + Create New Email button at the top-right of the screen to add another domain, or add a new email account to an existing domain.
Select a Domain Name
Clicking either button as seen above will prompt you to select the domain you wish to use for new email accounts. The domain is the part of the complete email address that appears after the @ symbol. For example: contact@yourdomain.tld
You can choose to use a domain that you already manage in your Hub, or a domain that you manage elsewhere.
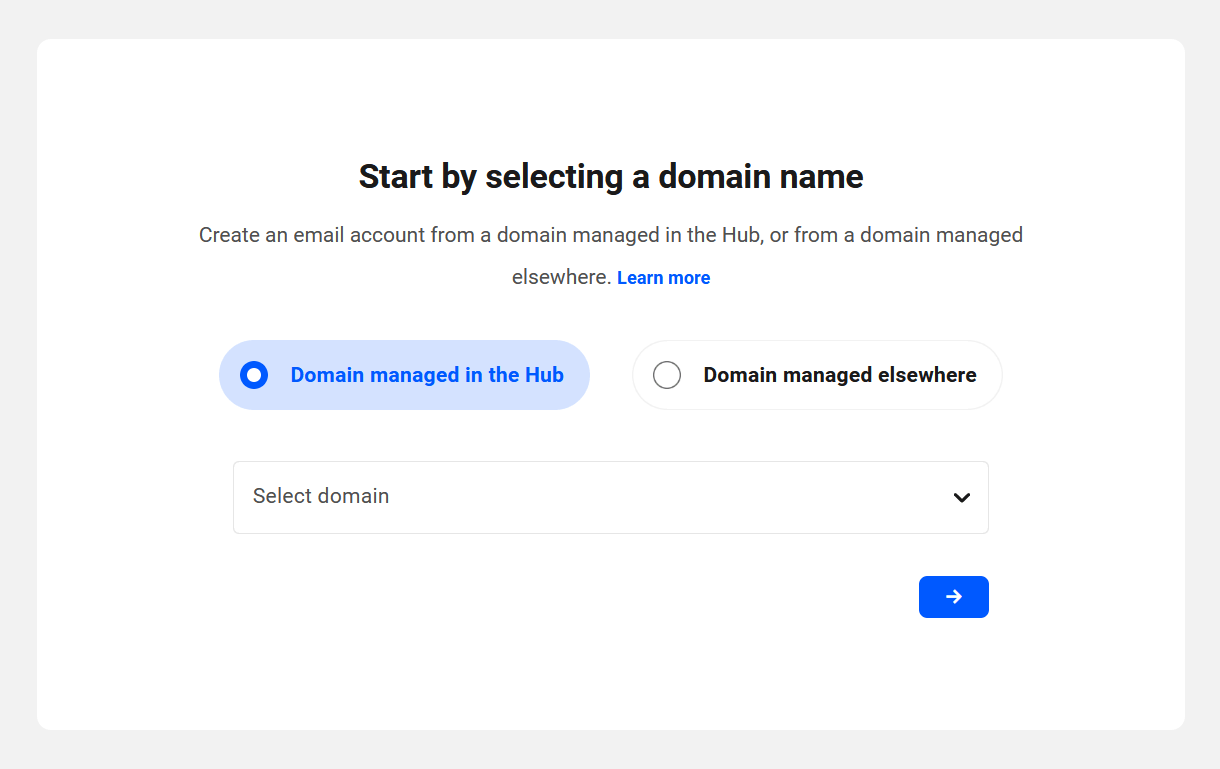
If you wish to use a domain that you already manage in your Hub, click Domain managed in the Hub and select or search for the domain you wish to use from the dropdown list of all of your Connected and Registered domains.

If you wish to use a domain that you manage elsewhere, click Domain managed elsewhere and enter the domain name without the protocol (the https:// part).
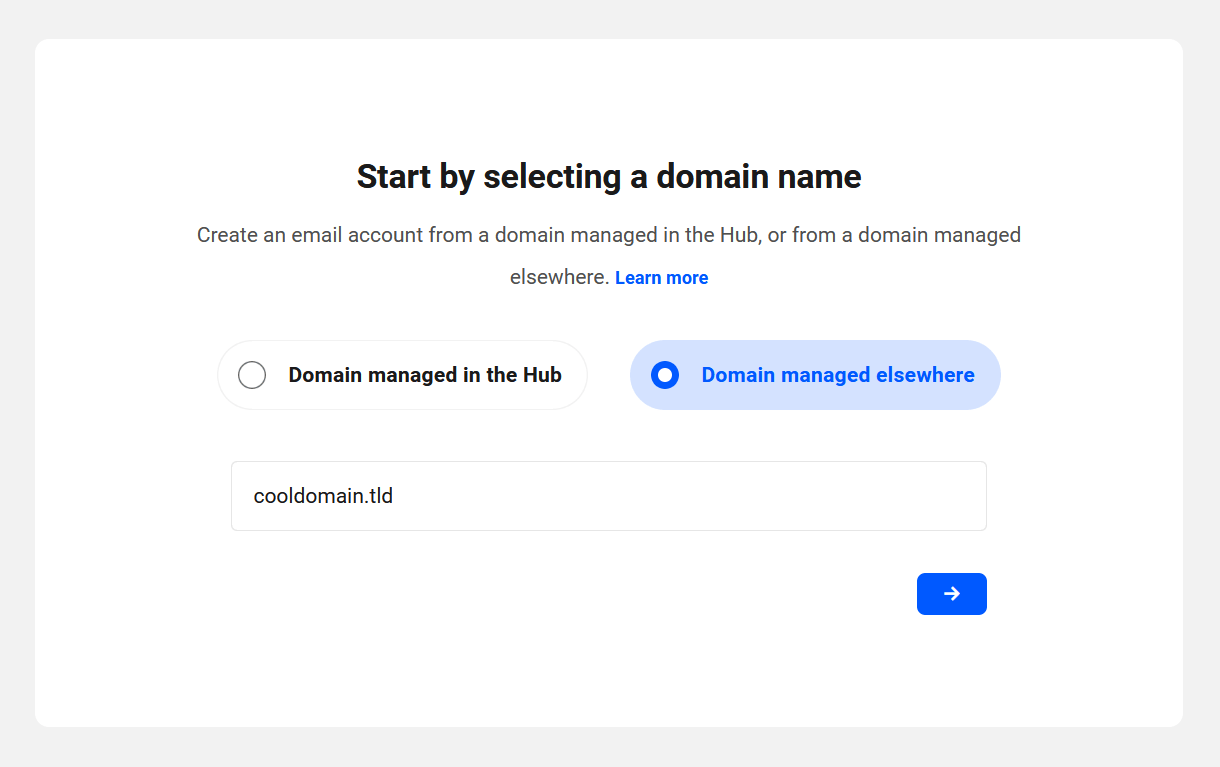
Once you have selected or entered the domain you want to use, click the blue arrow to continue to the next step.
Create the Email Address
Enter the Email address you wish to use for the first email account with the selected domain (for example: contact@yourdomain.tld). Note that the email address cannot be more than 60 characters. Then enter the Password you wish to use with this email address. You must create a strong password including all of the following:
- 10 to 34 characters
- At least one uppercase letter
- At least one number
- At least one special character
Only the following special characters are allowed in your password:
~ ! @ $ % ^ & ( ) - _ = + / \ ] [ { } : ; > < , . ' | ? #

Click the blue arrow to pop open the Payment modal where you’ll see the cost of your new email address as well as the billing start date.

Clicking the Pay button will create a charge on the Payment method you have set in your WPMU DEV account, and you’ll see a success message that the email address has been created.

The next step is to add the DNS records needed if this is the first time you’ve used this domain to create an email address.
If you manage your domain’s DNS in your Hub, click the Add DNS Records button to add them automatically to your selected domain.
If you manage your domain’s DNS elsewhere, you’ll see a View DNS Records button on the success screen instead. Clicking that button will direct you to the DNS Records tab where you can copy the records and add them where you manage your domain’s DNS.
Click the Download email configuration link to get a PDF of all the details needed to configure your new email account in your preferred email client. You can also download this at a later time from the Configurations tab.
Note that if you have already created one or more email accounts using the selected domain, the confirmation screen above will not be shown. Instead, you’ll be redirected to the Email Accounts screen where you’ll see your newly created email account.
7.2 Adding a New Email Account
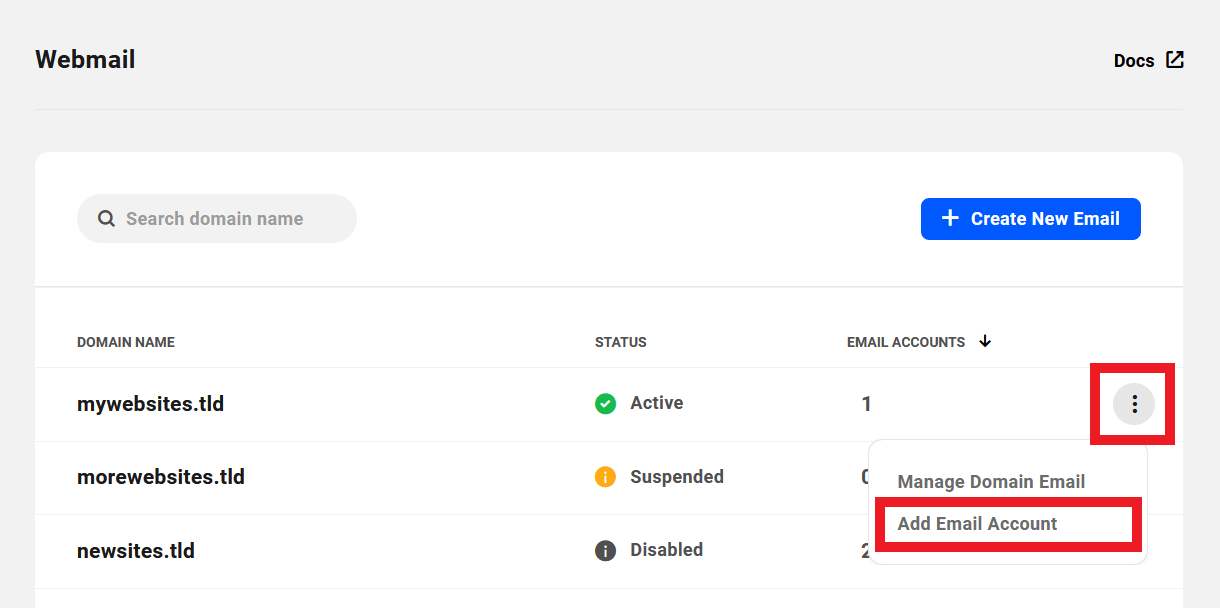
Copy chapter anchor to clipboardTo add a new email account to a domain you’ve already added, click the Add Email Account link in the domain’s options menu on the main Webmail overview screen.
Or click the + Add Email Account button at the top of the management area for that domain.

In the modal window that pops open, enter the Email address you wish to use (for example: contact@yourdomain.tld). Note that the email address cannot be more than 60 characters. Then enter the Password you wish to use with this email address. You must create a strong password including all of the following:
- 10 to 34 characters
- At least one uppercase letter
- At least one number
- At least one special character
Only the following special characters are allowed in your password:
~ ! @ $ % ^ & ( ) - _ = + / \ ] [ { } : ; > < , . ' | ? #
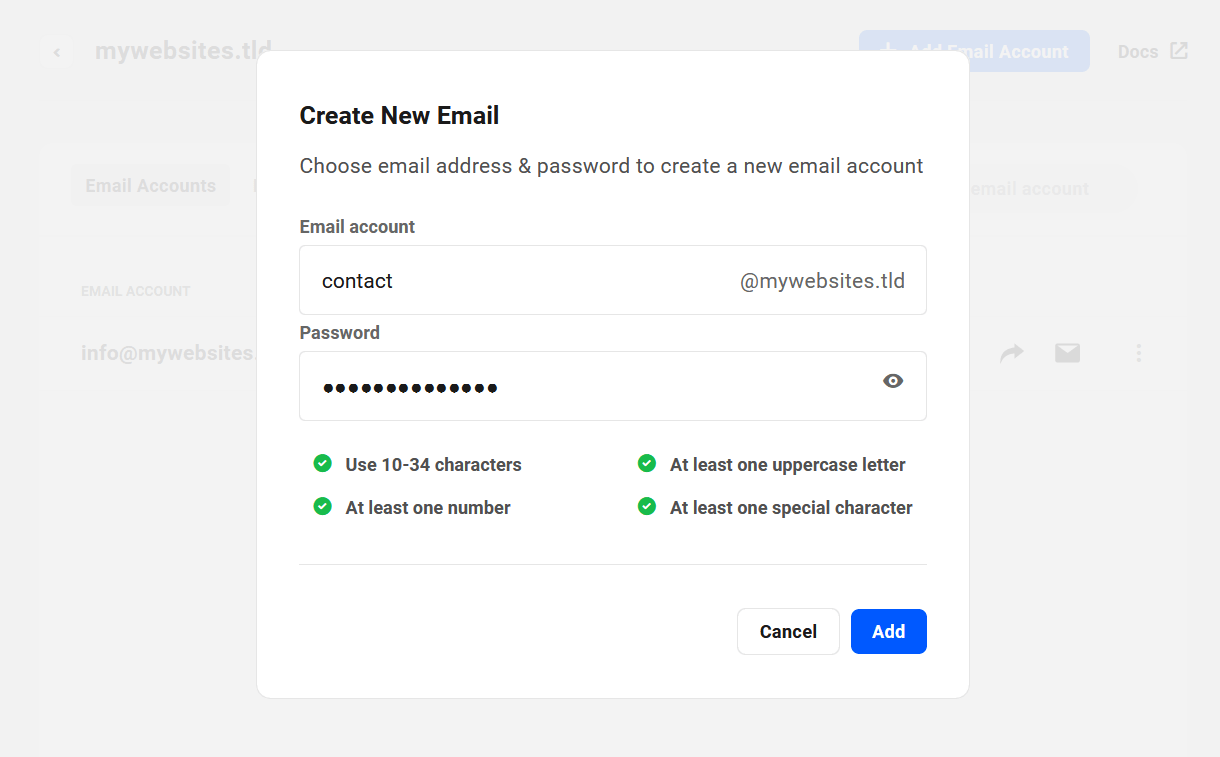
Click the Add button to pop open the Payment modal where you’ll see the cost of your new email address as well as the billing start date.
Note that you can also create a new email account from the main Webmail screen by clicking the + Create New Email button there and selecting the domain you wish to use. If you have already created one or more email accounts with the selected domain, the success message with the prompt to add DNS records will be skipped as they would already exist. Instead, you’ll be redirected to the Email Accounts screen where you’ll see your newly created email account.
7.3 Webmail Overview
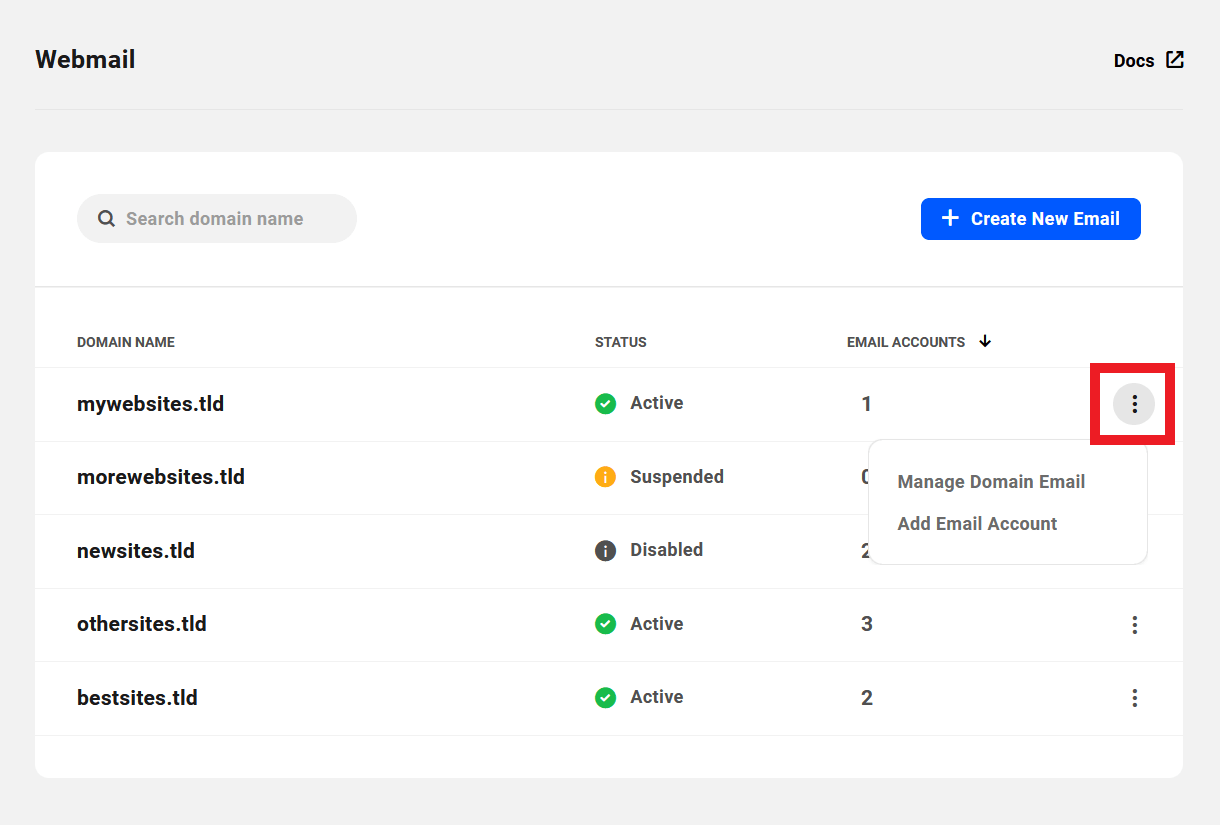
Copy chapter anchor to clipboardOnce you have added at least one webmail domain and email account, you’ll find a summary list of all of the domains and email accounts you are currently using on the main Webmail screen. Summary information is presented in 3 columns, as follows:
- Domain Name – This column indicates the domain names you are using for your email accounts.
- Status – This indicates the status of each email domain (see Managing Individual Email Accounts > Status below for additional information):
- Active – Appears if at least one email account under this domain is active.
- Suspended – Appears if all email accounts under this domain are suspended.
- Disabled – Appears if all email accounts under this domain are disabled.
- Email Accounts – The number of email accounts you have created for each domain.

Hover your cursor over the number in the Email Accounts column of any domain to reveal the email address(es) that you have created with that domain. Clicking the arrow icon next to any address listed will automatically log you in via SSO to the webmail interface for that address.

Once a client has been associated with an email domain, SSO login will be disabled in the Hub. Only the client will have access to their webmail via SSO login in your white-labeled client portal. See Accessing Webmail below for details.
Click the ellipsis icon at the far-right of any row to reveal additional management options for that domain:
- Manage Domain Email – Click this option to manage the email accounts associated with the domain.
- Add Email Account – Click to create a new email account under the corresponding domain.
7.4 Managing Email Accounts per Domain
Copy chapter anchor to clipboardTo manage existing email accounts for any domain, either click on that domain’s row on the Webmail overview screen, or click the Manage Domain Email link in that domain’s options menu.
Note that if you have a large list of email domains, you can use the search form at the top to quickly locate the one you need.

You will be taken to the management area for that domain where you’ll find all the information associated with the email accounts you have created with that domain.
7.4.1 Email Accounts
Link to chapter 4Under the Email Accounts tab, you’ll find summary information for each account of this domain, presented in 3 columns as follows:
- Email Account – These are the email addresses you have created with the domain.
- Status – This indicates the status of each account: Active, Suspended or Disabled (see Managing Individual Email Accounts > Status below for additional information).
- Date Created – The date the email account was created.

Email Forwarding Shortcut
Hover your cursor over the arrow icon on any email account’s row to reveal email forwarding options for the account if needed. You can toggle the forwarding Status on or off, or click the Manage Email Forwarding link to be directed to the Email Forwarding screen for the account where you can create & manage your forwarders.

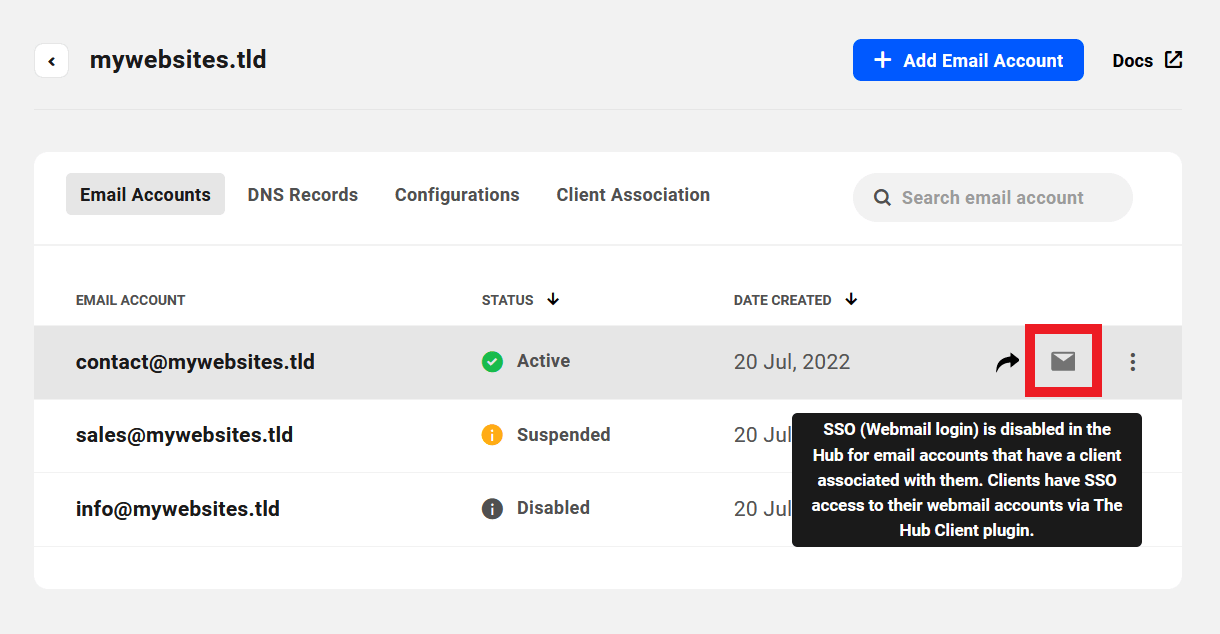
Webmail Access Shortcut
Click the envelope icon in any email account’s row to be logged in automatically via SSO (Single Sign On) to the webmail interface of the selected email account. See Accessing Webmail below for details.

Management Options
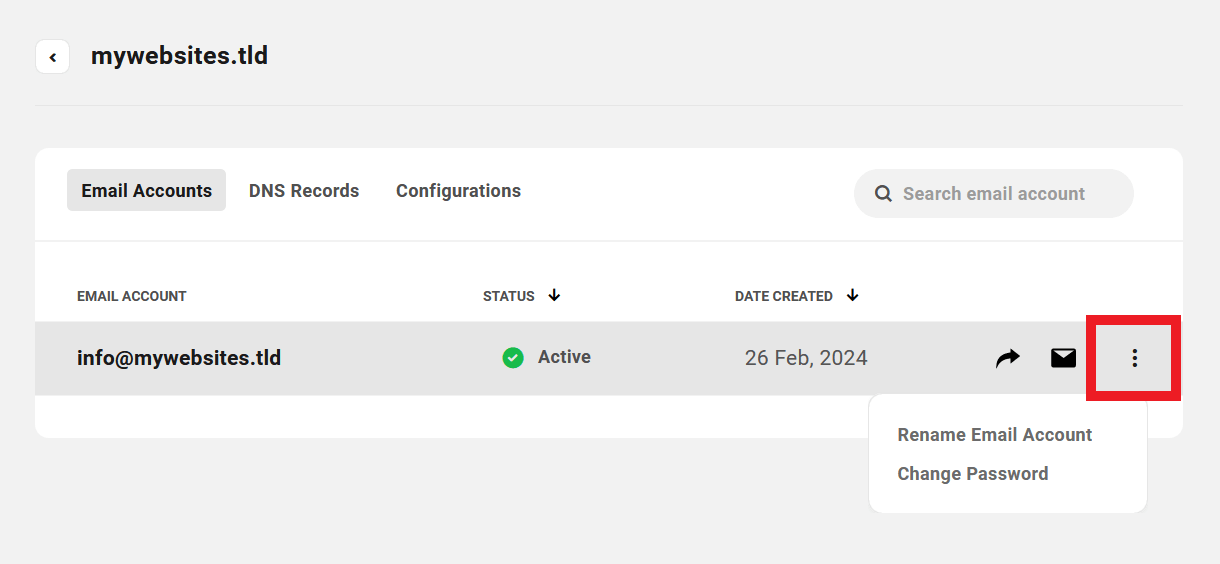
Click the ellipsis icon on any email account’s row to reveal additional management options for that account.

Rename Email Account
Selecting this option will pop open a modal window where you can change the mailbox name of the email account. For example, change from contact@yourdomain.tld to contact-us@yourdomain.tld
Note that the mailbox name cannot be more than 60 characters.

Change Password
Selecting this option will pop open a modal window where you can change the password for the email account. When changing the password, you must create a strong password including all of the following:
- 10 to 34 characters
- At least one uppercase letter
- At least one number
- At least one special character
Only the following special characters are allowed in your password:
~ ! @ $ % ^ & ( ) - _ = + / \ ] [ { } : ; > < , . ' | ? #

Add Alias
Selecting this option will pop open a modal window where you can add up to 10 alias addresses to the email account. Emails sent to an alias address will be delivered to the actual email address.

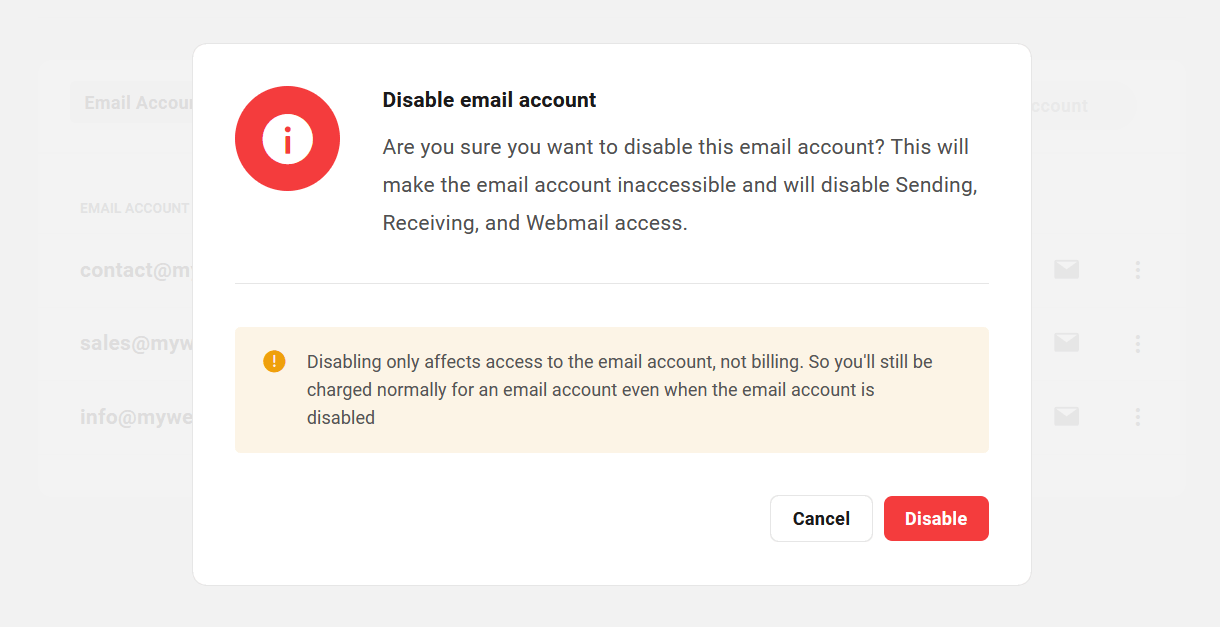
Enable/Disable Account
Selecting either of these options will pop open a modal window where you can enable or disable the email account as needed. Note that disabling an account only disables sending & receiving emails and webmail access for that email account. It does not affect billing; you would still be charged for the email account.
Delete
Selecting this option will pop open a modal window where you can delete the email account. All emails, data and settings will be permanently deleted and this operation cannot be undone. This option also stops the billing for the email account.

Note that if there is only one email account created for a domain, deleting that email account will also remove the domain from the Webmail section. If you then need to create a new email account for that removed domain, simply add it again as a new webmail domain. This is to avoid accumulating domains with zero email accounts in this section of your Hub.
7.4.2 DNS Records
Link to chapter 4Under the DNS Records tab, you’ll find the tools needed to add, verify & manage the MX, SPF and DKIM records required for your domain emails to work.
Managing DNS Records in the Hub
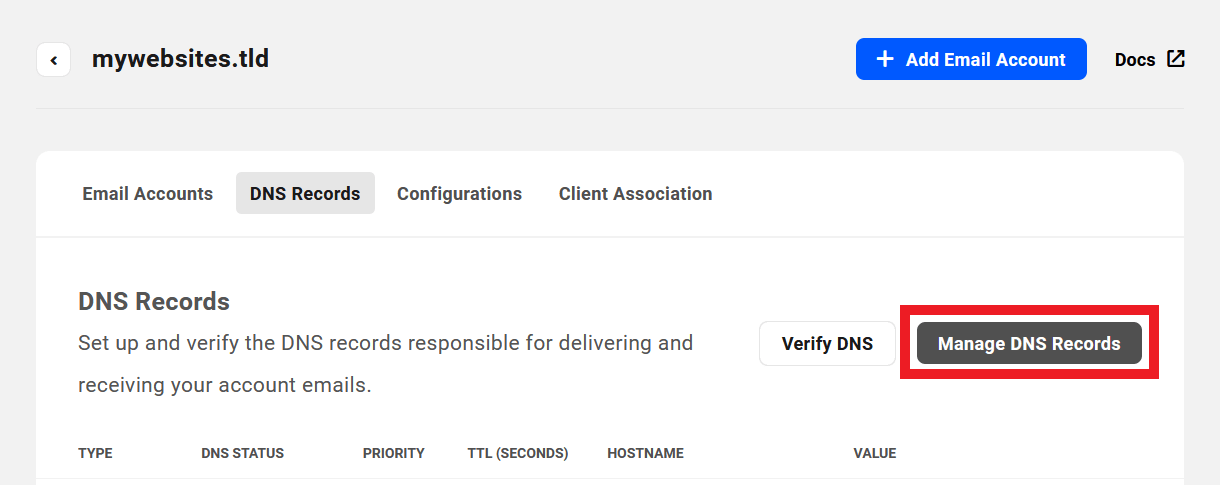
If you are managing DNS in your Hub for your webmail domain, click the Add DNS Records button to automatically add the records to your domain’s DNS setup.

You’ll then notice that the Add DNS Records button has changed to Manage DNS Records. Clicking that button will redirect you to the corresponding DNS management screen where you can add, edit or delete records as needed at any time.
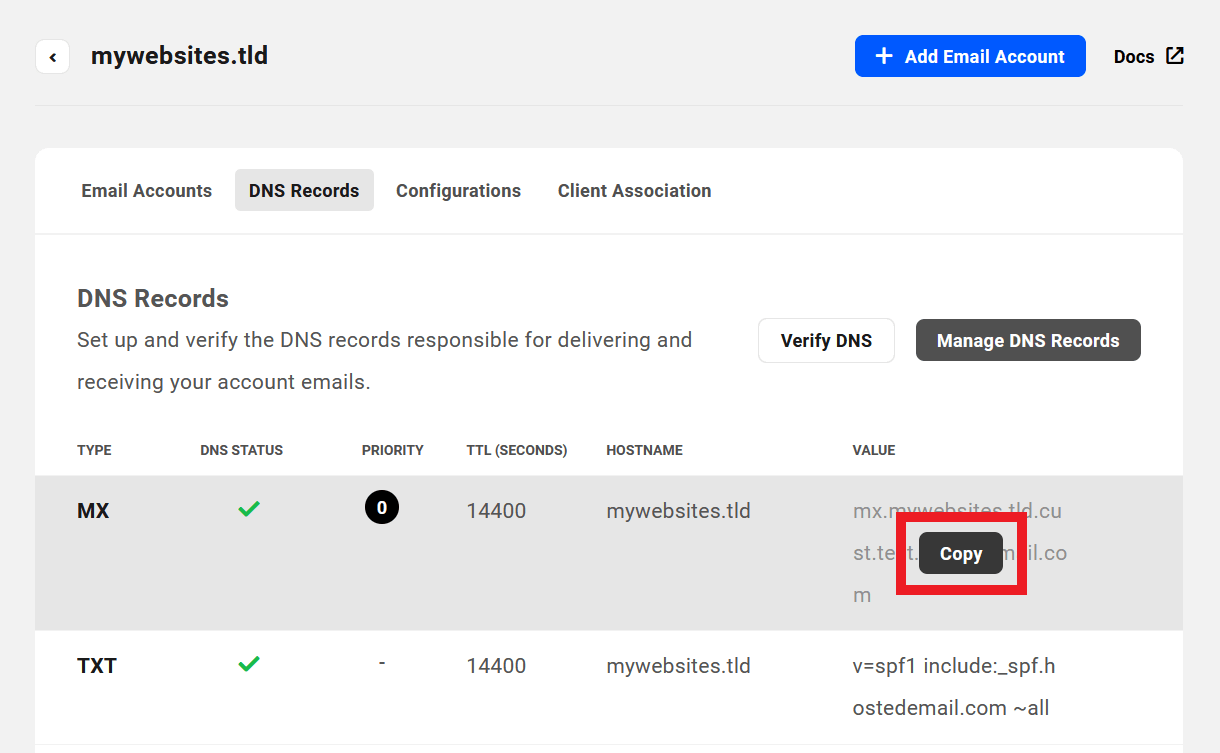
If you need to add any record manually, hover your cursor over the record’s Hostname and/or Value and click the Copy button that appears there.
Managing DNS Records Elsewhere
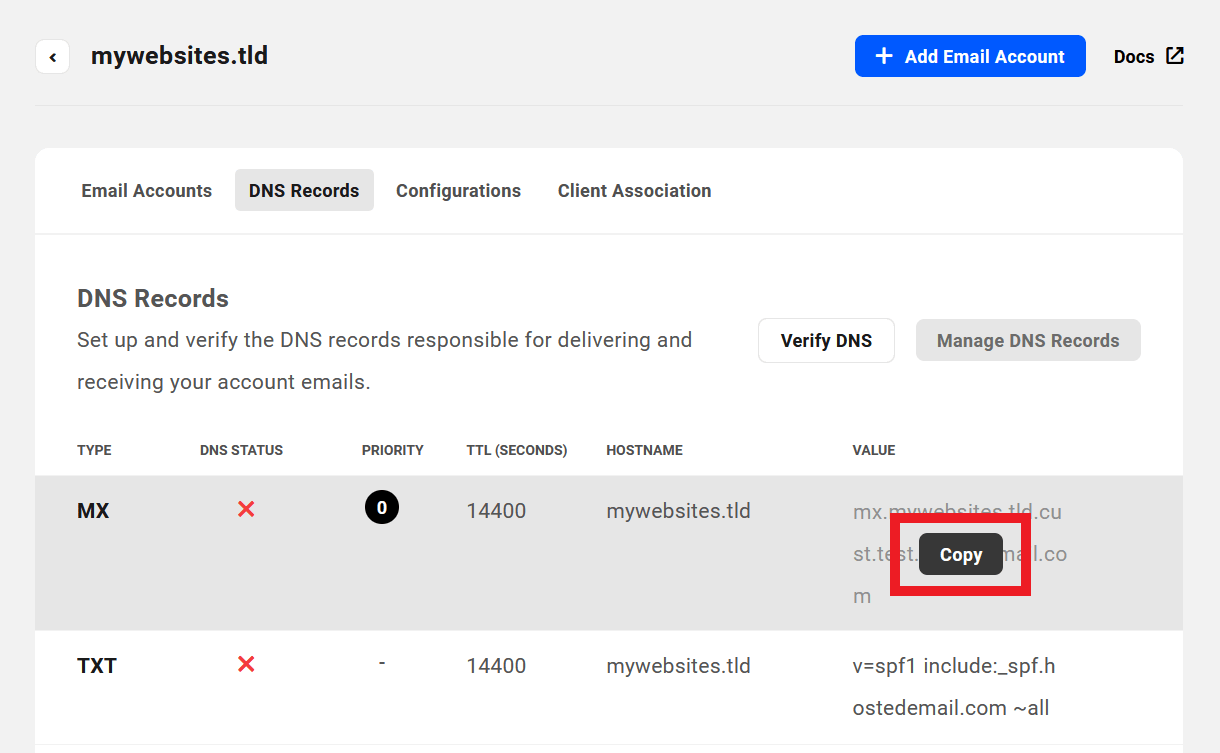
If you are managing the DNS for your webmail domain at another registrar or DNS manager like Cloudflare, the Manage DNS Records feature will be unavailable and the button will be disabled.

Instead, you’ll want to click the Copy button for each record and add those records manually at your registrar or DNS manager.
Verify DNS Records
Once you have added all the records in your DNS manager, either in your Hub or elsewhere, click the Verify DNS button to have our tool scan for the records and confirm their validity. You’ll see a green checkmark beside each record once they have been successfully verified.
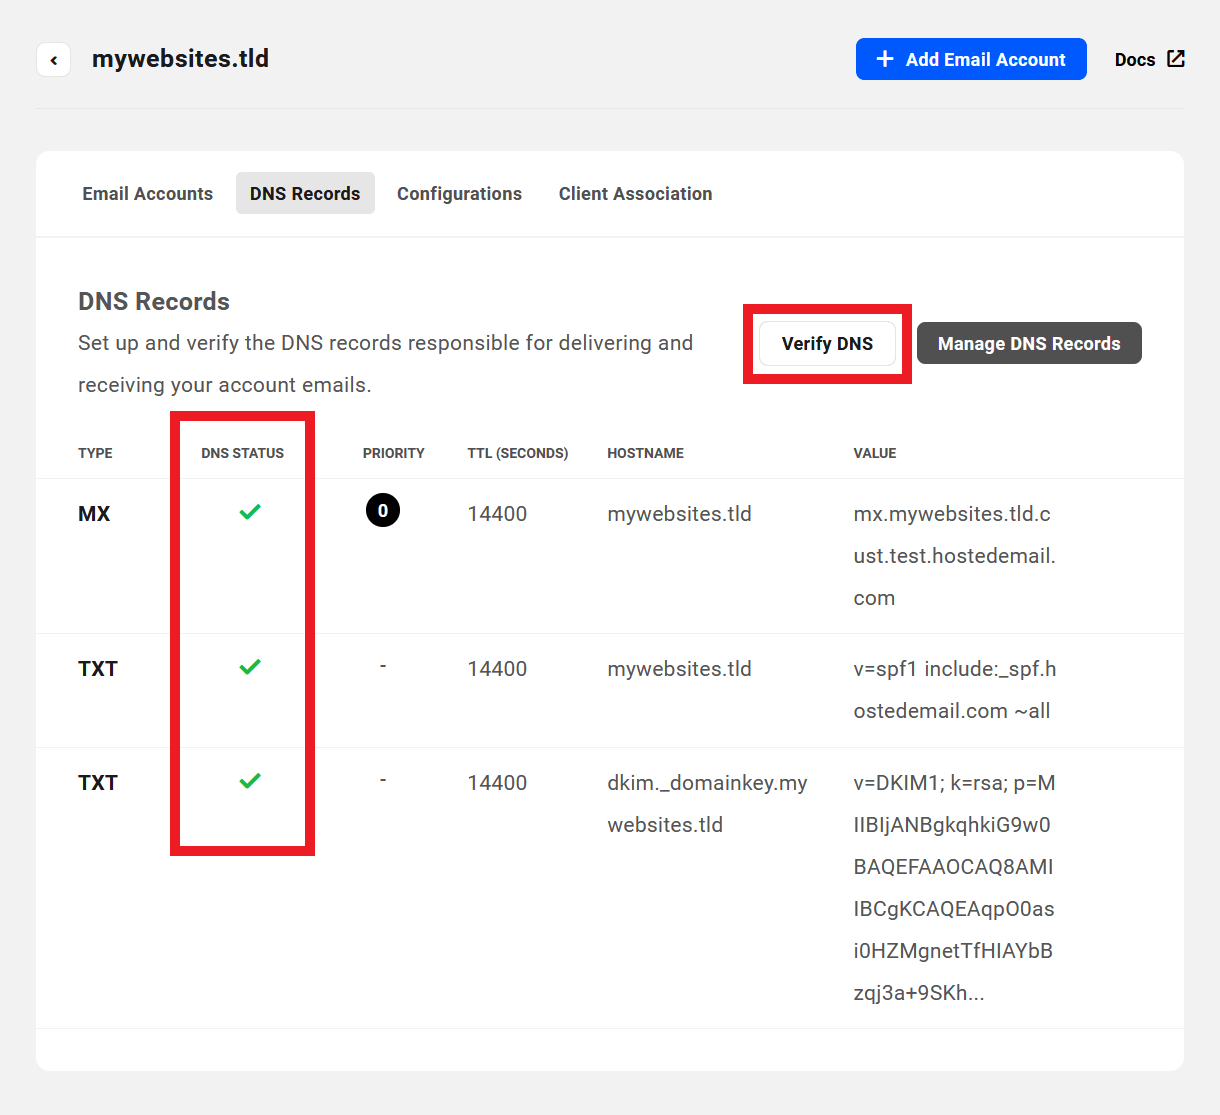
Note that, even though the records may be successfully verified, DNS propagation can take some time.You can use a handy online tool like https://dnschecker.org to check for propagation issues.
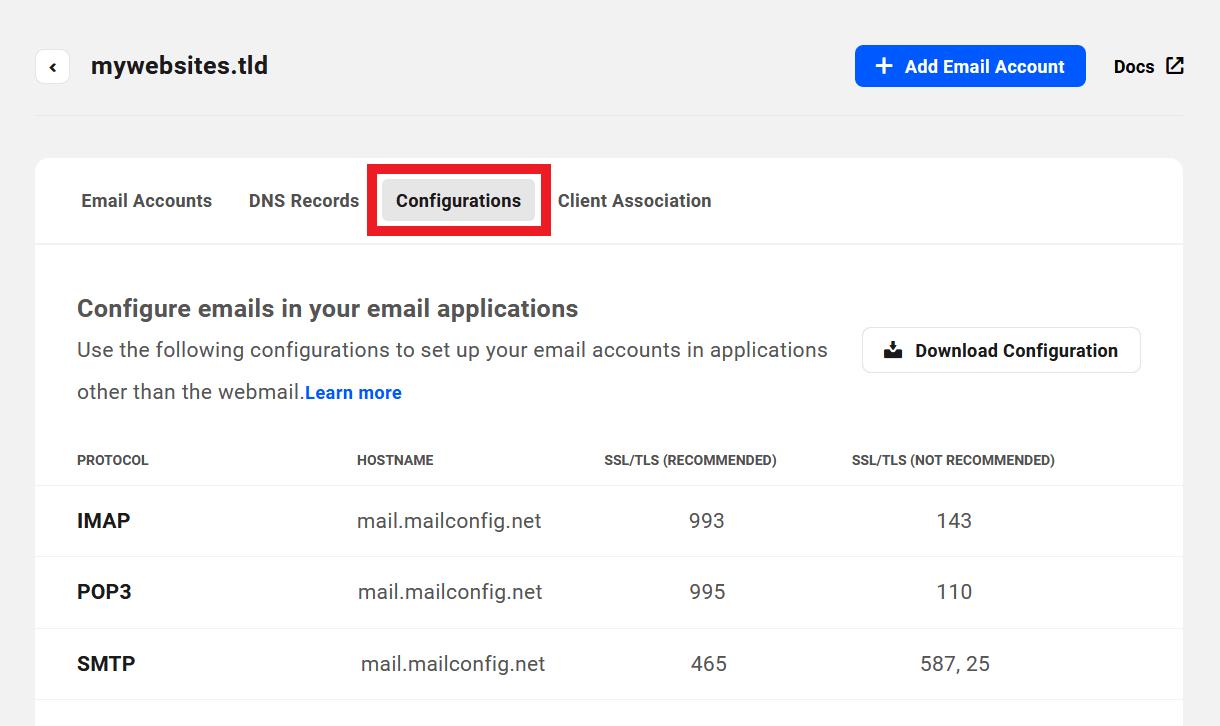
7.4.3 Configurations
Link to chapter 4Under the Configurations tab, you’ll find the information you need if you wish to set up your email account with other IMAP, POP3 or SMTP applications. See Configuring Webmail with Email Clients below for more information.
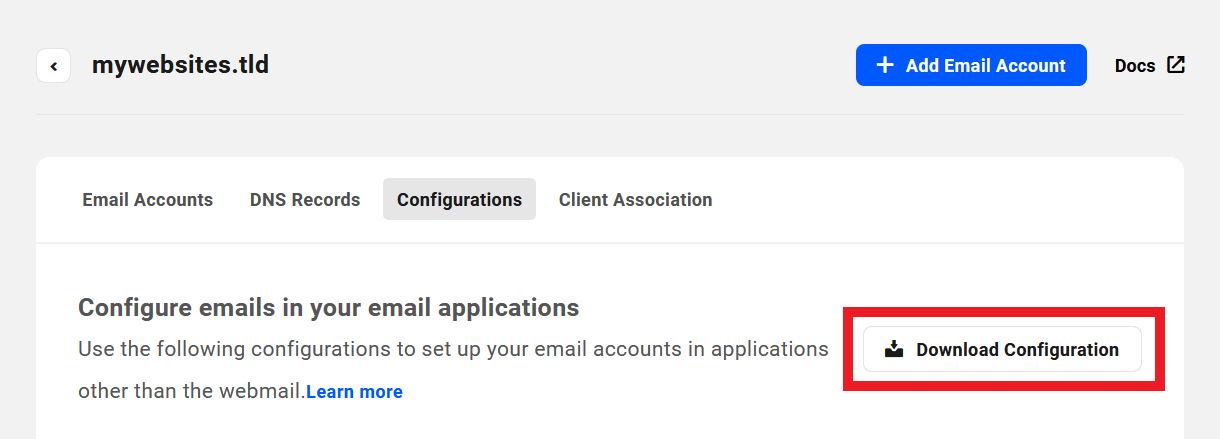
If needed, click Download Configuration to get a PDF of all the details needed to configure your new email account in your preferred email client.
Below are the recommended configurations for each protocol.
IMAP
Use if you are using your domain email in another email application.
Hostname – mail.mailconfig.net
Encryption – SSL/TLS
Port – 993
POP3
Use if you are using your domain email with an email client like Gmail or Thunderbird.
Hostname – mail.mailconfig.net
Encryption – SSL/TLS
Port – 995
SMTP
Use if you are using your domain email as the SMTP server for your site’s transactional email.
Hostname – mail.mailconfig.net
Encryption – SSL/TLS
Port – 465
See WPMU DEV Webmail in our Branda documentation for instructions on using a webmail address for SMTP in Branda.
7.4.4 Client Association
Link to chapter 4Under the Client Association tab, you can link the email accounts for the domain with an existing client that you have already added in your Clients & Billing portal. This will link all email accounts created with the same domain with that client.
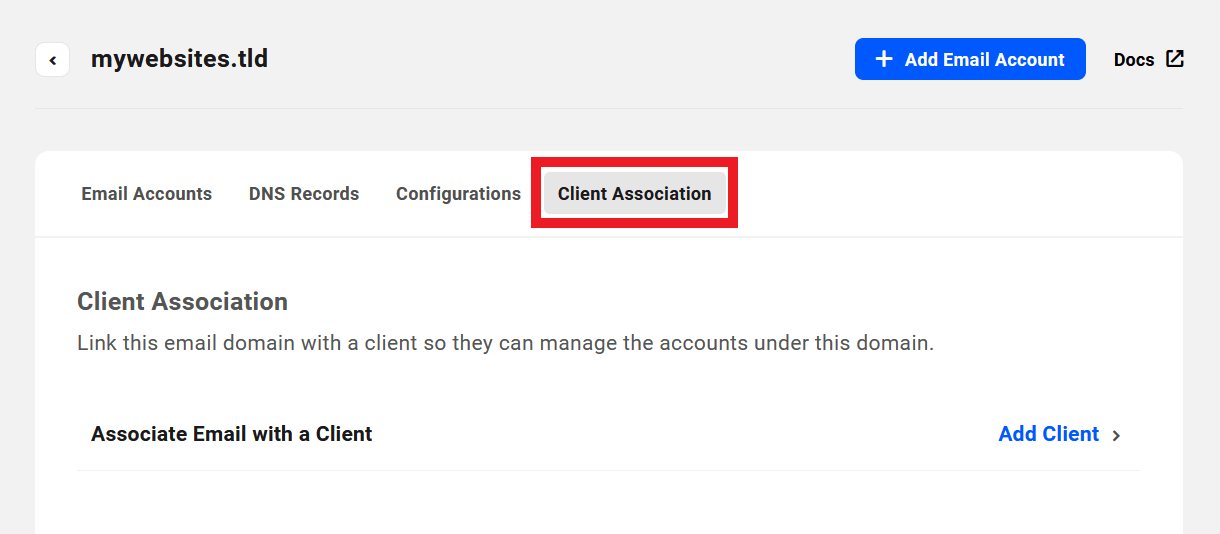
Click the Add Client link to pop open a modal window where you can select the client you wish to associate with this email domain.

If you need to remove the client, or associate the domain with a different client, click the name of the client currently displayed under this tab to pop open the edit modal where you can perform either action.

You will need to ensure that the Client Role that you have assigned to the selected client has at least the capability needed to access Webmail in the Hub.
Once a client has been associated with an email domain, Webmail login (SSO) will be disabled in the Hub. Only the client will have access to their webmail via the SSO login in your white-labeled client portal. See Accessing Webmail below for details.
7.5 Managing Individual Email Accounts
Copy chapter anchor to clipboardClicking on any email account’s row on the Email Accounts screen will direct you to this area where you can view and edit information specific to that email account.
You can also create forwarders and aliases for the specific email account here.
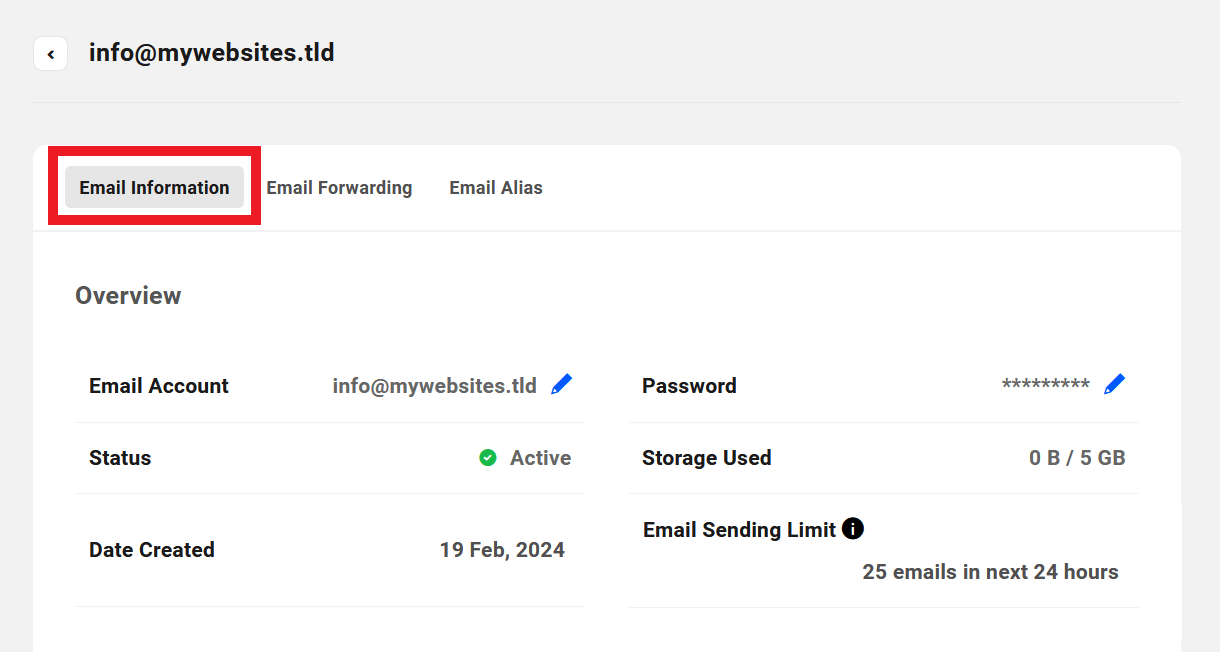
7.5.1 Email Information
Link to chapter 5Under the Email Information tab, you’ll find details about that specific email account.

Email Account
This indicates the current address for this email account. Click the pencil icon to change the inbox name if needed.
Password
This indicates the current password for this email account. Click the pencil icon to change the password if needed.
When editing the password, the new password must include all of the following:
- 10 to 34 characters
- At least one uppercase letter
- At least one number
- At least one special character
Only the following special characters are allowed in your password:
~ ! @ $ % ^ & ( ) - _ = + / \ ] [ { } : ; > < , . ' | ? #
Status
The current status of the email account:
- Active - The default status when created. Emails can be received at this address and sent from it.
- Suspended - The email account has been suspended by our webmail provider due to policy violation.
- Disabled - The email account has been manually disabled. Email sending & receiving and access to the webmail interface has been disabled for this address, but you will still be billed for it.
Storage Used
This is the total amount of email storage used by this email account. Every email account has 5GB of storage included, with file attachments limited to 27MB.
Purchasing more storage space is not yet possible, but when clicking the Add Storage link, you’ll be prompted to let us know how much additional space you might need in the future. This will help us to develop this additional feature.
Date Created
This simply indicates the date that this email address was created.
Email Sending Limit
This indicates the current limit of emails that can be sent from this address in the next 24-hour period.
In order to help prevent webmail accounts from being created solely for spam purposes, the sending limit for all new accounts is capped at 25 emails for the first 24-hour period. The sending limit will increase over a two-week period to a maximum of 500 emails per continuous 24 hours.
For example, if the sending limit for an account has been increased to 500/24-hours and you have already sent 200 emails in that same period, this will indicate 300 emails in next 24 hours.
If you exceed the sending limit for any 24-hour period, a notice will appear in the webmail interface to inform you of the situation.

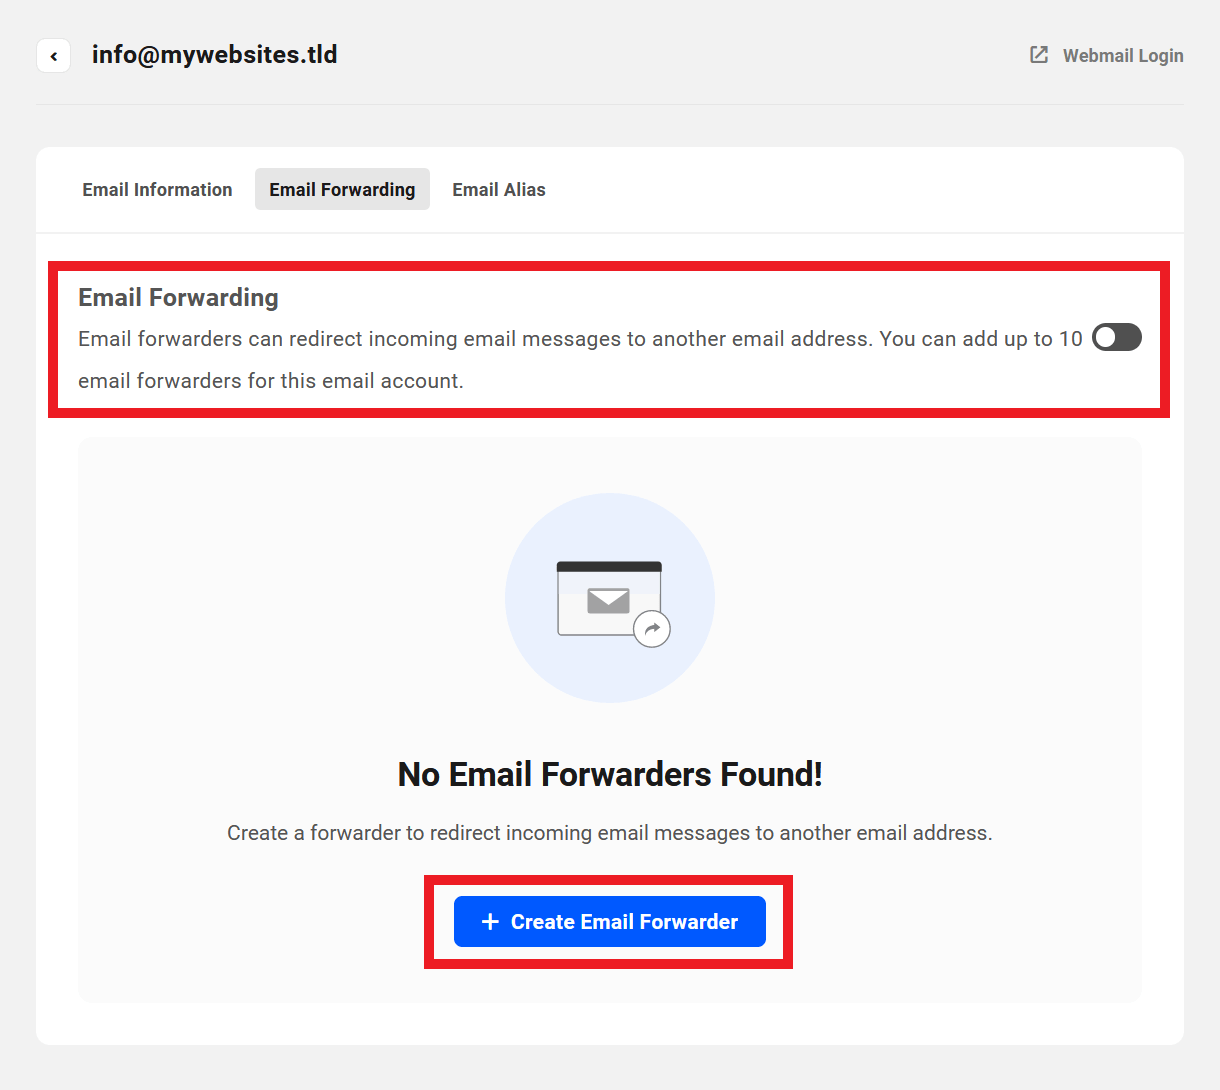
7.5.2 Email Forwarding
Link to chapter 5The Email Forwarding tab is where you can create up to 10 forwarding emails for the email account. Any email received in the current account will also be forwarded to the forwarding addresses you create here.
For example, you could set things up so any email received at [email protected] is also forwarded to [email protected] + [email protected] + [email protected]
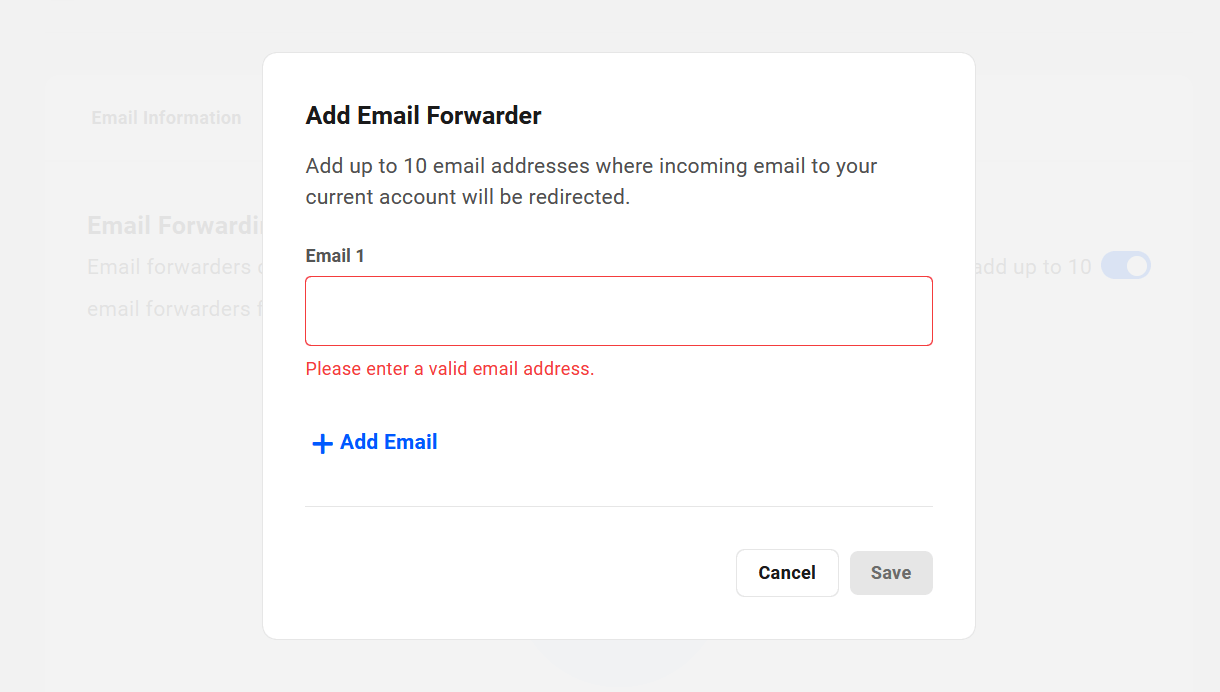
To create your first forwarder for an email account, click the toggle at the top-right of this screen to enable forwarding for this email account. Then click the + Create Email Forwarder button.
In the modal window that pops open, add up to 10 forwarding addresses for the current account, and click the Save button when you’re done.
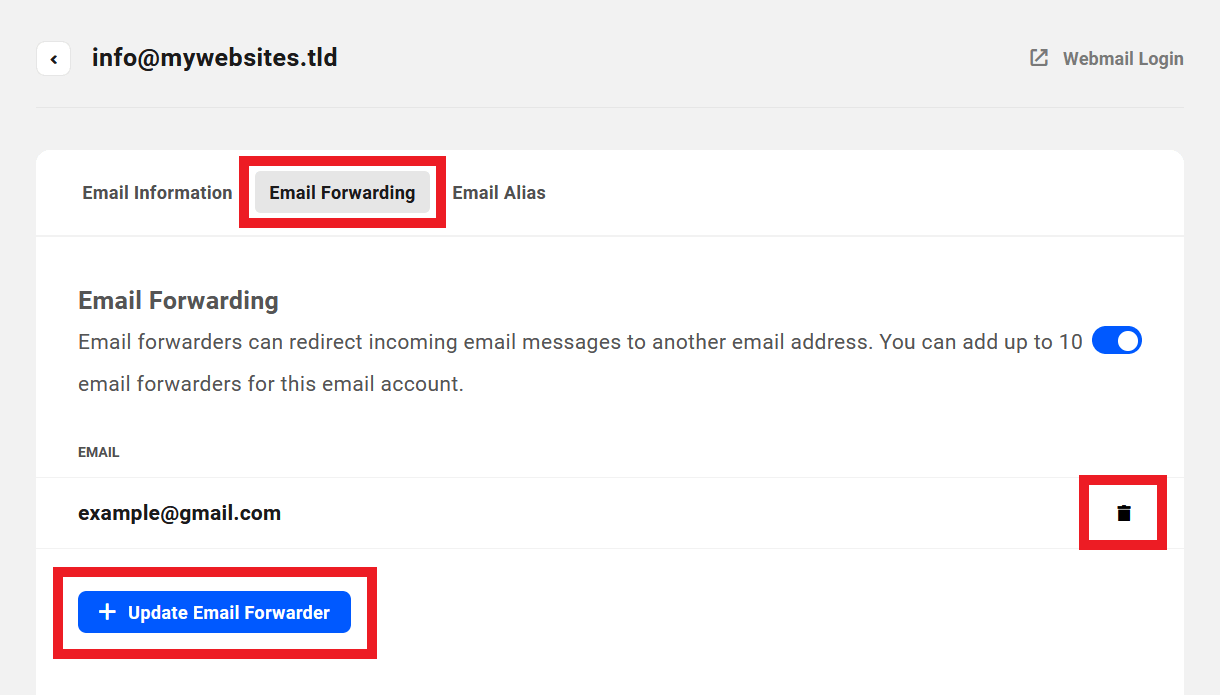
You’ll then see all your forwarders listed where you can click the + Update Email Forwarder button to add more if needed, or delete existing ones by clicking the trash icon. Note that there is no edit functionality for forwarding addresses, so if you enter an address incorrectly, simply delete and recreate it.
You can enable or disable forwarding for the email account at any time by clicking the toggle at the top of this screen, or by clicking the Status toggle on the Email Accounts screen for that domain.
7.5.3 Email Alias
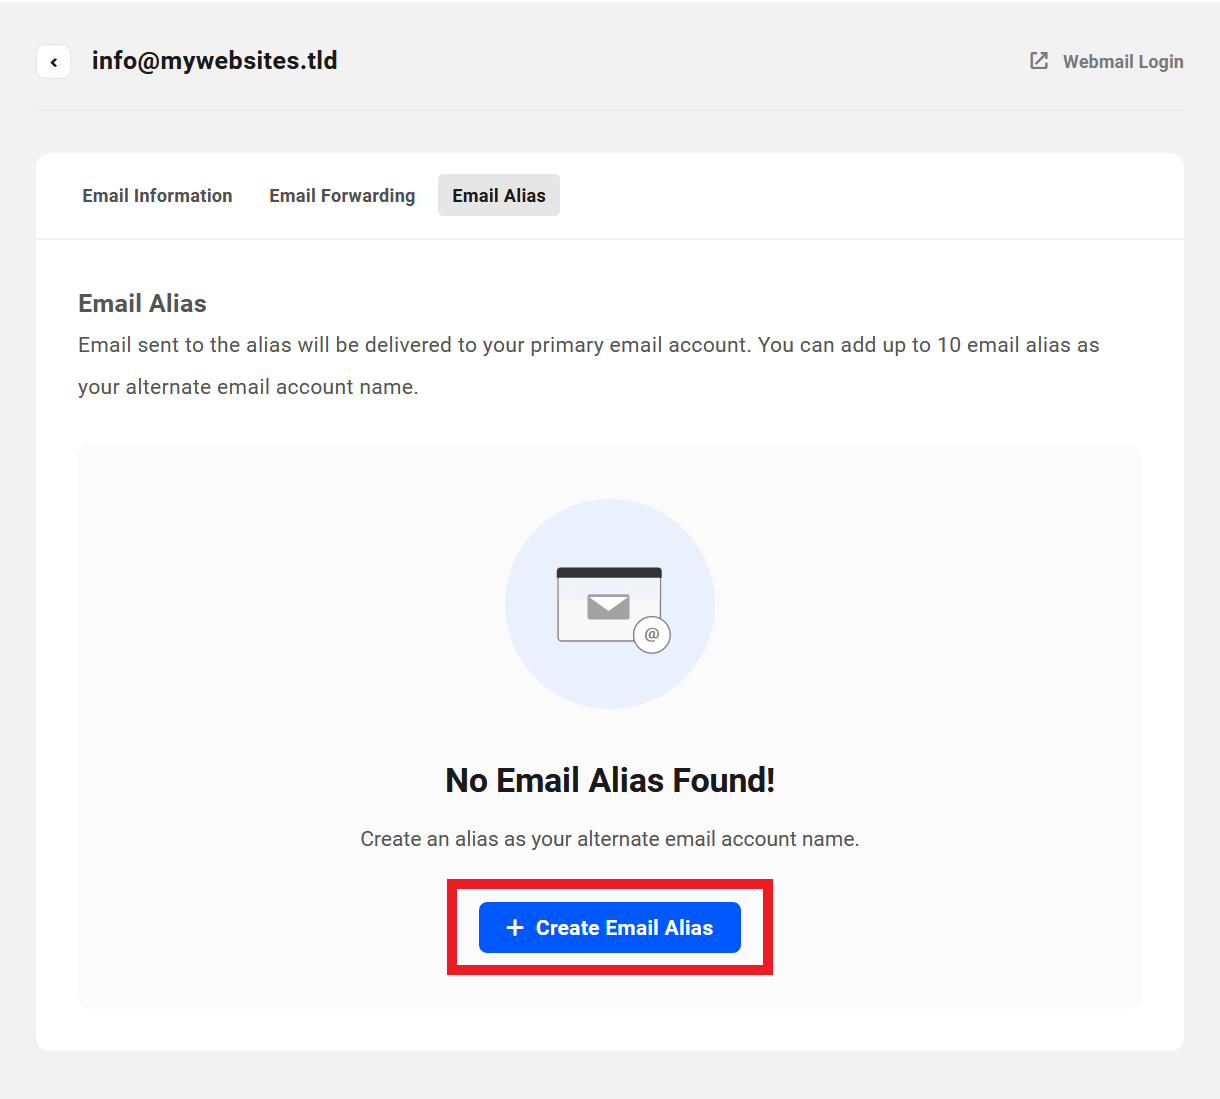
Link to chapter 5The Email Alias tab is where you can create up to 10 aliases for the email account. Any email received at an alias address will be redirected to the address of the actual email account.
To create your first alias for an email account, click the + Create Email Alias button.
In the modal window that pops open, add up to 10 alias addresses, and click the Save button when you’re done.
Note that alias addresses can only contain letters, numbers, dashes, underscores and periods.

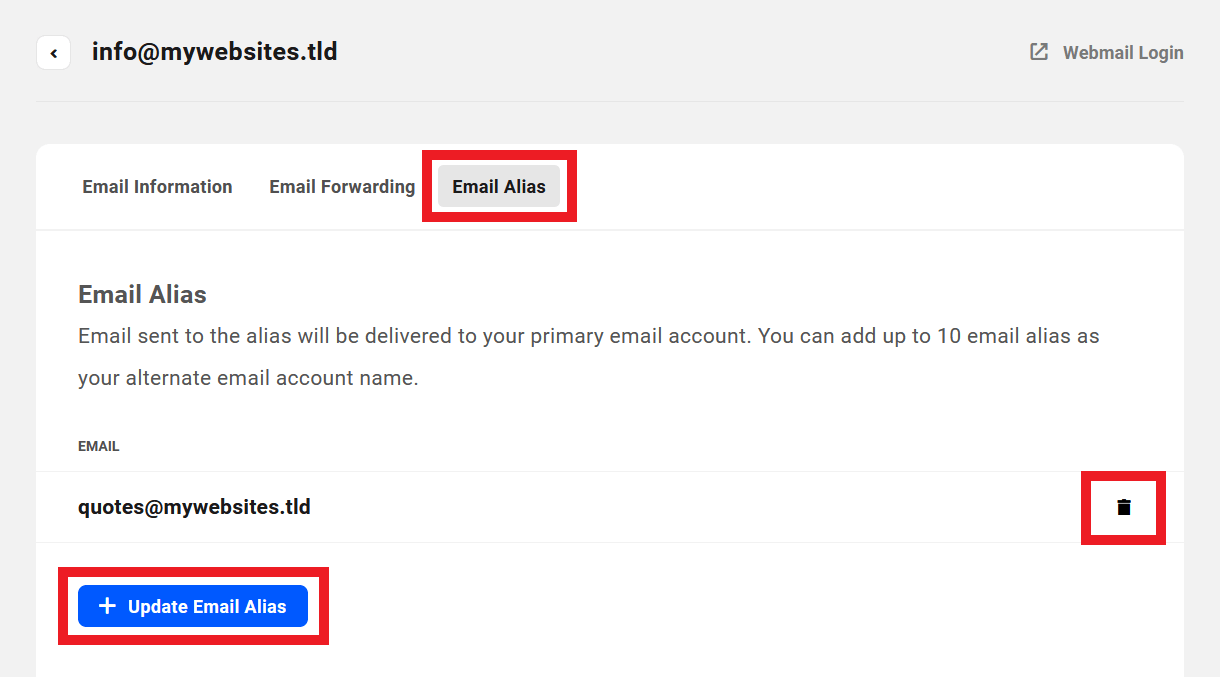
You’ll then see all your aliases listed where you can click the + Update Email Alias button to add more if needed, or delete existing ones by clicking the trash icon.
7.6 Accessing Webmail
Copy chapter anchor to clipboardThe webmail interface for any email account can be accessed using SSO (Single Sign-On) options from your Hub or white-labeled client portal, or by entering the webmail address directly in a browser.
Once logged-in, the webmail interface you see is quite standard and should be familiar. Click the Help icon in the sidebar menu to access the extensive documentation if needed.

7.6.1 SSO (Single Sign-On)
Link to chapter 6SSO (Single Sign On) options will log you, your team member or your client in automatically to the selected email account, without having to enter the email address & password on the login screen.
On the Email Accounts screen of any email domain you have set up, click the envelope icon on an email account’s row.
Or click the Webmail Login link on the management screen of any individual email account.

If a client has been associated with an email account, SSO access from the Hub will be disabled. However, clients will be able to use the webmail SSO login for their own accounts from your white-labeled client portal. A notice will appear in the Hub when hovering over any SSO button or icon for any such accounts.
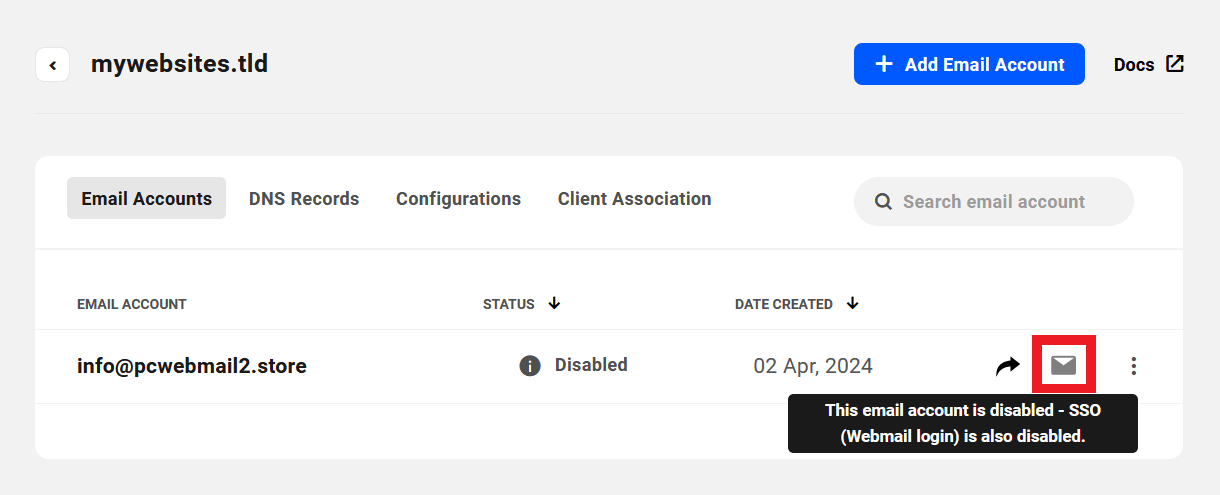
If an email account has been disabled, SSO login for that account will also be disabled in The Hub and in your white labeled client portal for you, as well as your team members and any client you may have associated with the email domain.
A notice will appear when hovering over any SSO button or icon for any such accounts.
7.6.2 Direct Access
Link to chapter 6The webmail account for any email address you have set up can be accessed directly at our white-labeled URL here: https://webmail.yourwpsite.email/
Simply enter the email address and password for the account you wish to access, and click the Login button.

7.6.3 Customizing the Webmail Domain
Link to chapter 6You can brand your webmail accounts with domains that you own so they can be accessed at webmail.domain.tld instead of our white labeled URL as noted above.
Our white labeled webmail URL is secure by default. But when using a custom domain, you must secure that domain with SSL/TLS. See Securing Your Custom Domain with Cloudflare below for more information.
However, Webmail can only be accessed at your custom domain when the address is entered directly in a browser. The SSO options in the Hub or your client portal will always direct to our white labeled webmail.yourwpsite.email address.
So if you do brand webmail with your own domain and want your clients to only login there, you may want to consider disabling the SSO capability in custom roles that you give to your clients.
To customize your webmail address, all you need to do is add a CNAME record to make webmail.domain.tld an alias of our MX server.
Whether you manage your domain’s DNS in your Hub or at another registrar, you’ll first want to check if a webmail CNAME record already exists. If it does, you’ll want to edit that existing record. If not, you’ll need to add a new record.
Editing an Existing CNAME Record
To edit an existing webmail CNAME record, click on the Edit option for that record wherever you manage your domain’s DNS.
Then change the Target of that record to mail.domain.tld.cust.b.hostedemail.com (replace the domain.tld part with your actual domain).
Adding a New CNAME Record
To add a new webmail CNAME record, click on the Add Record option wherever you manage your domain’s DNS.
Select to add a CNAME record, and enter webmail as the Hostname. Then enter mail.domain.tld.cust.b.hostedemail.com as the Target/Alias (replace the domain.tld part with your actual domain).
Securing Your Custom Domain with Cloudflare
Currently, the only way to secure your custom domain over HTTPS is to route the domain through Cloudflare and manage its DNS records there.
Be sure that the webmail CNAME record you add or edit as above is set to Proxied. Then set SSL/TLS to Full.
If you are managing your domains at Cloudflare, you will need to use different domains for webmail and your WPMU DEV hosted sites. That’s because WPMU DEV hosted sites require SSL/TLS to be set to Full (strict) at Cloudflare, while webmail requires SSL/TLS to be set to Full (it will not work with any other setting).
7.7 Configuring Webmail with Email Clients
Copy chapter anchor to clipboardThe IMAP protocol enables you to synchronize your webmail accounts with other applications so anything you do in your webmail account will be mirrored in the app, and vice-versa.
It’s a relatively simple process, but it can seem a bit daunting if you’ve never worked with email apps before. So we’ll provide a few examples below to help get you started. This chapter will be updated periodically with additional connection information as it becomes available.
If you just need to connect a webmail account with an app so you can fetch emails using the POP3 protocol instead, please see the Connecting Email Accounts chapter in our Hosting > Emails documentation. The process for connecting a webmail account is identical with one exception: you’d be using your webmail address instead of an address tied to the primary domain of a WPMU DEV hosted site.
7.7.1 Syncing Outlook with Webmail
Link to chapter 7Microsoft’s new Outlook replaces their old Windows Mail app. This walkthrough will help you get things set up in the new desktop app using IMAP and SMTP so Outlook and your Webmail interface will be synchronized.
Note that the process of setting things up in a mobile Outlook app (Android or iOS) is virtually identical.
If you already have one or more email addresses configured in the Outlook app, click the Settings icon at the top. Then click + Add Account under Accounts.

In the modal window that pops open, delete the Suggested account that might appear there, if any, and enter the webmail address that you want to sync in that field. Then click Continue.

If this is the first time you’re setting up an email address in the app, the modal window will look more like this. Here as well, simply enter the webmail address you want to sync, then click Continue.

The following configuration steps are identical for both scenarios, so we’ll use first-time setup for the rest of this walkthrough.
On the next screen, enter the current password of the webmail account you want to sync. Then click the Show more toggle to reveal the connection options.

In the IMAP Incoming server field, enter the Hostname as seen on the Configurations screen in your Hub: mail.mailconfig.net. Ensure the Port is set to 993, and Secure connection type is set to SSL / TLS.

Next, scroll down to the SMTP Configuration section.
Ensure the SMTP username is the address of the webmail account you’re connecting, and enter the current password of that webmail account in the SMTP password field.
In the SMTP Outgoing server field, enter the Hostname as seen on the Configurations screen in your Hub: mail.mailconfig.net. Ensure the Port is set to 465, and Secure connection type is set to SSL / TLS.

Finally, click Continue on this and any additional screens that may appear, and you’re done! Your selected webmail account is now fully synchronized with your Outlook email client.
7.7.2 Syncing Gmail with Webmail
Link to chapter 7This walkthrough will help you get things set up in Gmail using IMAP and SMTP so your Gmail and Webmail will be synchronized.
Note that this setup only works on the mobile Gmail app. The Gmailify feature available on their desktop client does not work with custom webmail domains.
Once set up, you will be able to access and manage your webmail account directly in the Gmail app on your mobile device.
The following example is for Gmail on Android devices. The setup steps for iOS devices should be very similar.
Open the Gmail app on your device and click the hamburger icon. Then scroll to the bottom and select Settings from the menu.

On the Settings screen, click Add account.

Then select Other from the options on the Set up email screen.

Enter the email address of the webmail account you want to synchronize, and click Next.

On the What type of account is this screen, select Personal (IMAP).

Then enter the current password of the webmail account you want to sync, and click Next.

In the Server field of the Incoming server settings screen, enter the Hostname as seen on the Configurations screen in your Hub: mail.mailconfig.net. Then click Next.

In the SMTP server field of the Outgoing server settings screen, enter the Hostname as seen on the Configurations screen in your Hub: mail.mailconfig.net. Then click Next.

Configure the Account options per your needs, and click Next. Note that the shortest Sync frequency that you can select is the default 15 minutes.

You’ll get a confirmation that the account is set up and synchronized. You can change the name that is displayed in sent messages in the Your name field if needed. Click Next to complete the setup. Your selected webmail account is now fully synchronized with your Gmail app.

7.8 The Client Experience
Copy chapter anchor to clipboardThis chapter deals exclusively with the client’s webmail experience in the branded client portal that you have set up with The Hub Client plugin. It does not cover any additional access or edit capabilities that you may have granted to your clients via client roles.
For the purposes of illustration in this chapter, we will assume the view of a client to whom a custom role has been granted with the View & Edit capabilities needed to manage all features that clients have access to in the Webmail and Billing sections of your client portal.
See our Team & Client Role Customization documentation for more information on client roles and capabilities.
7.8.1 Webmail Overview
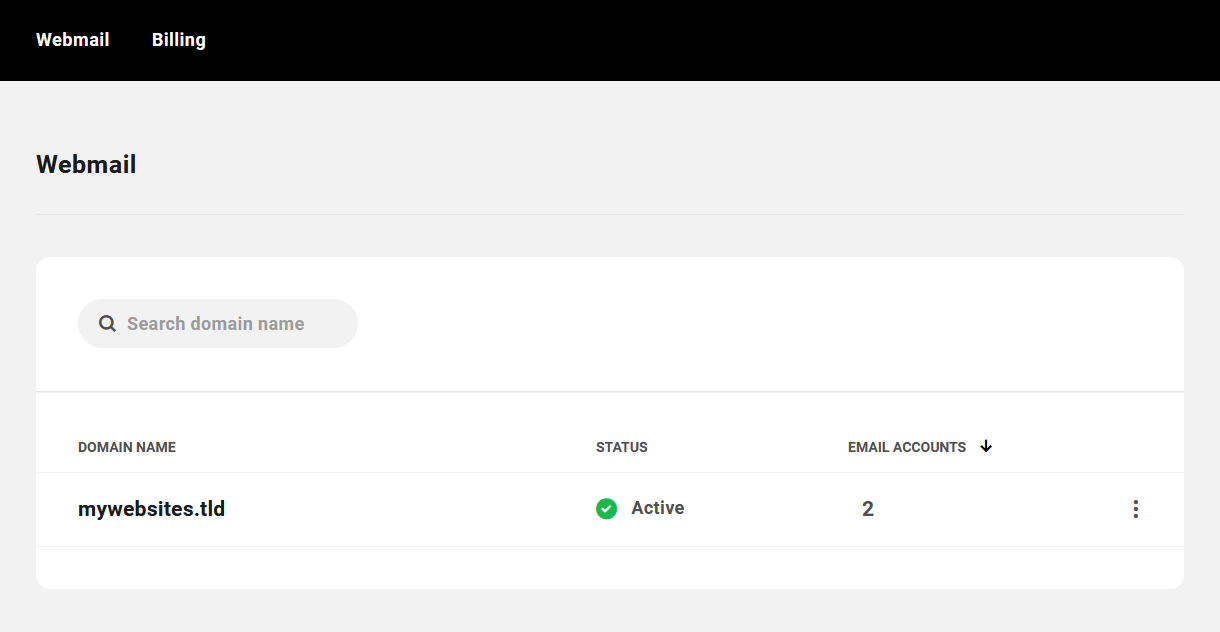
Link to chapter 8When the client accesses the Webmail section in your client portal, they will see a Webmail overview screen much like the one you see in your Hub, where summary information is presented in 3 columns, as follows:
- Domain Name – This column indicates the webmail domain names that you have associated with the client.
- Status – This indicates the status of each domain (see Managing Individual Email Accounts > Status above for additional information):
- Active – Appears if at least one email account under this domain is active.
- Suspended – Appears if all email accounts under this domain are suspended.
- Disabled – Appears if all email accounts under this domain are disabled.
- Email Accounts – The number of email accounts created for each domain.
Note that clients cannot add new webmail domains. Only you and your team members can do that, if you have granted them the needed capabilities. See the Webmail chapter in our Team & Client Role Customization documentation for details.
When the client hovers their cursor over the number in the Email Accounts column of any domain, the addresses of the accounts created for that domain would be revealed. Clicking on any email address would log the client in via SSO to the webmail interface for that email account. See Accessing Webmail above for details.

Similarly, hovering their cursor over the ellipsis icon for any domain would reveal the management options for that domain. Currently, the only option available to clients is to Manage Domain Email.

Clicking that option, or anywhere on the email domain’s row in the list, opens the list of all email accounts created under that domain.
If the client has a large list of email domains, they can use the search form at the top to quickly locate the one they need.
7.8.2 Managing Email Accounts per Domain
Link to chapter 8Email Accounts
Under the Email Accounts tab, the client will find summary information for each account under the domain, presented in 3 columns as follows:
- Email Account – The email addresses created with the domain.
- Status – This indicates the status of each account: Active, Suspended or Disabled (see Managing Individual Email Accounts > Status above for additional information).
- Date Created – The date the email account was created.

Note that clients cannot add new email accounts. Only you and your team members can do that, if you have granted them the needed capabilities. See the Webmail chapter in our Team & Client Role Customization documentation for details.
Email Forwarding Shortcut
The client can hover their cursor over the arrow icon on any email account’s row to reveal email forwarding options for the account if needed. They can toggle the forwarding Status on or off, or click the Manage Email Forwarding link to be directed to the Email Forwarding screen for the account where they can create & manage their forwarding addresses.

Webmail Access Shortcut
The client can click the envelope icon in any email account’s row to be logged in automatically via SSO (Single Sign On) to the webmail interface of the selected email account. See Accessing Webmail above for details.

Management Options
The client can click the ellipsis icon on any email account’s row to reveal additional management options for that account.
DNS Records
The DNS Records screen that the client sees in your client portal is much like the one you see in your Hub, and the functionality is identical.

Configurations
The Configurations screen that the client sees in your client portal is much like the one you see in your Hub, and the functionality is identical.

7.8.3 Managing Individual Email Accounts
Link to chapter 8When the client accesses an individual email account, the screen they see in your client portal is much like the one you see in your Hub.
The functionality in this area is virtually identical for clients, with a few exceptions. The client can edit the email account address and/or password, they can create email forwarding addresses and aliases, but they cannot disable the email account or request more storage space.
7.9 Webmail FAQ
Copy chapter anchor to clipboardCan I receive email using the plus sign (+) in my email addresses?
Yes. Using the plus sign method works just fine for email sent to a valid webmail or forwarding address. For example, email sent to an address like [email protected] would be received at [email protected]
Can I access the POP3 email accounts associated with my WPMU DEV hosted sites using webmail interface?
No. Only the IMAP email accounts created from the webmail manager can be viewed or accessed using the webmail interface.
Is it possible to create both WPMU DEV hosted email accounts and webmail accounts for the same domain on a site?
No, it is not possible to create both types of accounts for the same domain. You can only create email accounts using one method – either hosted email accounts or webmail accounts. If you have already set up hosted email accounts, you will need to delete them to create webmail accounts, and vice versa.
Why do I not see new email notifications in my Hub?
Unfortunately, it is not possible to fetch that information from your webmail account. You would need to log into your webmail account to check for new messages.
Why can’t webmail be accessed via SSO from my Hub once a client is added?
This is for reasons of privacy, security and branding. Once you have added a client to a webmail domain, only that client can access email accounts for that domain, and only from your white-labeled client portal.
What happens if I upgrade or downgrade my WPMU DEV membership?
If you are an Agency member and downgrade to a lower-tier membership, your existing webmail accounts will continue to function as usual, but your billing for each email account will increase to the regular price. Conversely, if you upgrade to an Agency membership, your existing webmail accounts will continue to function as usual, and your billing for each email account will decrease to the reduced Agency price.
Is using a custom domain for webmail access secure?
When using a custom domain for webmail access, you must secure that domain with SSL/TLS. See Securing Your Custom Domain with Cloudflare above for more information.
7.10 Troubleshooting
Copy chapter anchor to clipboardThis chapter contains troubleshooting tips for common email issues. If none of the actions detailed here help you to resolve an issue, please don’t hesitate to contact support.
7.10.1 Issues With Webmail
Link to chapter 10When experiencing issues receiving email in the webmail interface, there are a few things you can check to help troubleshoot the problem.
Check Webmail Storage Used
Check if you have reached the Storage Limit for your email account. If so, you’ll want to empty the Trash in the email account and/or delete some emails to free up some storage space. You’ll find more information in the webmail help documentation.
Add an Allowed Sender
If you are having trouble receiving email from a specific sender, go to Settings > Spam Settings in your webmail account. Then add that email address in the Allowed Senders box. That will allow that specific address to bypass the webmail spam filters. You’ll find more information in the webmail help documentation.

7.10.2 Issues With an Email Client
Link to chapter 10When experiencing issues receiving email in an IMAP or POP3 email client, there are several things you can check to help troubleshoot the problem.
Verify the Email Account Credentials
The first thing you’ll want to do is verify that the email address and password you’ve used in your email client are correct.
Go to the Webmail interface and enter the credentials in the login form. If you are able to successfully log in, the credentials are valid.
Verify That Webmail is Working
Check if you can receive email in your webmail inbox. If you can, you’ll know that the issue is with the email client configuration.
Check Your Email Client Configuration
If you have confirmed that the email account credentials are correct and you can access received emails in the webmail interface, you’ll want to check the server settings of your email client.
Go to the Configurations tab of the email account in your Hub and double-check that you have entered the recommended values in your email client for the protocol you’re using.
Check Your Domain’s MX Records
Under the DNS Records tab of your email account, be sure that the DNS Status of all 3 required records show green checkmarks to indicate that verification has passed successfully.
If any show a red “X” instead, click the Verify button on that screen to check again. If the red “X” still shows for any record, you’ll want to verify that the records have been correctly entered. For additional information, click the link below that corresponds to where you manage your domain’s DNS records:
Managing DNS Records in Your Hub
Managing DNS Records Elsewhere
7.11 Get Support
Copy chapter anchor to clipboardIf you still have questions or need assistance after reading this document, please don’t hesitate to contact our support superheroes using the available options under the Support tab in your Hub or via the Support tab in your WPMU DEV Dashboard.


