6. Domains
The Domains Manager in the Hub is where you can purchase domains through WPMU DEV, connect domains purchased from other registrars, transfer domains to WPMU DEV, and manage the DNS records for all of them.
![]()
If you haven’t set up your WPMU DEV account yet, visit the Hub page, where you can explore the features and see pricing packages.
Already a member? Head over to your Hub > Domains screen to get started.
6.1 Getting Started
Copy chapter anchor to clipboardIf you have not yet registered any domains, connected any to your Hub, or transferred any to WPMU DEV, you’ll be greeted by a prompt to register a new domain with us or transfer an existing domain to WPMU DEV.

If you wish to connect a domain managed elsewhere, click on Connect Existing Domain under the Connected Domains tab instead.

See the Register a Domain chapter for details on how to purchase a new domain from WPMU DEV right in your Hub.
See the Transfer a Domain chapter for details on how to transfer existing domains purchased from other providers to WPMU DEV.
See the Registrant Verification chapter for important information you need to know when registering or transferring domains.
See the Domain FAQs chapter for answers to other common questions about registering domains.
See the Connect a Domain chapter for details on how to connect domains purchased from other providers to your Hub.
See the Manage DNS chapter for details on how to manage the DNS records for all of your registered, connected, and transferred domains.
In the Hub and in this document, the term Registered domains refers to domains purchased through WPMU DEV, Connected domains refer to domains purchased through 3rd-party registrars that you connect to your Hub, and Transferred domains refer to domains transferred from other providers to WPMU DEV.
6.2 Registered Domains
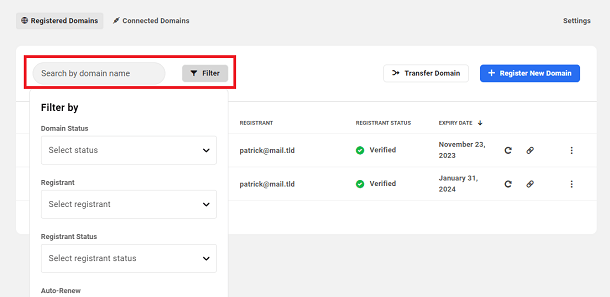
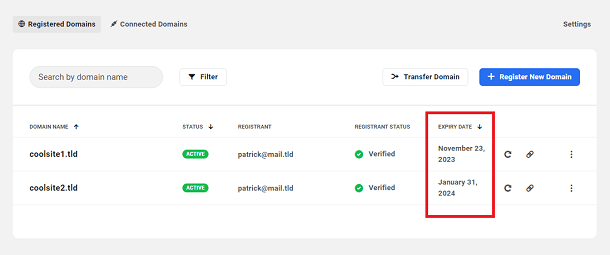
Copy chapter anchor to clipboardOnce you have registered or transferred at least one domain with/to WPMU DEV, you’ll find a list of all your registered and transferred domains under the Registered Domains tab.

Use the Search box to locate any domain, or use the Filter option to only display those domains you want. You can filter by Domain Status, Registrant, Registrant Status, Auto-Renew status or Hosted Site status.
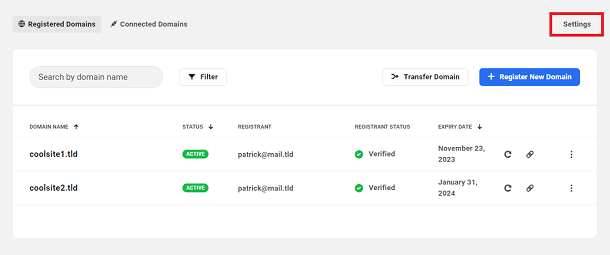
Click the + Register New Domain button to register a new domain with WPMU DEV.

If you had saved the contact information as your default registrant contact info when registering a domain, click the Settings link if you ever need to update that default info.
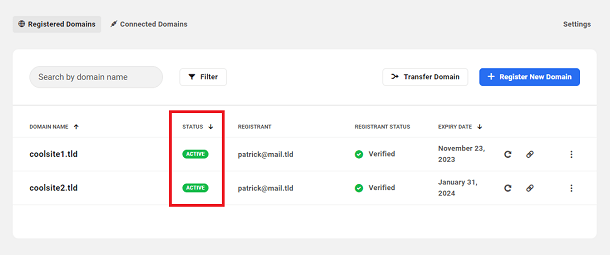
Status
The Status column indicates whether a domain is Active, Suspended, Transferring or has Expired. See Domain Status for details.
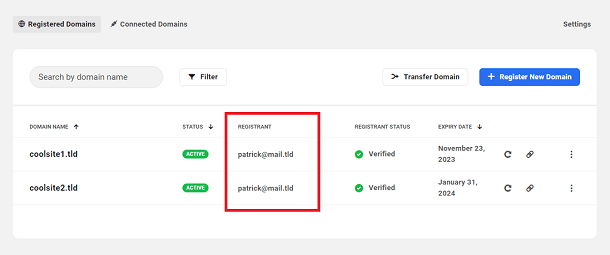
Registrant
The Registrant column indicates the current email address of the domain owner. See Contact Information for details.
Registrant Status
The Registrant Status column indicates whether the registrant has been Verified, is Verifying their contact info, or has been Suspended. If the owner contact information has been changed, this will indicate whether confirmation is Pending from either the new or current registrant. See Registrant Status for details.

Expiry Date
The Expiry Date column indicates the date the domain will expire. This will correspond to the Registration Period you selected when registering the domain, or the date corresponding to the term you selected if you manually renewed by clicking the Renew Domain button on the domain Overview screen.
Auto-Renew
Hover your mouse over the circling arrow icon in any domain’s row to reveal the Auto-Renew status where you can enable or disable the feature as needed.

Hosted Site
Hover your mouse over the link icon in any domain’s row to reveal its Hosted Site status.
If the domain is connected to a WPMU DEV hosted site, you can click the Manage Hosting link to go directly to the Domains tab of that site in your Hub.
If the domain is not yet connected to a hosted site, you’ll see an option to get that done right from this screen if you wish.

Additional Options
Click the ellipsis icon in any domain’s row to reveal additional management options for that domain.
- Manage Domain – Click to be directed to the Hosting > Domains screen for that domain.
- Renew Domain – Click to renew your domain before it expires, or to extend its Expiry Date.
- Update Contact Info – Click to be directed to the Contact Information screen for that domain.
- Update Nameservers – Click to pop open the Update Nameservers modal for that domain.
- Update DNS – Click to be directed to the Manage DNS screen for that domain.
- Associate Client – Click to associate a client with the purchased domain.

6.2.1 Register a Domain
Link to chapter 2If you have not yet registered or transferred any domains with/to WPMU DEV, you’ll see the Register a new domain welcome screen under the Registered Domains tab.
Click on the Register a New Domain button to get started.
The first thing to do is to see if the domain name you want to register is available. Enter your desired domain name in the search field, with or without the TLD extension (the .com part), and click the Search button.
To view all available extensions, click the View all link in the bottom corner of the grid. If the extension you’re looking for is not available, click the Request domain extension (TLD) link to pop open a form where you can request support for specific ones we may be missing.

We currently do not support Internationalized domain names (IDN) for domain searches and registrations. IDNs are not supported by our hosting email services either.
Once you have at least one domain registered, click on the + Register New Domain button at the top of the list of your registered domains to open the search form as above.
Domain Matches With Extension
If you specified the extension you want, and it is available, that will be confirmed and you’ll see a list of other available extensions as well in case you want to purchase one with a different extension.
Click the Buy Now button for the one you want, or search again for an alternative domain name.

If you specified the extension you want, and it is not available, that will be confirmed and you’ll see a list of other available extensions in case any of them may be a good fit.
Click the Buy Now button for the one you want, or search again for an alternative domain name.

Domain Matches Without Extension
If you did not specify the extension in your domain search, the results list will display the domains you can purchase with various available extensions.
Click the Buy Now button for the one you want, or search again for an alternative domain name.

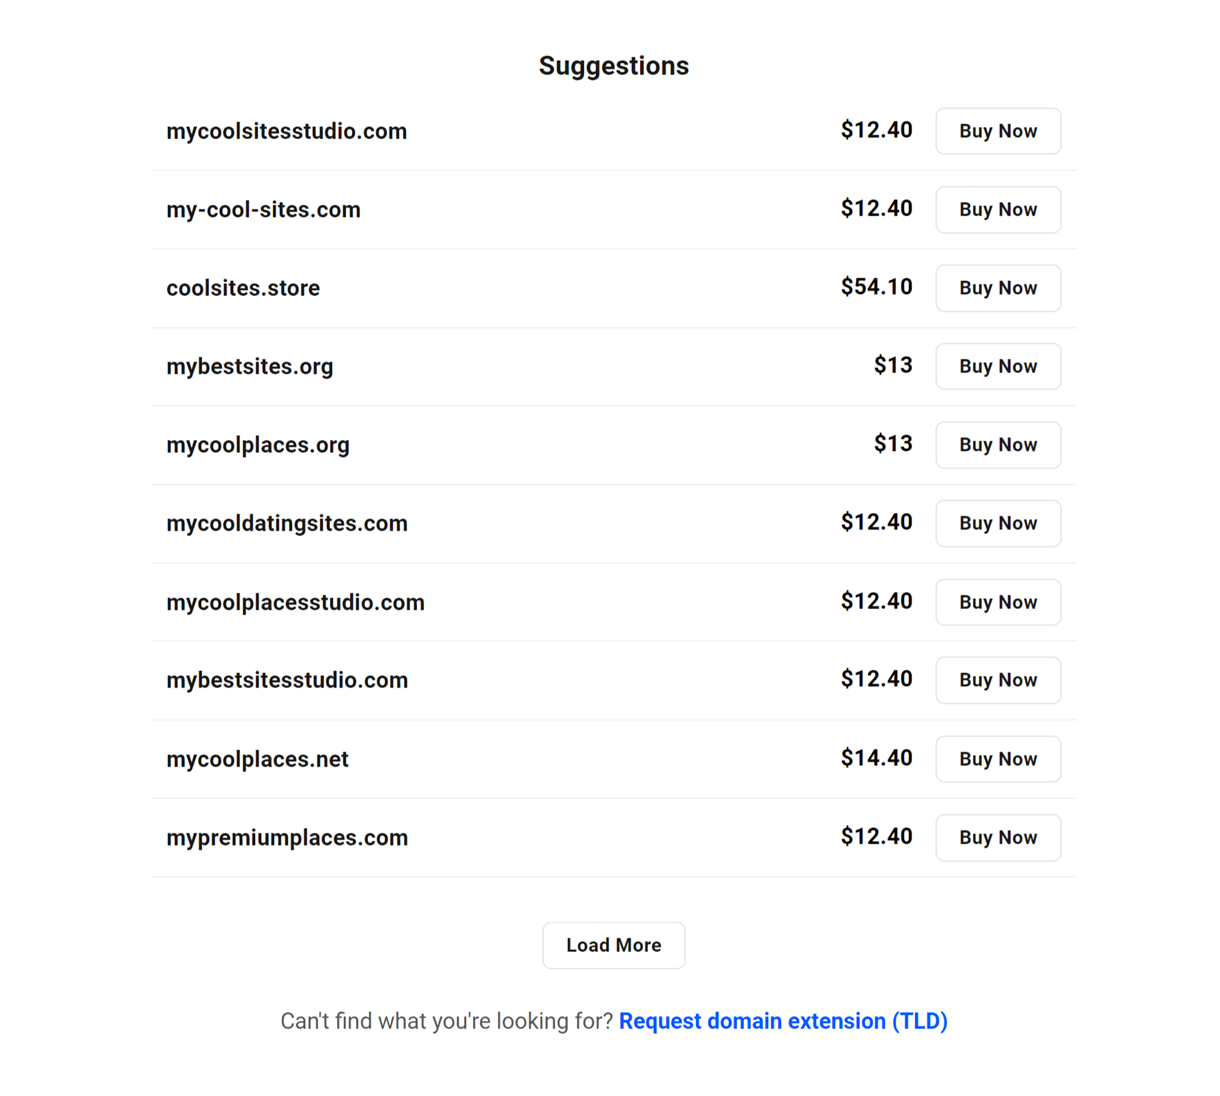
Domain Suggestions
Whether you included the TLD extension or not when searching for your desired domain name, a section just beneath the Matches section will display some alternative Suggestions for you.
6.2.2 Registration Information
Link to chapter 2When you click any Buy Now button, the screen will refresh and you’ll be prompted to enter some required information before proceeding to checkout.
The information you enter here will be displayed under the Domain Overview and Contact Information tabs once the domain purchase has been finalized.
All the information you enter at this step can be edited at any time after registration.

Registration Terms
First select the Registration Period. Most domains can be registered in annual increments for up to 10 years, but some, like .co domains, can only be registered for a maximum of 5 years. This will set the Expiry Date that can be found on the Domain Overview screen once the domain registration is done.
The Auto-Renew option is enabled by default so you don’t forget, but you can disable it here or at any time after purchase if you don’t need your domain to renew automatically.
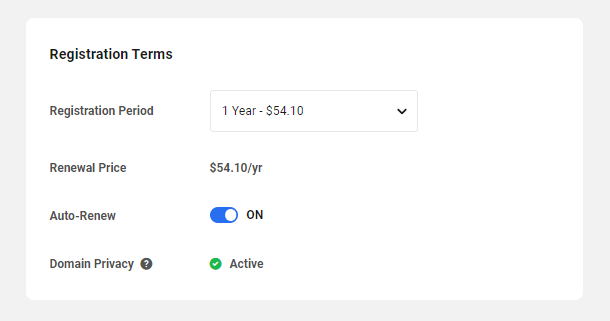
Domain Privacy is included at no extra cost for every domain you register through WPMU DEV, or transfer to WPMU DEV. This means that none of the personally identifying information you enter here is made publicly available by default. Even if you explicitly authorize sharing in your Data Sharing Preferences when clicking the link in a GDPR Consent Request email, that data will not be exposed in public WHOIS records.
Registrant Information – Client
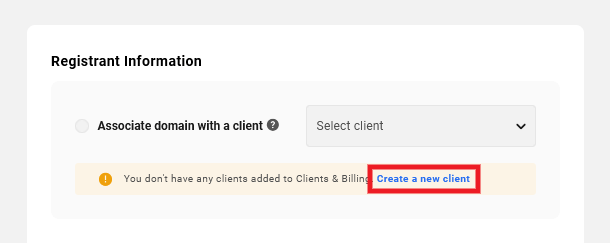
If you are purchasing the domain for a client that you already have in your Clients & Billing portal, you can select the client here, and the client’s Name & Billing Information will automatically populate the Registrant Information form below.
Click in the Associate domain with a client section and select the client from the dropdown list.

If you don’t yet have any clients added to your Clients & Billing portal, you’ll be prompted to create one first.
See Client Billing below for more information.
Registrant Information – Owner
Next, complete the form to include all information required to identify the domain Owner (the individual responsible for the domain). If you had selected to associate the domain with a client above, you may want to take a moment to double-check that all info is accurate and up-to-date.
What is entered here will also be used to automatically populate the Admin, Billing and Tech Contact Information. All information can be edited if needed after the registration is completed.
Please note that the Address fields are limited to a maximum of 64 characters.
If you wish to use this same information for future domain registrations, select the option to Save this as my default registrant information for future domain registrations at the bottom of the form. You can edit this information at any time by clicking the Settings link on the Registered Domains tab.

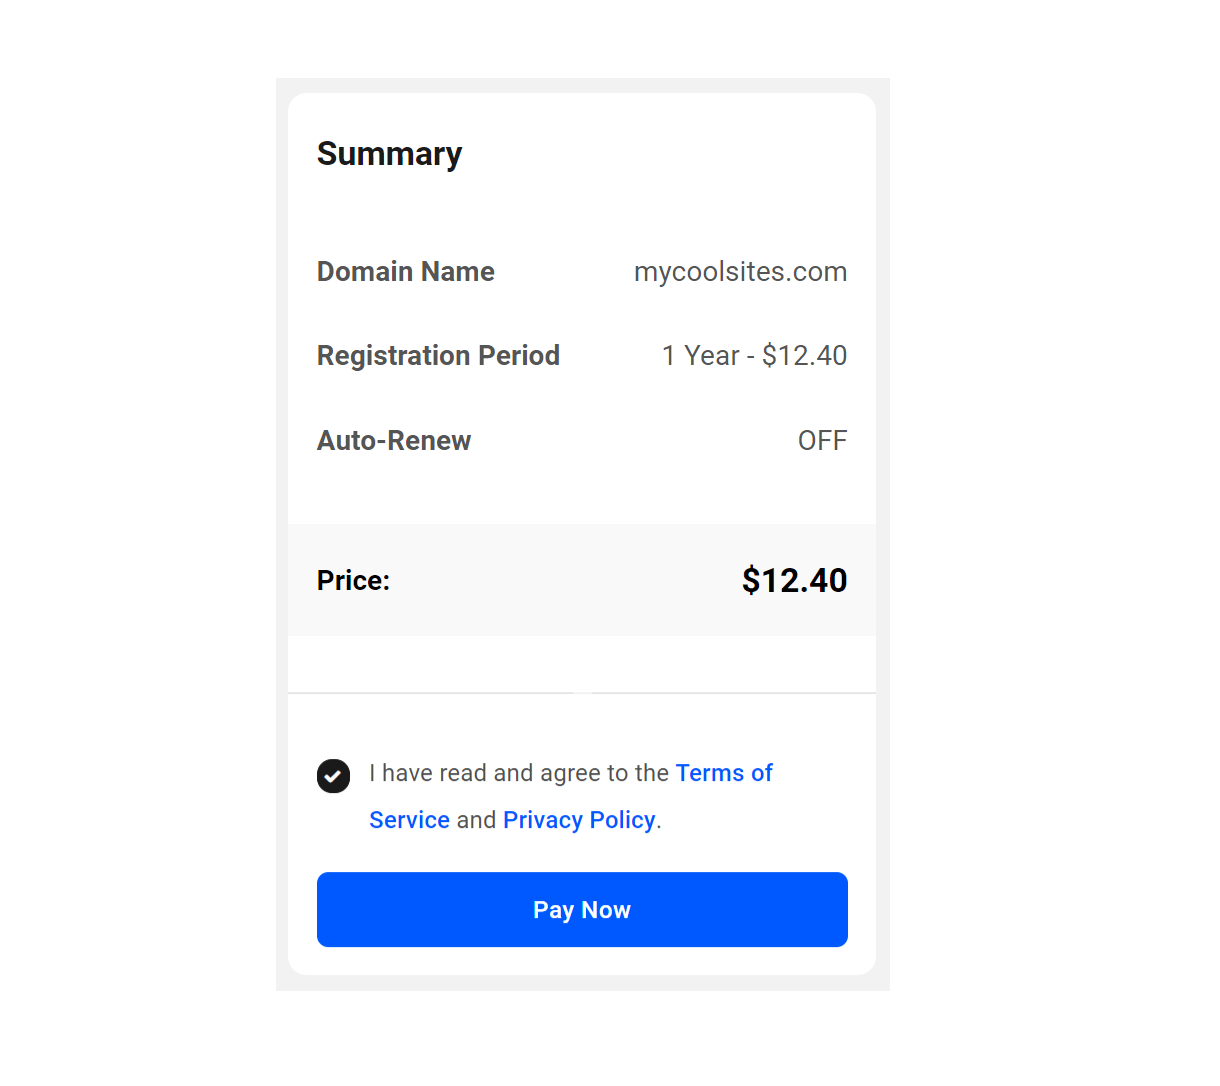
Summary
Review the Summary to ensure that all information is correct, click the Terms of Service & Privacy Policy box, then click the Pay Now button to finalize your purchase.
The amount indicated in the Price section will be charged to the credit card you have set as your Payment Method in your WPMU DEV Account.
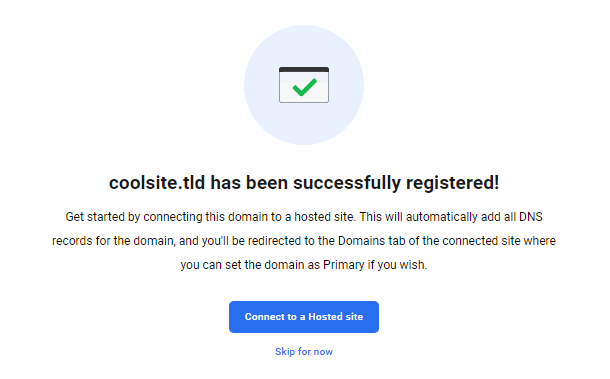
Registration Confirmation
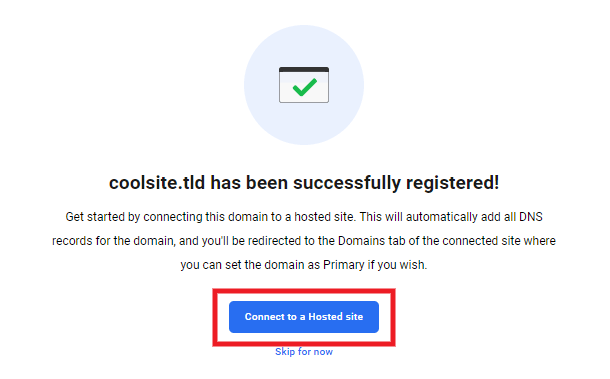
You’ll then see a success message appear on screen with a few options.
- Connect to hosted site – Click this to connect the domain to a site you have hosted with WPMU DEV, and have its DNS automatically set up for you.
- Skip for now – Click to be directed to the Registered Domains screen in your Hub.
6.2.3 Domain Overview
Link to chapter 2Clicking on any domain listed on the Registered Domains screen will pop open the Overview for that domain. This is where you’ll find all the information related to the domain that you have registered with or transferred to WPMU DEV.

Renew Domain
Click the Renew Domain button at the top of this screen to manually renew your domain before it expires, or to extend its Expiry Date.
For example, if you initially registered a domain on June 1st for one year and did not enable the Auto-Renew option, it would expire on June 1st of the following year.
However, if you renew the domain for an additional 2 years before it expires using this option, it would then expire 3 years from the registration date.
Domain status
This will display the current status of the domain, which could be any one of the following:
- Active – This is the default status for a domain unless or until the domain expires, is suspended, or is getting transferred.
- Suspended – A domain is suspended if the current registrant status changes to Suspended. See Registrant status below for details.
- Expired – A domain’s status changes to expired if it is not renewed at the end of the current registration period. You can prevent a domain from expiring by toggling on the Auto-Renew option, or by manually renewing it as noted above.
- Transferring – This domain status indicates that a domain is currently getting transferred from another provider to WPMU DEV. Once the transfer is successful, the domain’s status will change to Active.
Registrant status
This indicates the current status of the user that was used when registering the domain.
- Verified – The domain owner has verified their identity by clicking the link in a confirmation email.
- Verifying – The domain owner has not yet verified their identity by clicking the link in the confirmation email.
- Suspended – The domain owner has not verified their identity within the allowed 15-day delay. When a registrant status changes to suspended, the associated Domain status also changes to suspended.
- Pending New Registrant – If any of the First Name, Last Name or Email values have been changed in the domain Owner’s contact information, this status will display until the new owner has clicked a verification link in an email sent to them.
- Pending Current Registrant – Once the new owner has verified their identity as above, this status will display until the current owner confirms the change by clicking a confirmation link in an email sent to them.
See the Registrant Verification chapter below for details.
Hosted Site
This indicates whether the domain has been connected to a site hosted by WPMU DEV.
- Not Connected – If the domain is not yet connected to a WPMU DEV hosted site, you’ll see a Connect to a hosted site link that gives you the option to do that right from this screen.
- Connected – If the domain has been connected to a WPMU DEV hosted site, you’ll see a Manage hosting link there that will redirect you to the Domains tab of that site when clicked. A Disconnect link will also appear so you can easily remove the domain from the hosted site and clear its DNS records.
See the Connect a Registered Domain to a Hosted Site chapter below for details.
GDPR Consent Status
This indicates the status of the Data Sharing Preferences you set after clicking the link in the email that is sent to you immediately after the domain purchase.
If you did not click the link in that email and can’t find it any more, or if you wish to change your data sharing preferences, click the Send Consent Email or Change Response link to send the email again.
- Contract Only – This status appears if you did not yet choose to share any optional personal data.
- Contract and Consent – This status appears if you did choose to share optional personal data.
- Denied – This status appears if you choose to not share any data.
- N/A or Pending – This status appears if you have not yet set your Data Sharing Preferences.
Transfer Lock
Transfer locking is a security feature that prevents unauthorized changes to a domain, such as transferring to another registrar or modifying DNS records.
This feature is enabled by default on all domains registered with WPMU DEV.
However, you can toggle this feature off if needed. This helps to ensure that you have full control over your purchased domain.
Get transfer auth code
An auth code is required when you want to transfer your domain from one domain registrar to another. You can get the transfer auth code directly from the Hub.
To view the transfer auth code, disable the Transfer lock. You will find the Get transfer auth code link. Click on the link to view the transfer auth code.

Registration Date
This indicates the date that the domain was first purchased and registered.
Expiry Date
This indicates the date the domain expires according to the Registration Period you chose when registering the domain.
If you use the Renew Domain option, you can extend the expiry date according to the new Registration Period you select.
Renewal Price
This indicates the amount that will be charged to the credit card you have set as your Payment Method in your WPMU DEV Account if or when the domain is renewed or its registration period extended.
Auto-Renew
Toggle this option on if you want your domain to be renewed automatically at the end of the current registration period. See also Renew Domain above.
If this option is already enabled, the date the domain will auto-renew will be indicated here. Auto-renewal occurs between 7 and 15 days before expiry, depending on the TLD.
Nameservers
This section will indicate the nameservers currently assigned to your domain. By default, these will be the WPMU DEV nameservers: ns1.wpdns.host, ns2.wpdns.host & ns3.wpdns.host
The functionality to create and use your own custom nameservers instead is not yet available, but is coming in a future update. You can however enter the nameservers from Cloudflare if you use their services. See Change Your Nameservers in the Manage DNS chapter below for details.
6.2.4 Contact Information
Link to chapter 2The Contact Information tab is where you’ll find all the information related to the domain Owner as well as the Administrative, Billing and Tech contacts. Information for each contact is located under their respective tabs.
- Owner – This is the contact information of the person who registered and owns the domain. If you have selected to associate the domain with a client, the client’s information will be here.
- Admin – This is the person responsible for managing the domain if different from the owner.
- Billing – This is the person responsible for billing-related actions for the domain if different from the owner.
- Tech – This is the person responsible for fixing or adjusting any domain issues or settings if different from the owner.

When you register a domain with WPMU DEV, all the contact information you enter at the Registrant Information step is used to automatically populate all contact types.
To add or edit any information for any of the contact types, simply click the Edit Info button at the top-right of this screen to pop open a modal edit window.

Select the contact type you want to edit, and optionally choose to copy all existing info from any of the other contact types.

You can also edit any or all individual fields for each contact type as needed.

Once you’ve edited a contact type, remember to click the Save button before switching to a different one, or you’ll lose the changes you just made.
If you make any changes to the First Name, Last Name or Email fields of the Owner contact information, please be sure to review the Registrant Verification chapter for important confirmation details.
6.2.5 Manage DNS
Link to chapter 2See the Manage DNS chapter below for details about managing DNS records for your registered domains.
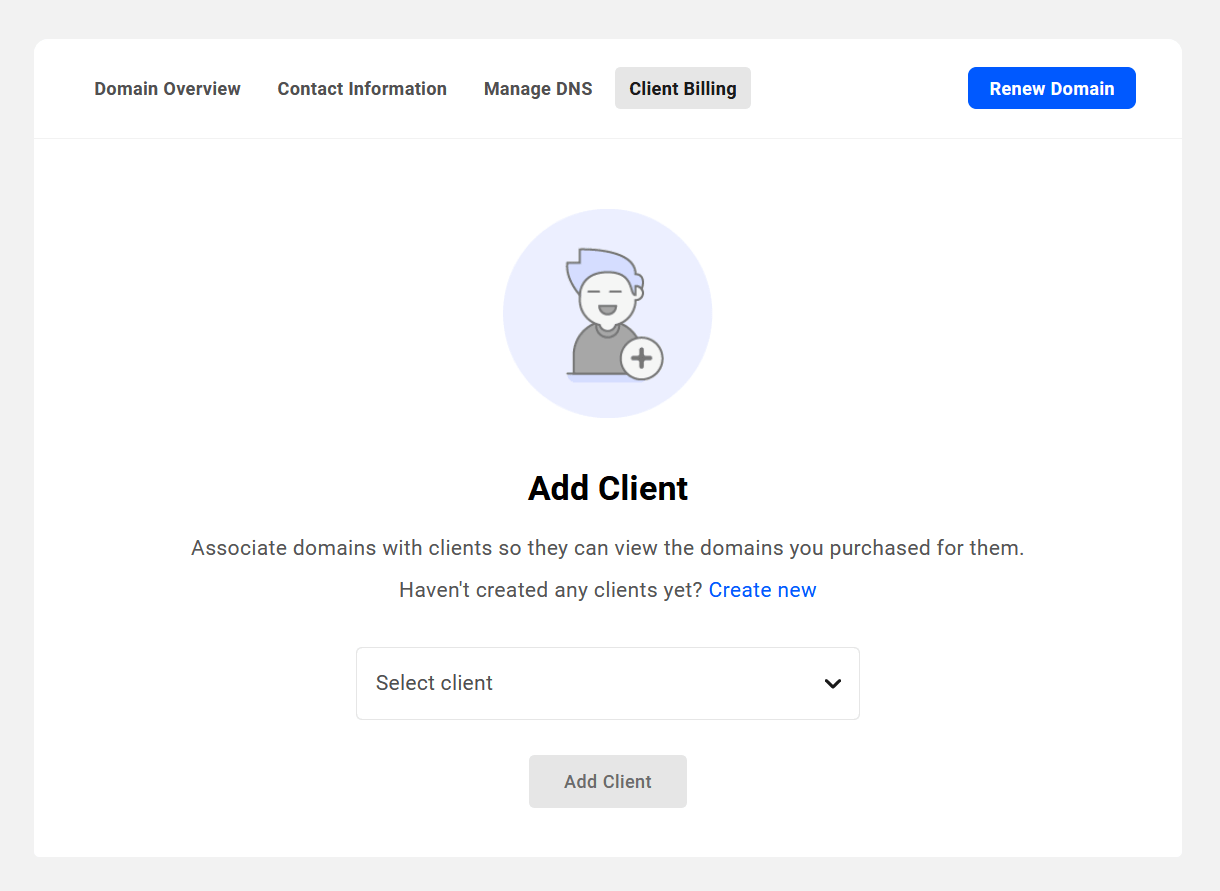
6.2.6 Client Billing
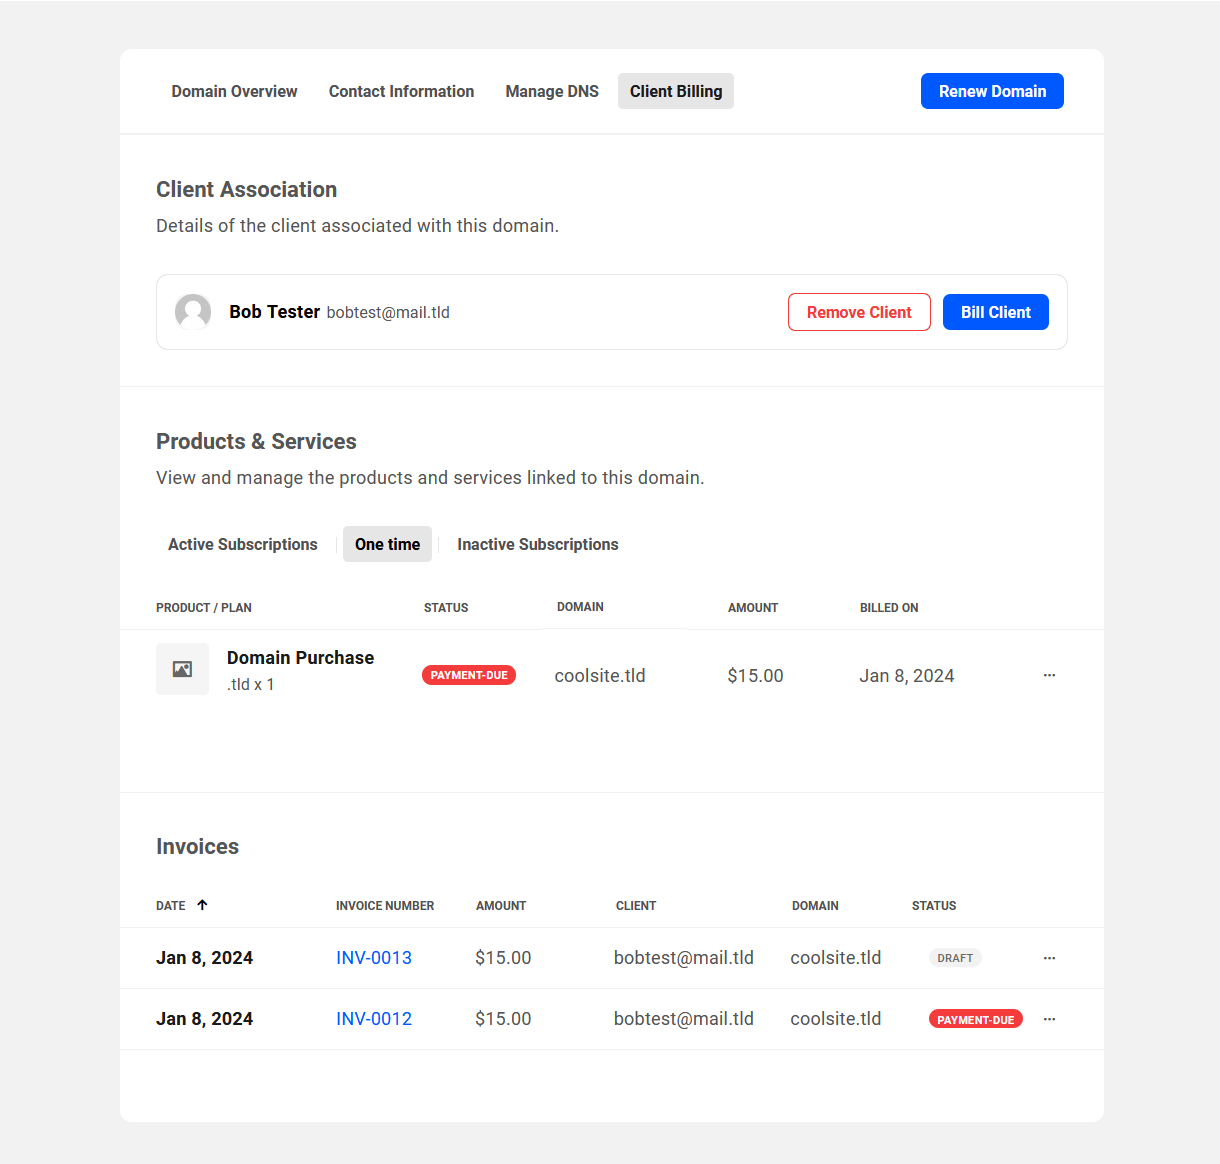
Link to chapter 2Here, you can associate a client with the domain and view all client billing activity for the domain.
If a client purchases a domain from you through your white labeled Hub Client Reseller portal, this screen will be auto-populated with the client’s purchase and invoicing information.
To manually associate a client with a registered domain so you can bill them for any of your domain-related products/services, select the client from the Select client dropdown and click the Add Client button.
Once the client has been added, the screen will refresh and you’ll see the information related to the client.

Click the Remove Client button if you need to remove the client currently associated with the domain. Removing a client from a domain will cancel all active subscriptions and will void any pending invoices for the domain.
Note that removing a client will not remove the contact information associated with that client. If you need to change that after removing a client, you will need to manually edit the Owner contact info manually. See Contact Information above for more.
Click the Bill Client button to bill the client for any product or service you currently have set up in Clients & Billing. This will automatically associate the purchased product/service with the domain you’re currently viewing.
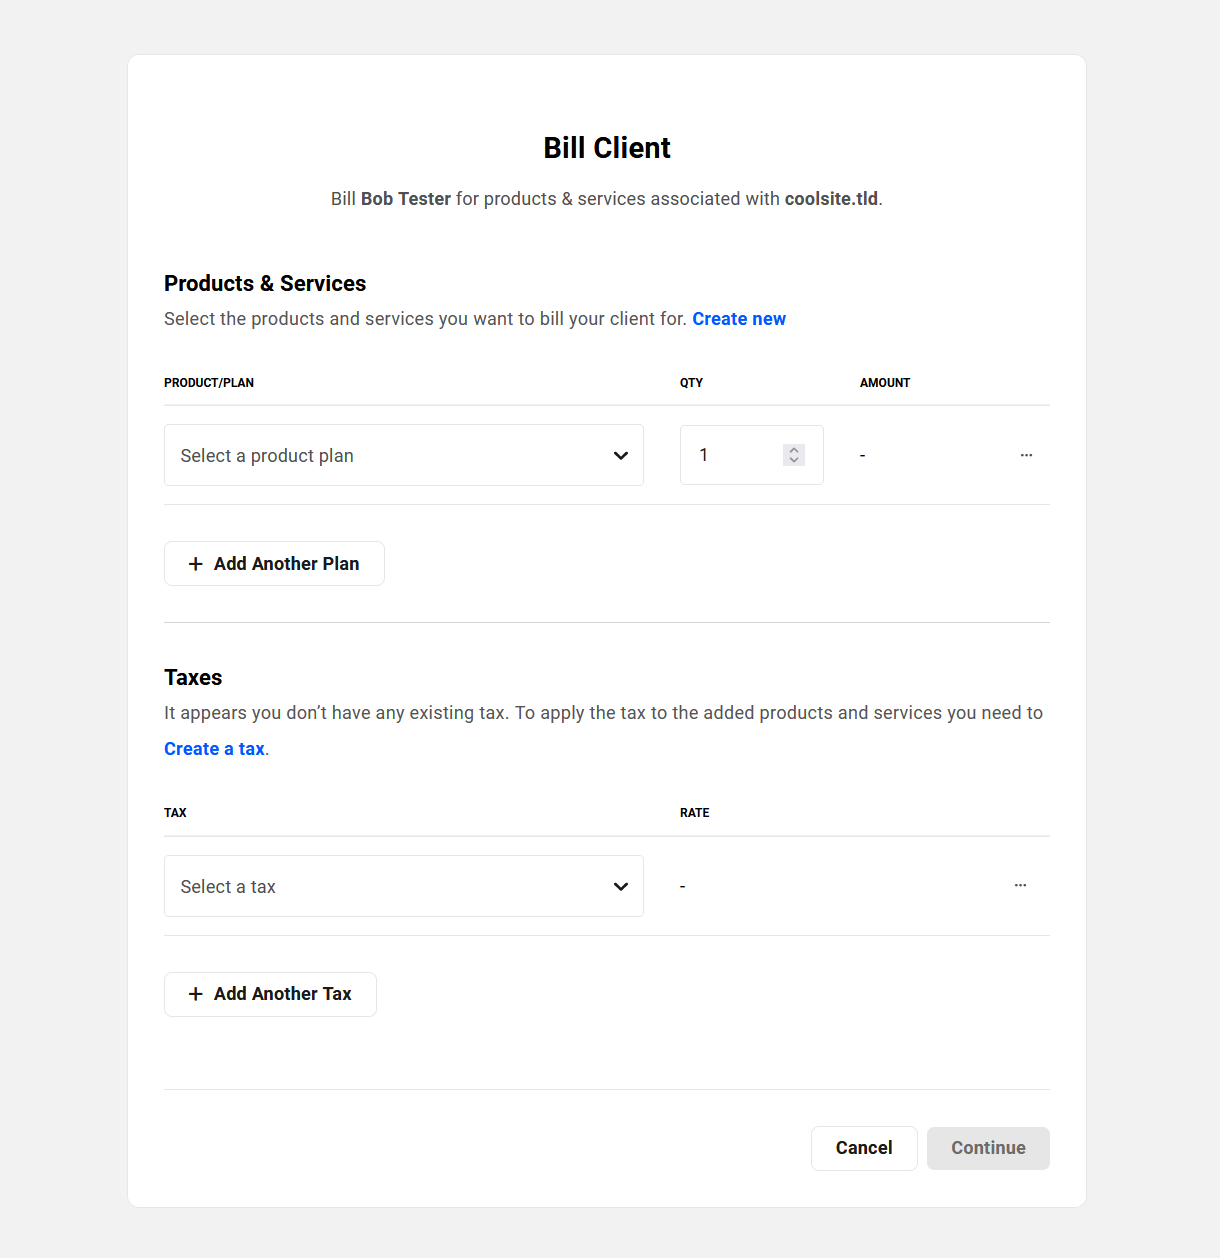
The process of creating an invoice here is identical to creating an invoice in Clients & Billing. Select the product you wish to bill the client for and any applicable taxes, then click the Continue button.
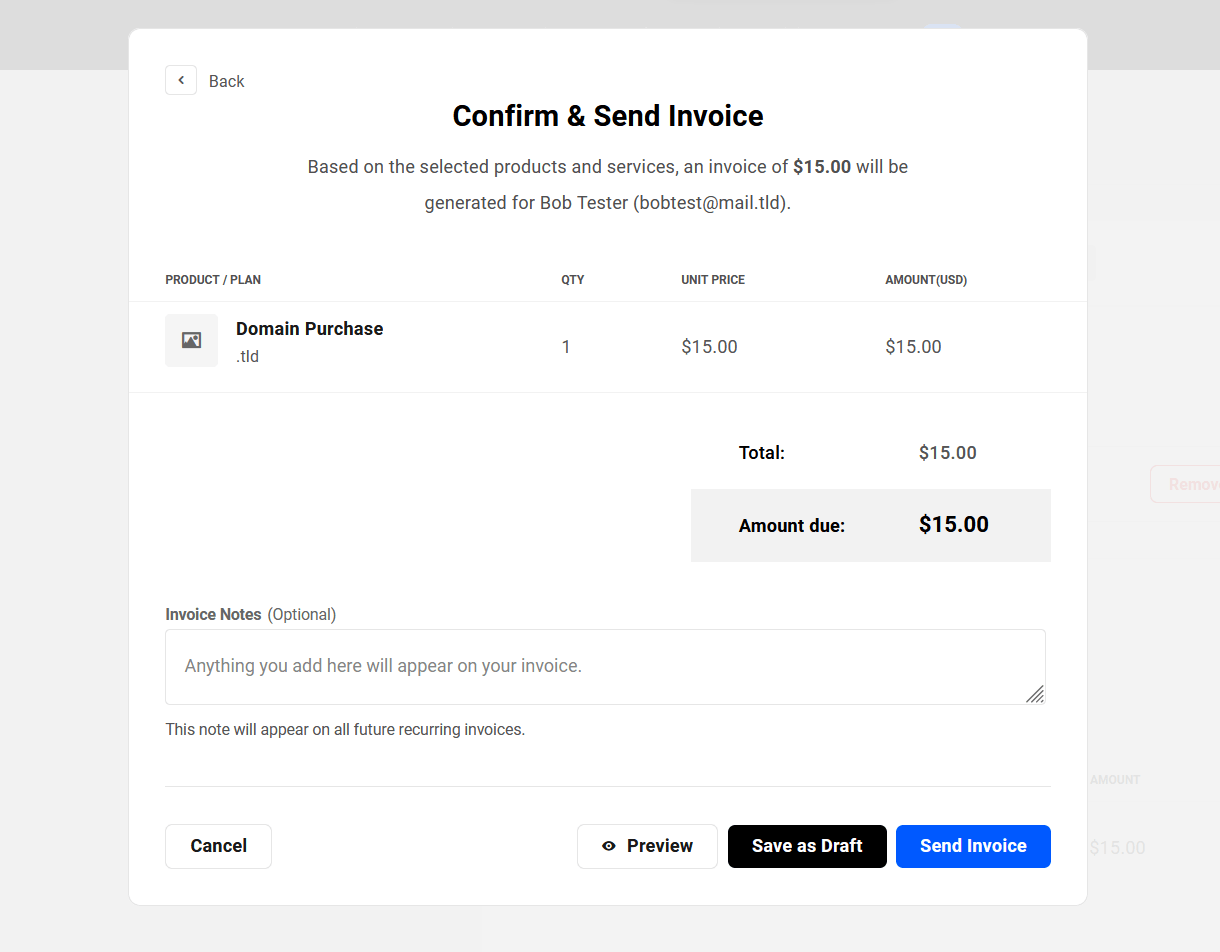
On this screen, double-check that the products/services you’re billing the client for are correct, that you’ve added any needed taxes, and optionally add a personalized Invoice Note that will appear in the footer of the invoice sent to the client.
If you need to make any changes, click the Back button at the top-left to go back to the previous step.
Click the Preview button to open a preview of the invoice in a new tab. To send the invoice right away, click the Send Invoice button. To cancel the invoice without saving or sending anything, click the Cancel button.
Click the Save as Draft button to save the invoice so you can edit or send it at a later time. You’ll find the Edit option when you click the ellipsis icon at the far right of its row. See Managing Invoices in Clients & Billing for more information on available management options for draft and other invoice status.
Once you have billed a client for products/services for a domain, you’ll see all the active and inactive subscriptions, one-time purchases, and invoices related to this domain and client displayed under the Client Billing tab for that domain.
All domain-related invoices can also be found in the main Invoices section of Clients & Billing.
6.2.7 Connect a Registered Domain to a Hosted Site
Link to chapter 2Any domain you register with WPMU DEV can be connected to any site you have hosted with us. Doing so will also automatically configure the needed DNS records for the domain.
You can connect the domain to a hosted site from the Registration Confirmation screen as soon as you have purchased it, or from the Registered Domains or the Domain Overview screens at any time afterwards.
Connect From Registration Confirmation
To connect a domain to a hosted site as soon as you’ve purchased it, click the Connect to a Hosted site button on the Registration Confirmation screen.
Connect From Registered Domains
To connect a domain from the Registered Domains screen, hover your mouse over the link icon in the domain’s row and click the Connect to Hosted Site link in the tooltip that pops open.
Connect From Domain Overview
To connect a domain from the Domain Overview screen, click the Connect to hosted site link.

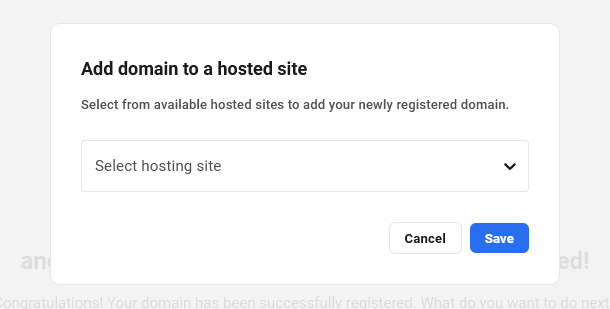
Any of the above options will pop open a modal window where you can select the WPMU DEV hosted site you wish to connect the domain to. Click Save to confirm the action.
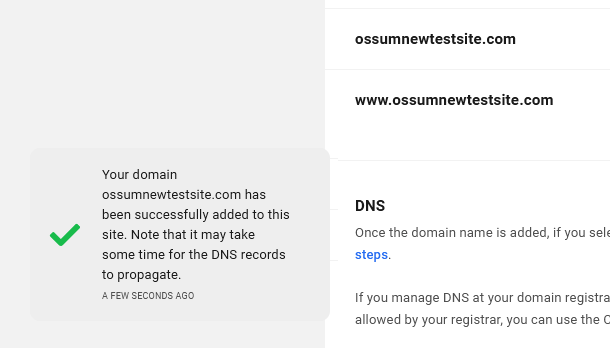
You’ll be redirected to the Domains screen of the site you just added the domain to where you’ll see a success message reminding you that DNS updates can take a little while.
Now, back on the Domain Overview screen for your new domain, you’ll see the data on the Hosted Site row has been updated to indicate that your domain is now connected to a WPMU DEV hosted site.
Click the Manage Hosting link at any time to go to the Hosting > Domains screen of that site in your Hub.
Click the Disconnect link to remove the domain from your WPMU DEV hosted site.

Disconnect a Registered Domain from a Hosted Site
You can remove a domain from a hosted site by clicking the Disconnect link on the domain’s overview screen as shown above.
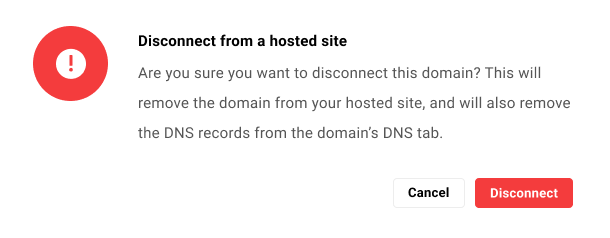
If the domain you want to disconnect is using our default nameservers, disconnecting it from the hosted site will also automatically remove the corresponding DNS records from the Manage DNS tab of that domain. You’ll be prompted to confirm the action.
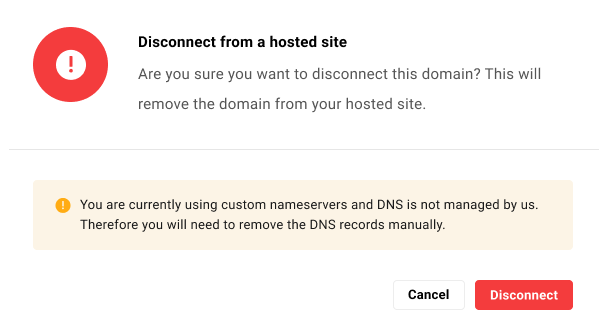
If the domain you want to disconnect is using custom nameservers, like those from Cloudflare for example, you will need to manually remove the domain’s DNS records from where they are currently managed. A reminder of this will appear in the confirmation prompt.
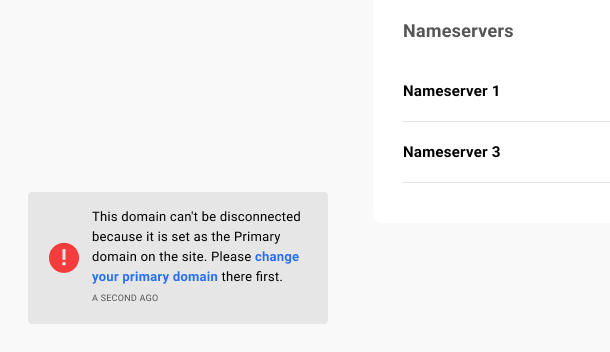
If the domain you want to disconnect is set as the Primary domain for the hosted site it’s connected to, you’ll need to first set a different domain as primary on that site before you can disconnect it. A notice will pop up in your Hub to remind you of this.
6.2.8 Registrant Verification
Link to chapter 2Registrant verification is the process of confirming the identity of the domain owner.
Verification is required in the following situations:
- The first time you purchase a domain with any combination of First Name, Last Name and Email address. The verification email is sent to the Email address entered in the Registrant Information step.
- Any or all of First Name, Last Name and/or Email address already used to purchase one or more domains is modified in the Owner Contact information. This triggers a process whereby both the current and the new registrant must confirm the change. See Domain Ownership Changes below for details.
- A domain renewal reminder or Whois Data Reminder Policy email bounces. This indicates the email address is no longer valid and requires an update. If the Owner’s Email address is not updated in the allowed time-frame, the registrant and domain status will be suspended as detailed below.
In all of the above situations, a verification email is sent to the email address you enter when registering a domain with us.
You have 15 days to click a link in that email to confirm that the name and email address are valid.
The email is sent several times during that 15-day period to ensure you are aware of it, but you only need to click a verification link once.
It’s very important to pay attention to this email. Failure to verify the email address associated with the domain owner within the 15-day period will result in the Registrant Status changing to Suspended. That, in turn, causes the domain to be suspended as well. The domain will remain suspended till its expiry date. If there is a website associated with the domain, and that domain is set as the Primary, the site will stop working until the verification is done or the Primary domain is changed to one that works.
Domain Suspension
If your domain gets suspended, the only way to get the domain unsuspended is to complete the domain verification by clicking the link in an email already sent, or by updating the Owner contact information to have a new email sent. Once the verification is done, the domain will be back up almost instantly.
Domain Verification
When you purchase a new domain, transfer an existing domain or update the domain registrant’s contact information, a domain verification process takes place. If a record already exists with the exact combination of First Name, Last Name and Email provided during the Registrant Information step, then the domain is automatically verified and no further action is required.
However, If no record exists with the exact combination of provided registrant information, then a verification email is sent to the email address provided during domain registration. Failure to complete the domain verification within the 15-day period will result in Domain Suspension.
Note that the Domain Verification process remains the same irrespective of your domain provider.
Domain Ownership Changes
As noted above, if the first name, last name and/or email address is changed in the domain Owner contact information, both the current and new registrant must confirm the change.
This is done by clicking a link in a Change of Registrant Confirmation email, and confirming the change on the Domain Update Request page that the link points to.
However, the emails that are sent depend on whether the current and/or new registrants have previously authorized OpenSRS/Tucows to act as their designated agent so future changes can be automatically approved without having to confirm again via email. This is done by checking a checkbox on that page at any time.

So there are 4 possible scenarios whereby the current and/or new registrants must confirm any such change:
Both the current and the new registrants have authorized OpenSRS to act as their designated agent
- OpenSRS automatically approves the transfer as designated agent of the new registrant.
- OpenSRS automatically approves the transfer as designated agent of the current registrant.
- Email confirmation is sent to both registrants.
- Trade is successful.
Only the current registrant has authorized OpenSRS to act as their designated agent
- OpenSRS sends an approval email to the new registrant.
- Once approved by the new registrant, OpenSRS automatically approves the transfer as designated agent of the current registrant.
- Email confirmation is sent to both registrants.
- Trade is successful.
Only the new registrant has authorized OpenSRS to act as their designated agent
- OpenSRS automatically approves the transfer as designated agent of the new registrant.
- OpenSRS sends an approval email to the current registrant.
- Once approved by the current registrant, email confirmation is sent to both registrants.
- Trade is successful.
Neither the current nor the new registrants have authorized OpenSRS to act as their designated agent
- OpenSRS sends an approval email to the new registrant.
- Once approved by the new registrant, OpenSRS sends an approval email to the current registrant.
- Once approved by the current registrant, email confirmation is sent to both registrants.
- Trade is successful.
Note that in all of the above scenarios, a domain transfer would be unsuccessful if:
- The email address of either registrant is invalid.
- Either registrant rejects the transfer.
- There is no response to an approval email within 15 days.
6.3 Registered Domain Email Examples
Copy chapter anchor to clipboardEmails are sent to the domain owner contact for various domain-related activities like domain purchase, renewal, expiry, etc.
These emails are fully white-labeled and contain no reference to WPMU DEV whatsoever. All emails come with a Your Domain Info subject line and are mailed from [email protected]
This very generic structure is intentional as it will greatly simplify the next phase of this feature where you will be able to resell domain services to your clients.
6.3.1 Domain Purchase, Renewal and Expiry
Link to chapter 3.AU Auto-Renew Notification 60 Days Before Expiry
This email is sent 60 days prior to automatic renewal of a domain registered with an Australia country extension: .au

Renewal Reminder 90, 60 & 30 Days Before Expiry
A renewal reminder email is sent 90, 60 and 30 days before the expiry date of any domain that is not set to auto-renew.

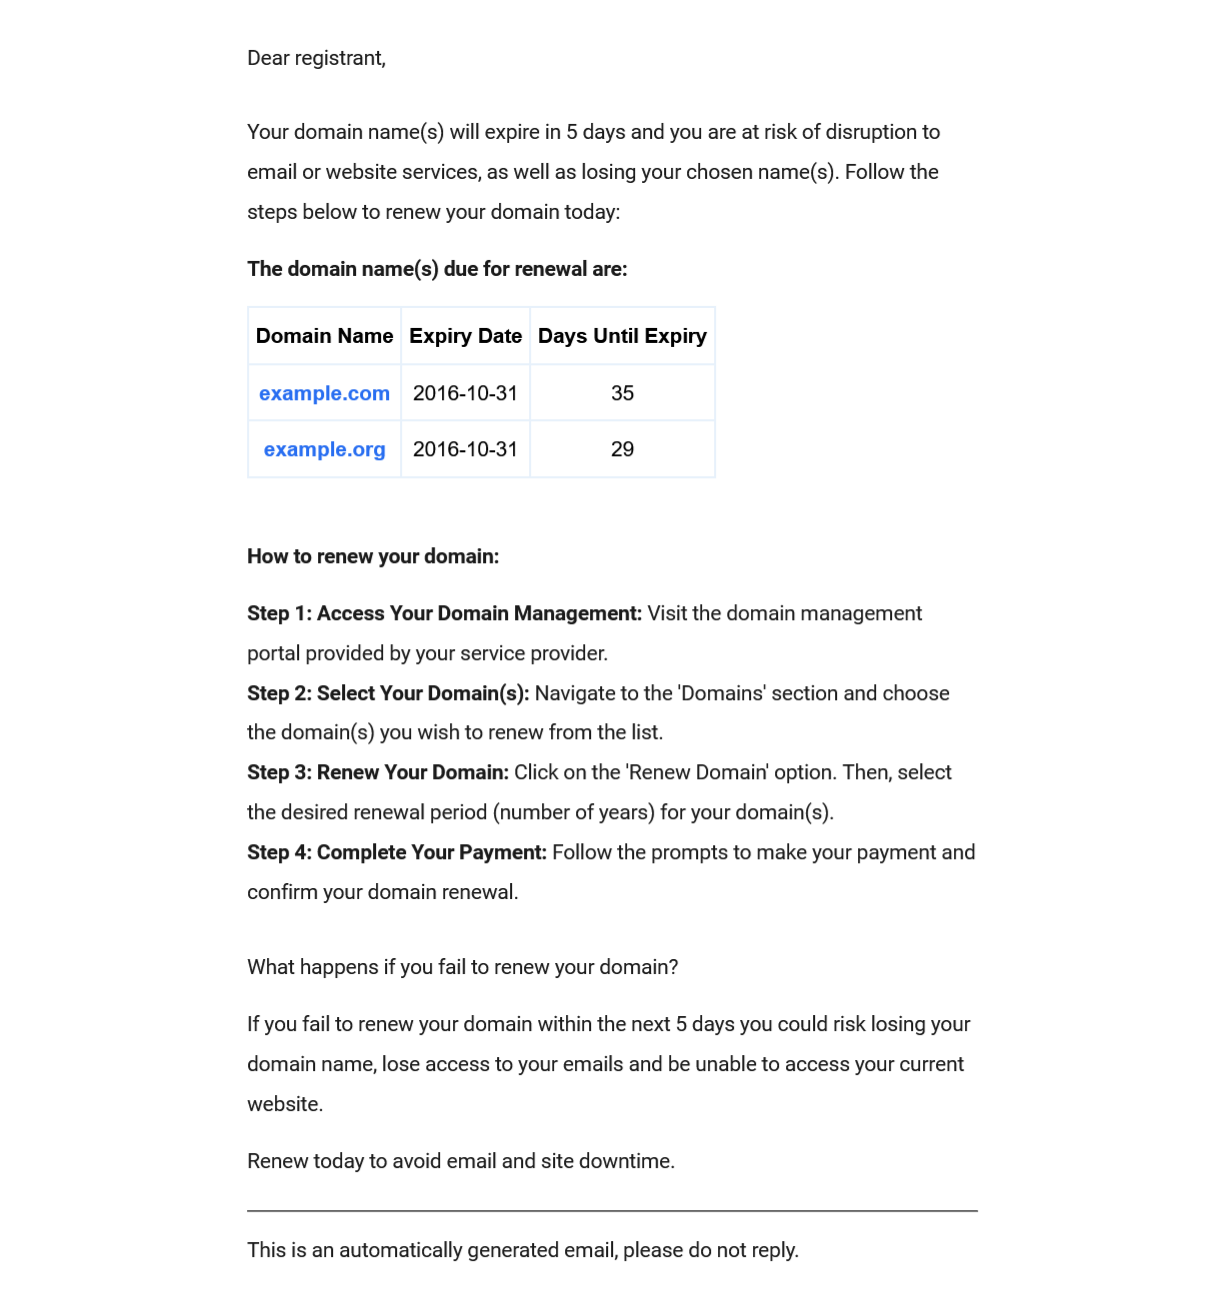
Renewal Reminder 5 Days Before Expiry
This renewal reminder email is sent 5 days before the expiry date of any domain that is not set to auto-renew.
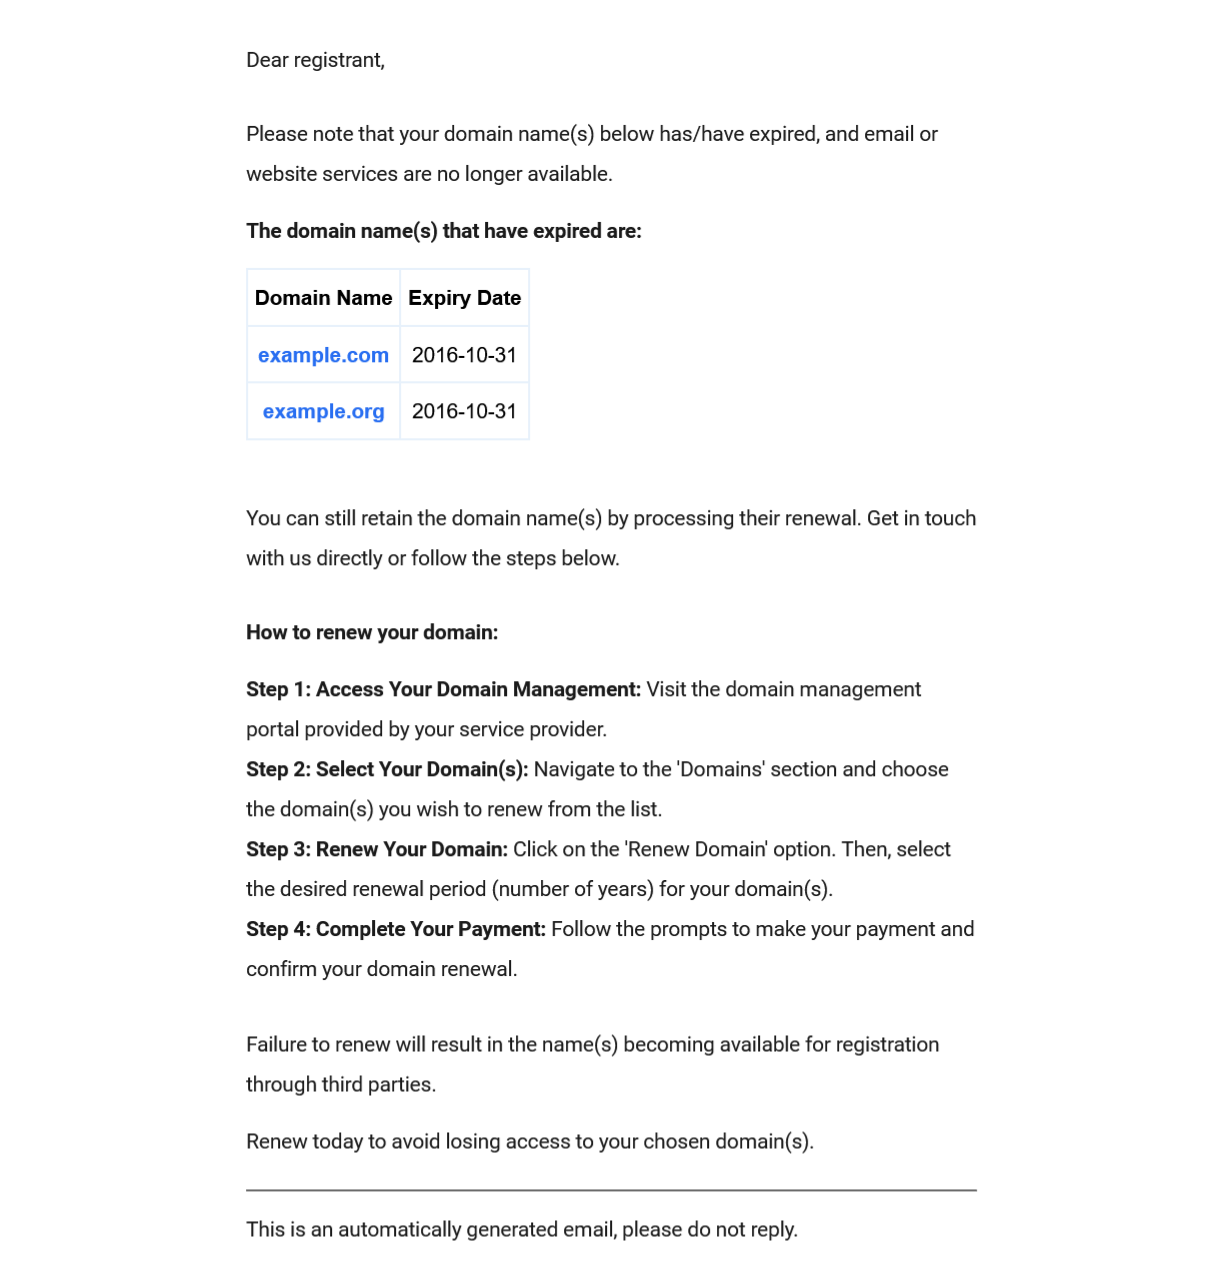
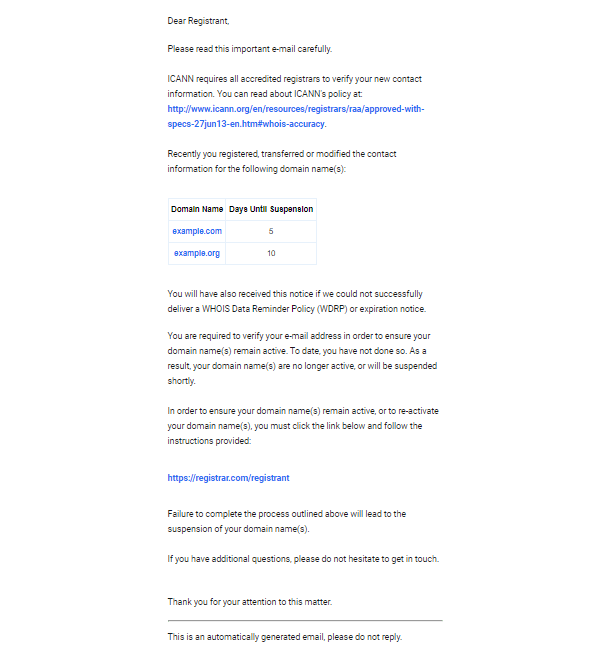
Renewal Reminder 3 & 10 Days After Expiry
A renewal reminder email is sent 3 and 10 days after the expiry date of any domain that is not set to auto-renew.
Renewal Confirmation
This email is sent upon successful renewal of a domain.

6.3.2 Domain Admin Messaging
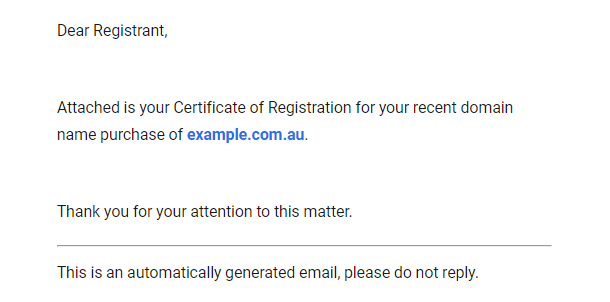
Link to chapter 3.AU Certificate of Registration
This email is sent to the owner contact upon successful registration of a new domain with an Australia country extension: .au
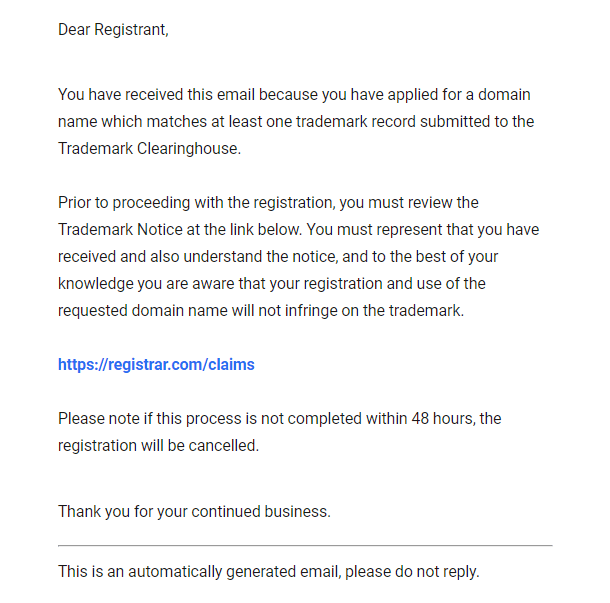
Trademark Claims Notification
This email is sent if the domain being registered matches at least one record submitted to the Trademark Clearinghouse.
Domain Auth-Code Email
This email is sent if you request the auth-code needed to transfer a domain away from WPMU DEV and to a different registrar.

Contact Modification Report
This email is sent when the contact information for the domain owner has been successfully modified.

6.3.3 GDPR Messaging
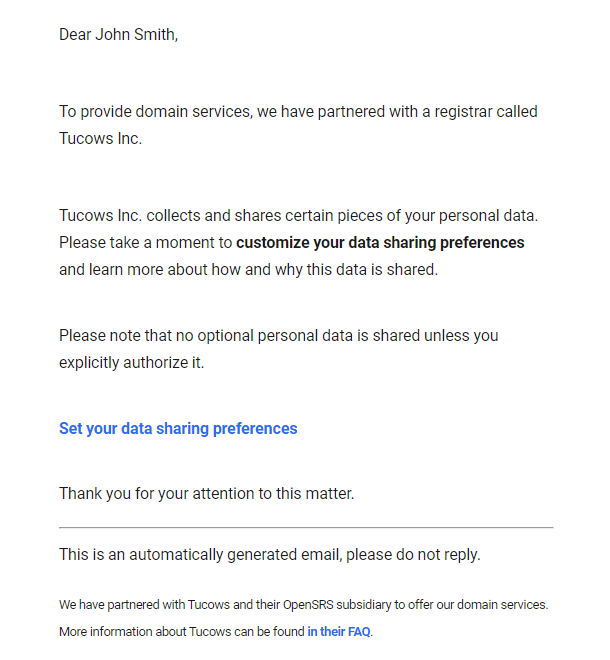
Link to chapter 3GDPR Initial Consent Request
This email is sent as the final step of a domain purchase when GDPR consent is required to provide personal information.
Asynchronous – No Tucows Information

Synchronous – With Tucows Information
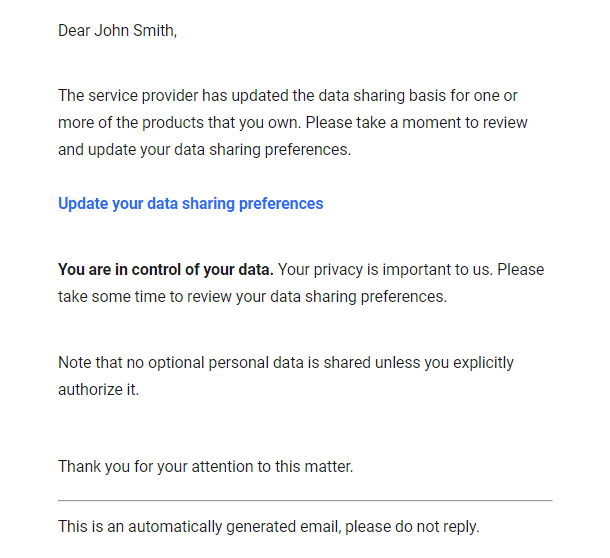
GDPR Updated Product Consent Request
This email is sent when you are required to update your consent preferences.
GDPR Consent Page Link Reminder
This email is sent when you request a link to the GDPR sharing preferences page.

6.3.4 Registrant Verification Messaging
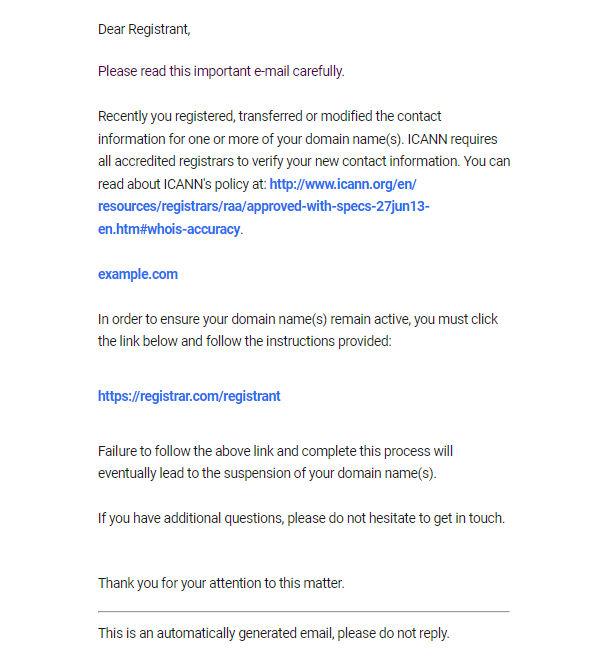
Link to chapter 3Registrant Verification Message to Registered Domain Owner
This email is sent when you register a domain that requires verification of the owner’s contact information. Currently, the only TLD that does not require verification is .co
Registrant Verification Message to Registered Domain Owner – Reminder
This email can be sent several times within a 15-day period if you have not yet clicked on the link in the previous email.
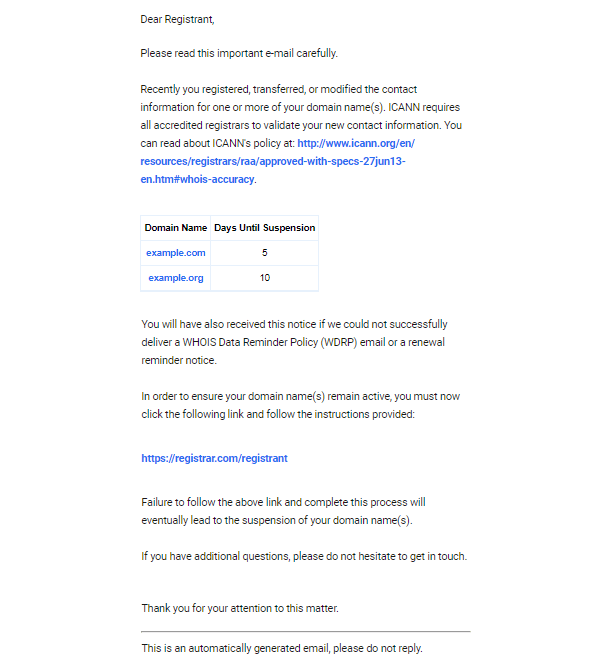
Registrant Verification Suspension Message
This email is sent if you fail to verify owner contact information within the allowed 15-day period.
Change of Registrant Confirmation
This email is sent to both the current and the new domain owner contact when any of the following data is changed for the domain owner contact: first name, last name and/or email address.

Completed Change of Registrant Notification
This email is sent when any of the following data is changed for the domain registrant owner contact: first name, last name and/or email address.
6.3.5 WHOIS Messaging
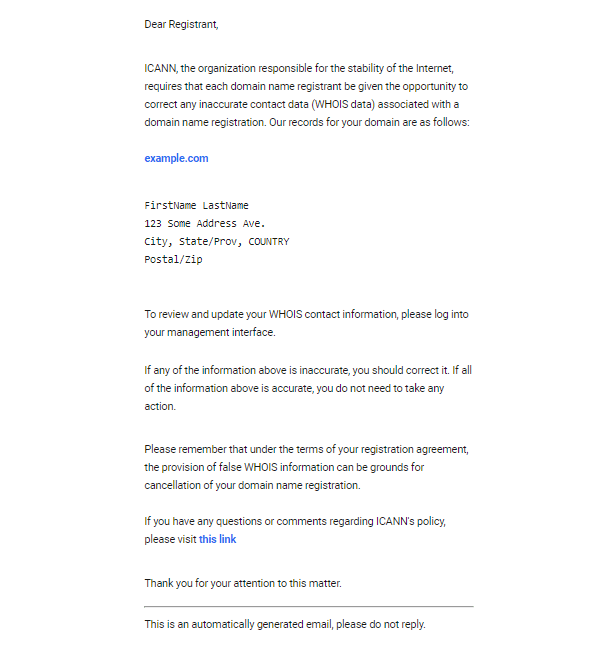
Link to chapter 3WHOIS Data Reminder Policy
This email is sent after successful domain registration so you can confirm or update the WHOIS data associated with your domain.
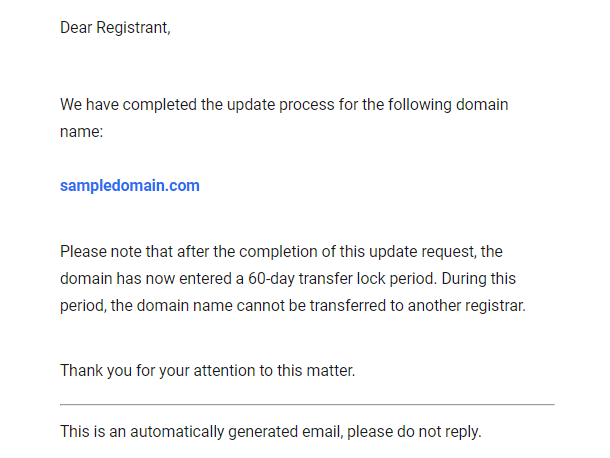
Whois Privacy Modification Report
This email is sent when a request to update the WHOIS data associated with your domain is complete.

6.3.6 Nameserver Messaging
Link to chapter 3Nameserver Check Success Notification
This email is sent when the nameserver check confirms that the assigned nameservers are resolving for your domain.

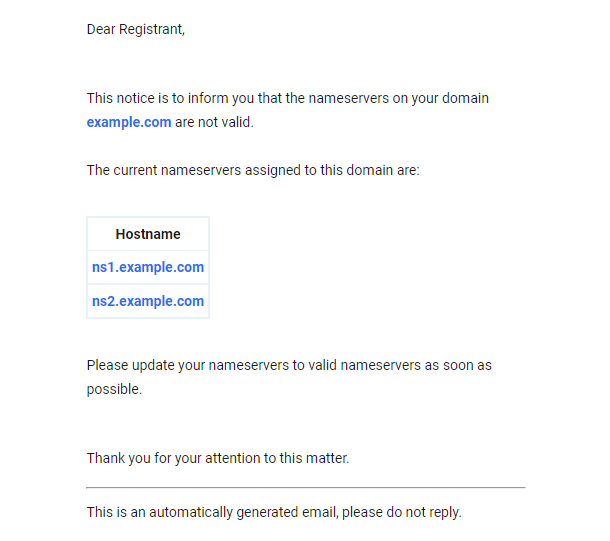
Nameserver Check Failure Notification
This email is sent when the nameserver check discovers that the assigned nameservers are not resolving for your domain.
6.4 Transferred Domains
Copy chapter anchor to clipboardThis chapter concerns transferring domains from other providers to WPMU DEV. To transfer a domain away from WPMU DEV, see the Transfer Lock section above.
Before you proceed with transferring your domain, please check the Domain Transfer rules to verify if your domain is eligible for transfer.
6.4.1 Transfer a Domain
Link to chapter 4Getting Started
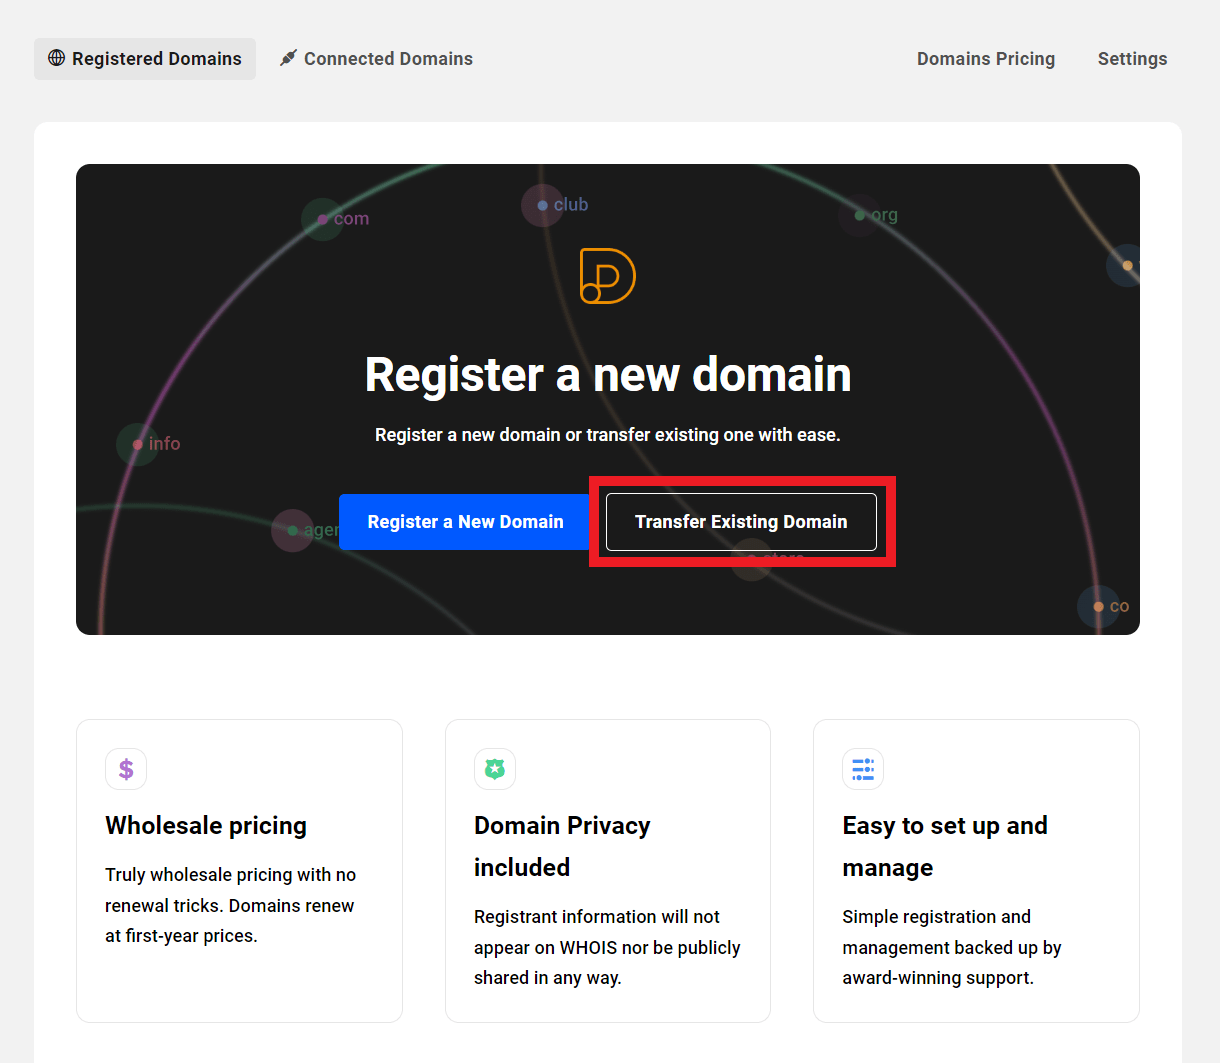
If you have not yet registered or transferred any domains with/to WPMU DEV, you’ll see the Register a new domain welcome screen under the Registered Domains tab.
Click on the Transfer Existing Domain button to get started.
If you already have one or more domains listed under the Registered Domains tab, you can click the Transfer Domain button there.

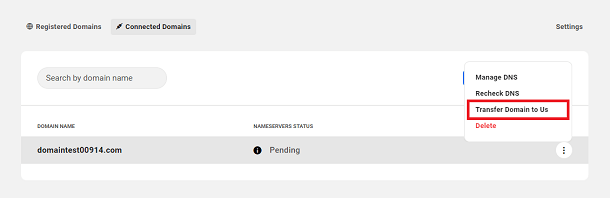
Or If you have connected any domain(s), then under the Connected Domains tab, click on the ellipsis icon on any domain’s row to reveal the available management options for that domain. Click on the Transfer Domain to Us button.
Alternatively, clicking on any connected domain’s row will open the Nameserver details for that domain. Click the Transfer Domain to Us button.

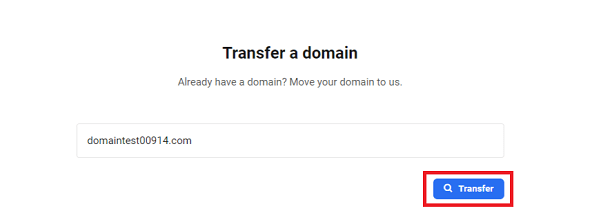
Any of the above options will open the Transfer a Domain screen. Enter a valid domain name you wish to transfer, with the extension (the .com part), and click the Transfer button.
Nameservers Selection
Once you click on the Transfer button, the Nameservers settings screen will appear.
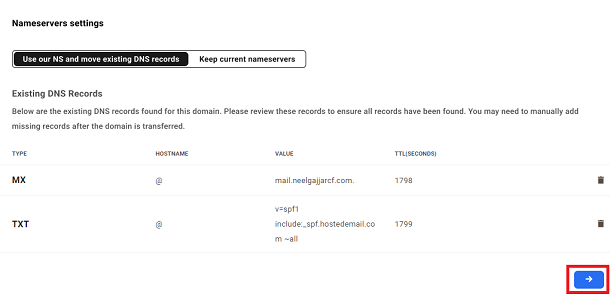
Here, choose if you want to use WPMU DEV’s nameservers and move the existing DNS records of your domain to us or continue with your current nameservers.
Note that if you’re transferring a Connected Domain that is already using our nameservers, this step will be skipped automatically.
Use Our Nameservers
If you choose to use our nameservers, the existing DNS records for your domain (if any) will be imported. Once the transfer has completed, you’ll want to double-check that all needed records exist in the DNS Records section for that domain, and manually add any missing ones if needed.
Keep Current Nameservers
It’s important to know that most domain providers will cut off access to their nameservers as soon as a transfer is initiated, which will cause downtime for a live site if the domain resolves there.
So this option is only recommended if you are currently using a 3rd-party DNS manager like Cloudflare where nameserver access will not be interrupted by a domain transfer.
Transfer Terms
Once you’ve made your nameservers selection, click the Right Arrow button to continue to the Terms step.

On the following screen, you’ll be prompted to enter some required information before proceeding to checkout. Refer to the Registration Information subchapter for information about registration terms and registrant information.
By default, the Registration Period of all the transfer-in domains is set to 1 year, and will extend the current expiry date of your domain. See Domain FAQs for more information.
Enter the Authorization/Transfer/ EPP Code of the domain you wish to transfer. Contact your Current Registrar to get your domain’s Authorization Code.
Note: If the Authorization code is invalid, the domain transfer will fail and the transfer amount will be refunded to your account.
Domain Transfer Progress
Once all the information is provided and payment is made by clicking the Pay Now button, domain transfer is initiated. It might take up to 7-8 days or more (depending on your current domain registrar) for your domain to get completely transferred after the initiation of the domain transfer. During the transfer process, the domain status will be set to Transferring.

If the domain transfer is successful, the following email will be sent to the email address you provided during the domain registration process.
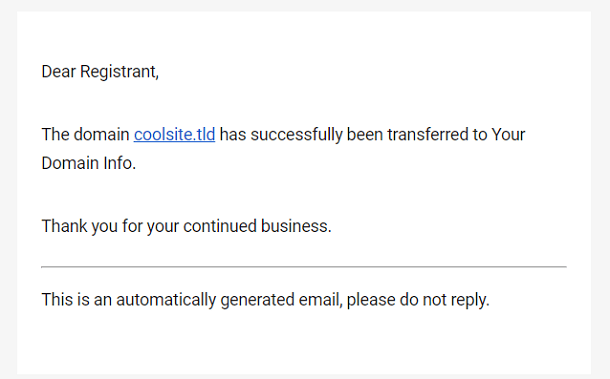
And the domain status will change from Transferring to Active.
However, if your current domain registrar rejects the domain transfer request, you will receive the following email.
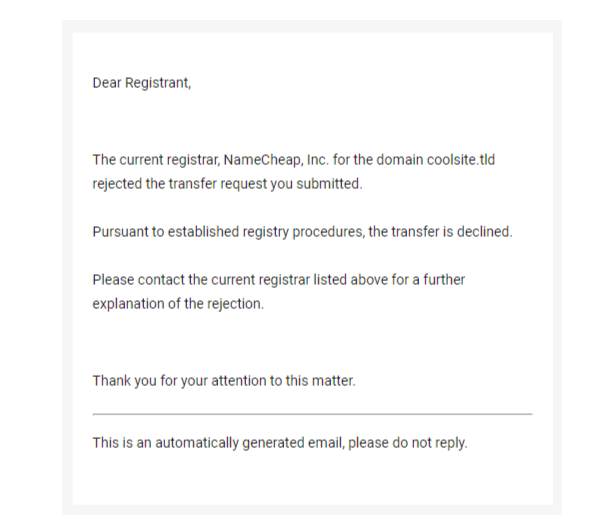
In such a case, you need to contact your current domain registrar to know the reason for rejection.
Want to speed up the domain transfer process?
Some domain registrars might send a domain transfer request confirmation email along with an option to manually approve or cancel the transfer request. If not canceled, the domain transfer request will get auto-approved after certain days. However, if you need to speed up the transfer process, you can manually approve the request. Please note that not all domain registrars provide this option.
If you are planning to transfer domains in bulk, please feel free to contact our support heroes who will be happy to assist you in the process.
6.4.2 Domain Transfer Rules
Link to chapter 4Before you proceed with a domain transfer, please ensure that the following conditions are satisfied
- Domain(s) should have been registered at least 60 days ago.
- Domain(s) shouldn’t have been transferred in the last 60 days.
- Domain(s) registrant and administrative email addresses should be valid and up to date.
- Domain(s) shouldn’t be locked or protected.
- Domain(s) shouldn’t be in the redemption period
- Domain(s) should be currently active and not suspended or expired.
- For most TLDs, the domain name can be transferred even if it is currently in the grace period (a certain period after domain expiration). Note that this period can vary depending on your domain registrar.
- Domain name can’t be transferred to a different registrar within 60 days of making changes to the registrant name, organization, or email address
Please contact our support heroes if you face any issues during the domain transfer process.
6.4.3 Domain Transfer Errors
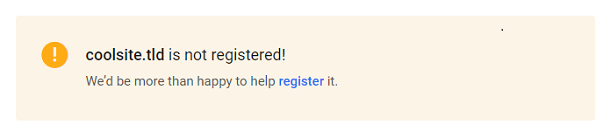
Link to chapter 4Domain Not Registered
If the domain name you want to transfer is available and is currently not registered with other providers, then you can easily register it with WPMU DEV.
Domain Not Eligible for Transfer
Your domain may not be eligible for a transfer for various reasons, refer to the domain transfer rules to make sure your domain satisfies all the requirements

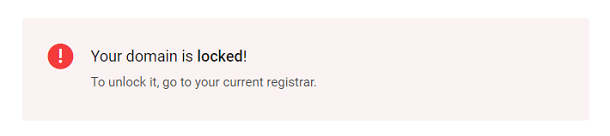
Domain is Locked
Your domain can get locked due to various reasons. To unlock your domain, please contact your current domain registrar.
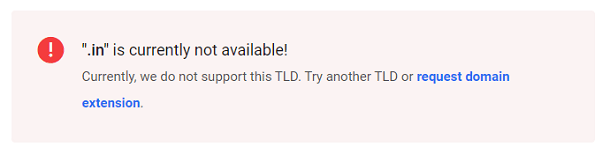
Domain Extension Not Supported
If you specified the extension you want, and it is currently not supported for domain transfer, you can raise a request, and we will consider supporting it in future updates.
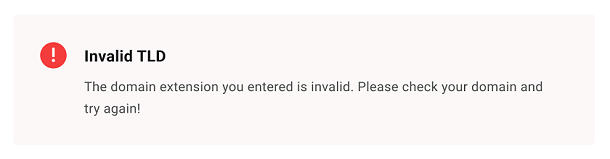
Invalid TLD
You have entered an invalid domain extension. Ensure that your domain extension is entered correctly or try again with another domain extension.
Already Registered
You can’t transfer a domain that has already been registered with another WPMU DEV account. See Domain FAQs below for more info.

6.5 Connected Domains
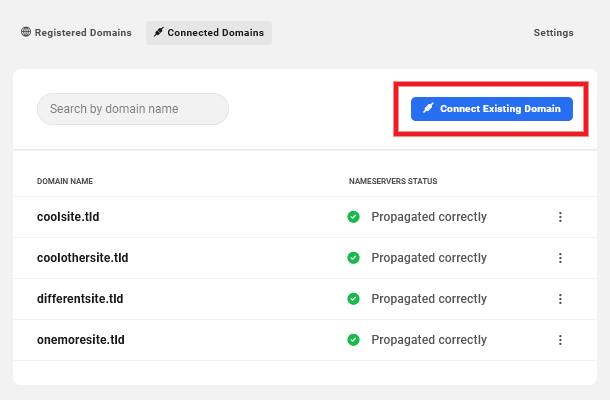
Copy chapter anchor to clipboardOnce you have connected at least one domain registered through a 3rd-party provider, you’ll find the list of all your connected domains under the Connected Domains tab.
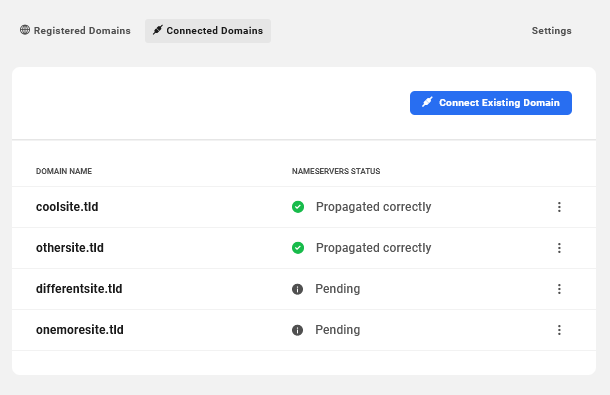
Connected domains whose nameservers have been correctly configured will be indicated with a Propagated correctly status. Connected domains whose nameservers have not yet been configured, or have been incorrectly configured, will have a Pending status.
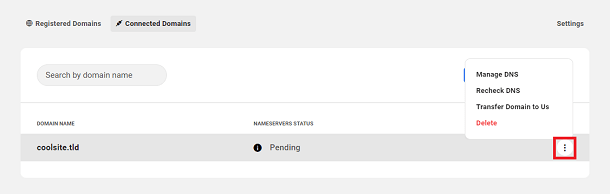
Click the ellipsis icon on any domain’s row to reveal the available management options for the domain:
- Manage DNS – Select this option to be redirected to the Manage DNS screen for that domain.
- Recheck DNS – Select this option to refresh the DNS information for the domain in your Hub, and be redirected to the Manage DNS screen.
- Transfer Domain to Us – Select this option to transfer the currently connected domain from a 3rd party provider to WPMU DEV. You’ll be redirected to the Transfer a Domain screen.
- Delete – Select this option if you wish to remove the domain from your Hub. (Note that this does not delete a site; it simply removes the domain from the Domains manager in your Hub.)
6.5.1 Connect a Domain
Link to chapter 5If you have not yet connected any domains from another registrar, click on the Connect Existing Domain button.
If you already have one or more domains from other registrars connected to your Hub, click on the Connect Existing Domain button at the top of the list of connected domains.
Either of the above options will open the Add New Domain screen. Enter the domain name you wish to connect to your Hub, including the extension (the .com part).

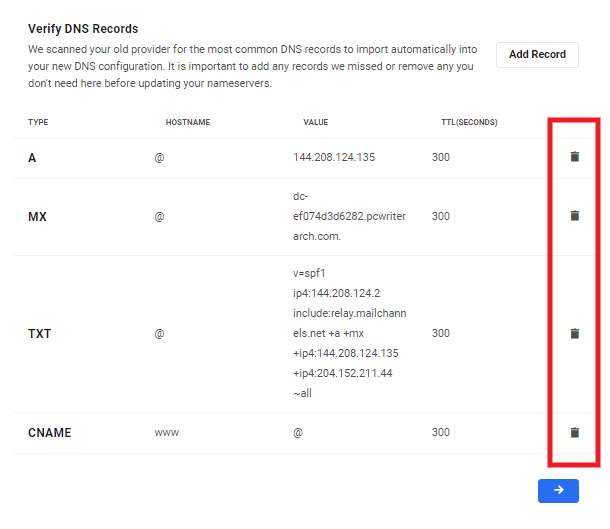
The Hub DNS Manager will scan for common DNS records, import them automatically and list them for verification. Note that if you have just purchased your domain and no records yet exist, the list will be empty.
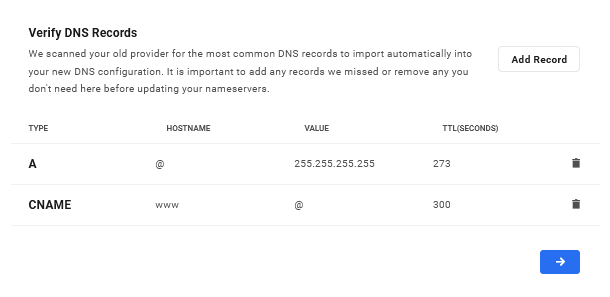
Use the trash can icon to remove any records you wish to exclude from being imported.
To verify all records have been imported, check that the records from your Domain registrar match the records listed. Record information includes:
- Record Type – Covered in the list above
- Hostname – Uses @ for Root, www to add the www. name record
- Value – if the record is an alias, directs, or returns
- TTL (Seconds) – Time to live value in seconds is how long a resolver is supposed to cache the DNS query before it expires and a new one needs to be done. The lower this number is, the faster your DNS changes will resolve around the world.
If any records are missing, you can add them manually. See Add or Edit DNS Records below for details.
If you encounter any issues while connecting a domain, don’t hesitate to contact support for expert help.
6.6 Manage DNS
Copy chapter anchor to clipboardThis chapter provides detailed guides for managing DNS records for both WPMU DEV registered domains and connected 3rd-party domains.
The DNS management screen for any registered domain can be accessed from the Registered Domains area by clicking the Update DNS option for that domain.

When accessing this screen for a registered domain, it will appear under its own tab next to the Domain Overview and Contact Information tabs.

The DNS management screen can be accessed for any 3rd-party connected domain from the Connected Domains area by clicking the Manage DNS option for that domain.

When accessing this screen for a connected domain, there are no additional tabs or features available as they are not needed or relevant.
You will however notice that the WPMU DEV nameservers are listed at the top of the screen for connected domains. Simply click to copy each one to update the nameserver information at the domain registrar of your connected domain. See Change Your Nameservers below for details.

6.6.1 Migrate DNS to WPMU DEV Checklist
Link to chapter 6This guide will help you to move the DNS management of your domain from your current registrar to WPMU DEV, or by making one small adjustment if you are currently using Cloudflare. See Update CNAME Record at Cloudflare below for details.
See this detailed guide if you need additional information, and to learn why it’s better to manage your DNS with WPMU DEV.
Manage DNS with Us
Step 1 – Connect your domain to the Hub
The first thing to do is connect your domain to the Hub so it can fetch your existing DNS records.
Go to the Domains manager, click on the Connected Domains tab, and follow the instructions in the Connect a Domain chapter above.

Step 2 – Change nameservers at your current registrar
Once your domain has been connected to the Hub and it has fetched the DNS records, the next thing to do is change the nameservers at your current registrar.
Click on the domain you just added to the Domains manager and you’ll see the WPMU DEV nameservers listed at the top of the screen. Then follow the instructions in the Connected Domains section of the Change Your Nameservers chapter below.
If you need help locating the nameserver settings at your current domain registrar, see the Common Registrar DNS Guidance section in that same chapter.

Step 3 – Verify that WPMU DEV nameservers have propagated
The final step is to check that WPMU DEV nameservers have propagated correctly. Simply click the Check nameservers button as seen in the image above. Once propagated, you’ll see a confirmation message appear.

Update CNAME Record at Cloudflare
If you are currently routing your domain through Cloudflare and are managing its DNS there, keep things as they are and continue using their nameservers.
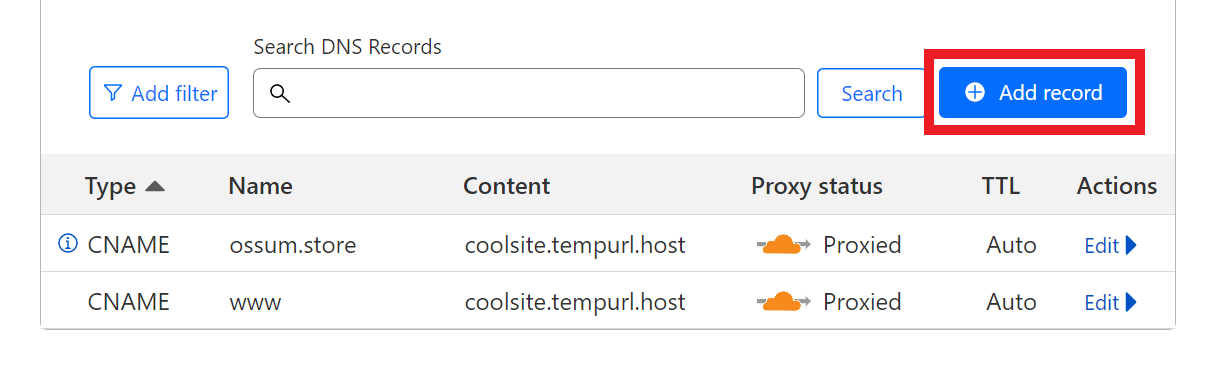
However, we strongly recommend using the CNAME method at Cloudflare instead of A & AAAA records as the CNAME would not need to be edited if your site’s IP address changes for any reason (during a site migration for example).
First, delete all A & AAAA records for your domain and the www subdomain if they exist. Then add a CNAME record for your site’s tempurl.host address, with @ or your domain name as the record Name, and another with www as the Name.
Finally, ensure that the CNAME records are Proxied so the original IPs are not discoverable.
6.6.2 Add or Edit DNS Records
Link to chapter 6Once you’re on the DNS screen for your registered or connected domain, the process of adding & editing DNS records in your Hub is identical for both types of domains.
Adding Records
To add a new DNS record, click the Add Record button.

Available DNS records include:
- A Record
- CNAME Record
- MX Record (See Note below)
- AAAA Record
- NS Record
- TXT Record
- SRV Record
- CAA Record
When adding certain records, it is important to include a dot at the end to ensure they register correctly.
For example, the MX record value for WPMU DEV email is mailu.wpmudev.host. and that dot at the end, after .host, is required, even though it might get removed once the record is registered.
Additionally, if you use your top-level domain name as the Hostname in any of the following records, you’ll want to ensure to include a dot after the full domain name. If you don’t include that dot, the resulting record will be created as a subdomain of your top-level domain. We recommend using the @ symbol as the Hostname entry instead to avoid any errors in the resulting record.
- A
- MX
- AAAA
- TXT
The Add New DNS Record panel will show you what the resulting record will be as you are typing. The images below show what the result would be for an A record with and without the final dot.


Note that the TTL (Time To Live) value of any record you add must match the TTL of any existing record of the same type and hostname. A notice will appear in the modal to remind you of this.
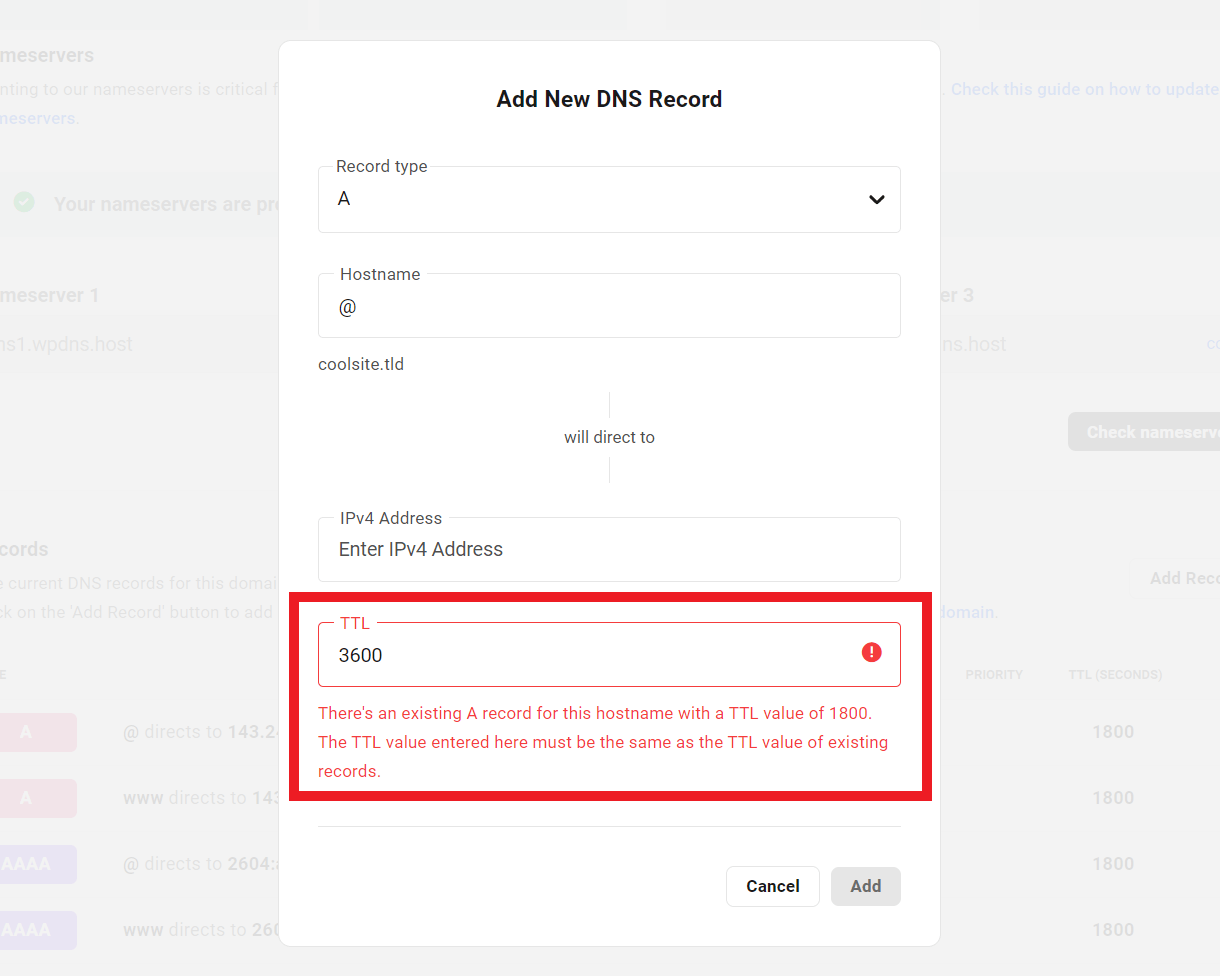
After you have verified the records are correct, click the Add button to continue.
If you are a Google Workspace user and/or are setting up MX records for a domain hosted by Google Domains, you’ll want to configure DKIM and SPF records before configuring DMARC. According to Google, DKIM and SPF should be authenticating messages for at least 48 hours before turning on DMARC.
Editing Records
To edit an existing DNS record, click the ellipsis icon on that record’s row to reveal the management options for that record, and select Edit.

That will pop open a modal window where you can edit whatever you need to in that record, following the same guidelines as above when adding a record.

6.6.3 Change Your Nameservers
Link to chapter 6Registered Domains
By default, domains registered through WPMU DEV will use our nameservers. But you can modify them if needed. For example, if you prefer to route your domain through Cloudflare, you’ll need to use their nameservers.
To change the nameserver records for a registered domain, click the Edit Records button above the list of Nameservers on the Domain Overview tab.
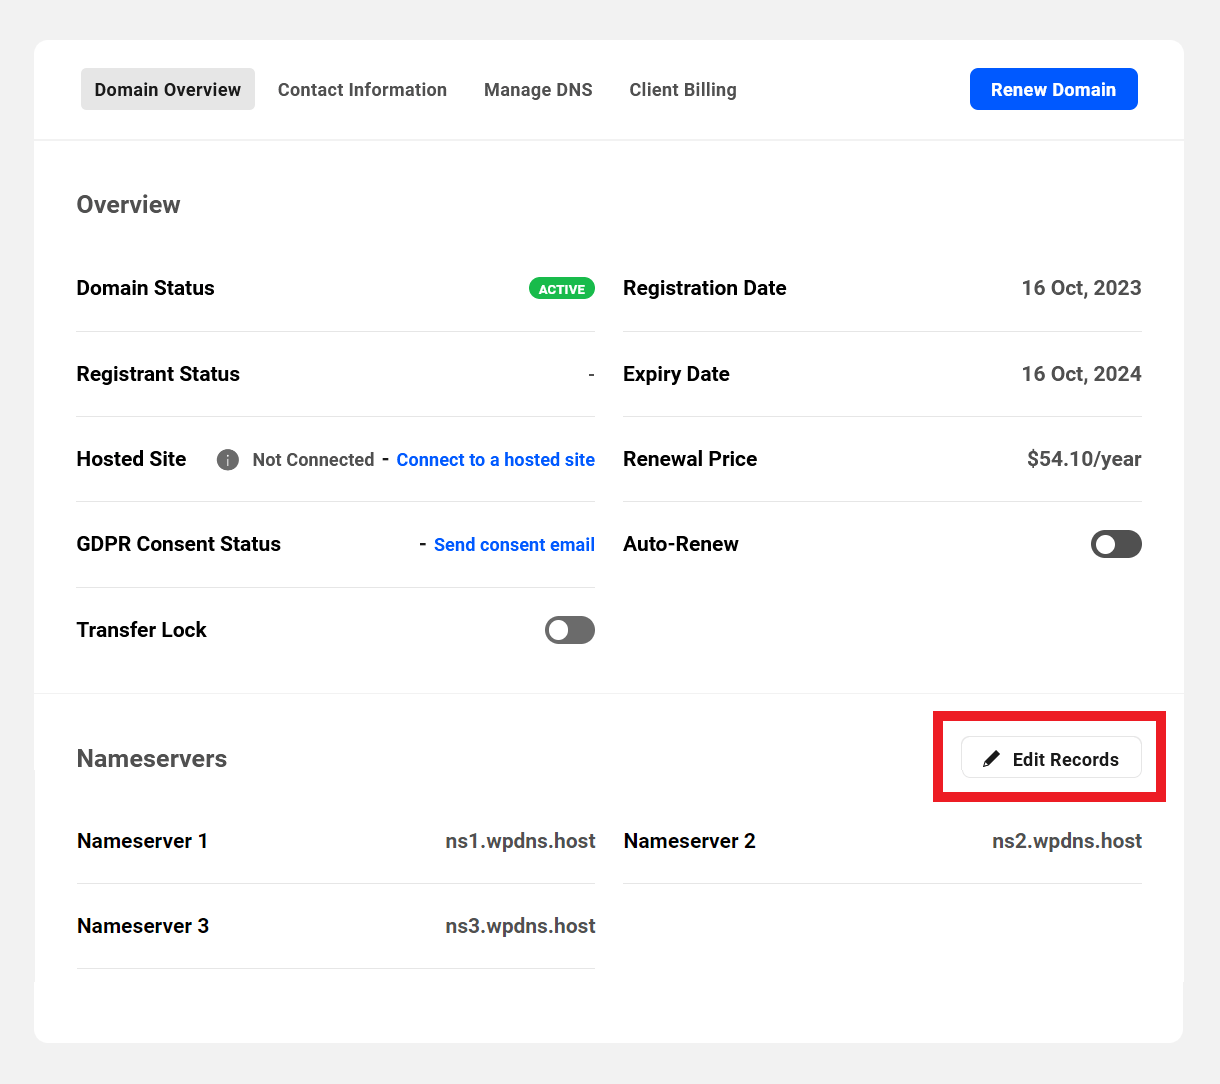
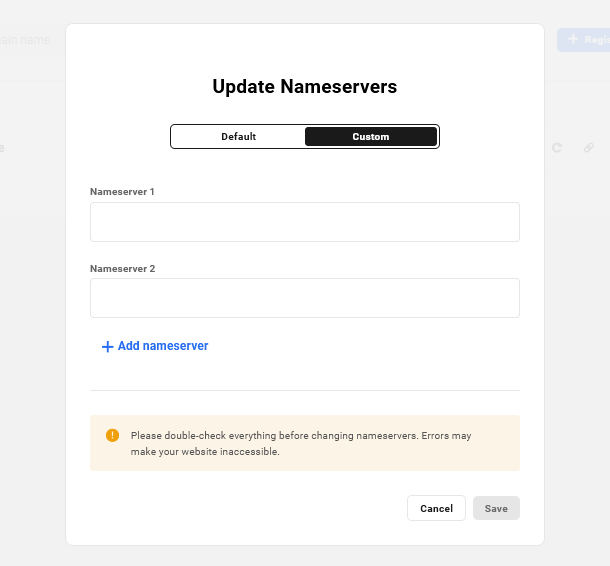
That will pop open a modal window where you can select to use our Default nameservers, or enter your own Custom ones. Please note that the functionality to create and use your own custom nameservers instead is not yet available, but is coming in a future update.

If you choose to use custom nameservers, click the Custom option and enter them in the field provided. Click Save when you’re done.
Connected Domains
When you connect a 3rd-party domain to your Hub, you must update the nameservers at the domain registrar so they point to WPMU DEV. Be sure to add the domain to your Hub first though so there’s a DNS zone created for it, otherwise changing nameservers at your registrar may fail.
After the records are successfully created, you must point the Domain nameservers from your Domain Name Registrar to the WPMU DEV Hub Domain record.
To do this, log in to your domain registrar panel and locate the Nameserver settings. This will be different for each name registrar service (i.e., GoDaddy, Namecheap, eNom). We’ve provided a list of common registrars below, along with links to each service’s guidance on editing nameservers.
If you have trouble locating the Nameserver settings, contact your provider. If you are still experiencing issues, check with a WPMU DEV live chat agent.
Once you’ve located your Nameserver settings, replace the Nameservers with the WPMU DEV Nameserver locations. You can use the copy option to copy and paste the address. Nameserver changes commonly take 24-48 hours to propagate, so you may need to wait before the changes are active.

Some registrars require identifying your new nameservers by IP address. The IP addresses for WPMU DEV nameservers are as follows:
- ns1.wpdns.host – 173.199.96.96
- ns2.wpdns.host – 173.199.96.97
- ns3.wpdns.host – 173.199.96.96
Once this process is complete, you can use the Check nameservers button to check it is connected.
You’ll see a green confirmation message that your nameservers are propagating correctly, and can then edit or add DNS records as needed to your domain.
Common Registrar DNS Guidance
If you wish to manage DNS for all your sites from the Hub, you will need to access the Domain manager at the original registrar and edit your nameservers there.
Editing nameserver files is a relatively simple procedure regardless of who the registrar is, but locating those files in order to edit them sometimes is a challenge.
See the Registrar Guides chapter below for step-by-step instructions on changing nameservers at your registrar.
Or use the links below for guides on editing nameservers as provided by several common registrars.
6.6.4 Subdomains
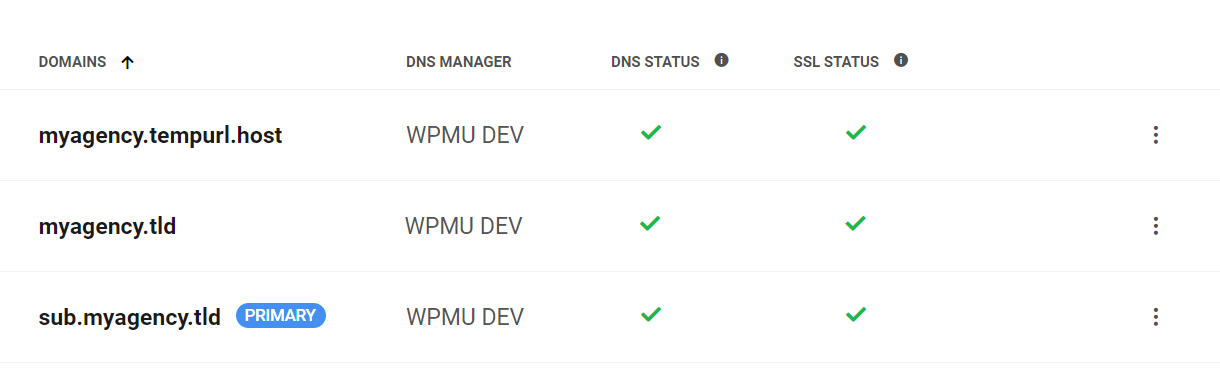
Link to chapter 6You can create and use a subdomain as the primary domain of any WPMU DEV hosted site if required, as seen in the example below. This type of setup works whether you manage the DNS of the top-level domain in the DNS Manager of your Hub or at your domain registrar.
See Use a Subdomain as Primary Domain below for instructions on how to set this up in the DNS Manager of your Hub.
A subdomain of one domain can even be attached to a different hosted site altogether. This can be quite handy if you need to temporarily white label a new tempurl.host site for a client to review, or if you want 2 or more single sites to appear to be related as subsites.
This type of configuration only works if both sites are hosted by WPMU DEV and you manage the DNS of the top-level domain in the DNS Manager of your Hub. See White Label a tempurl.host Domain below for instructions on setting this up.

Creating subdomains involves modifying a domain’s DNS records, which is not complicated, but a mistake can break a site temporarily. To avoid DNS-related issues, never change or delete anything from your DNS unless you are sure it is necessary.
Use a Subdomain as Primary Domain
To create and add a subdomain to a WPMU DEV hosted site, you first need to get the IP address of the site where you want to add your subdomain. Go to the Hosting section of that site in your Hub and click on the Domains tab.
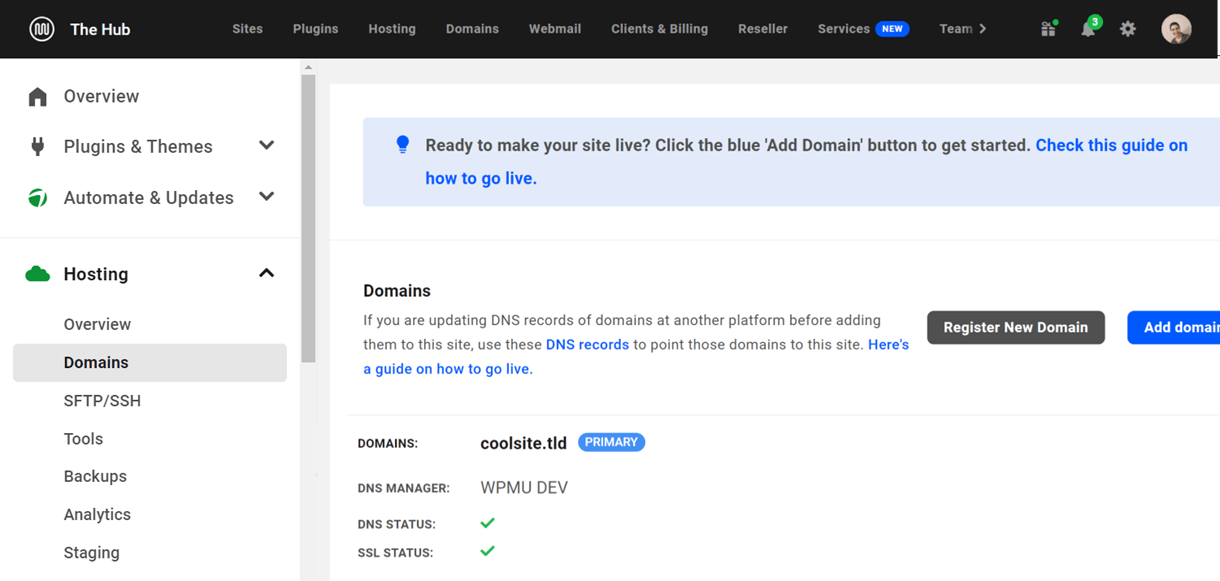
Then click on the DNS records link in the description at the top of the screen.
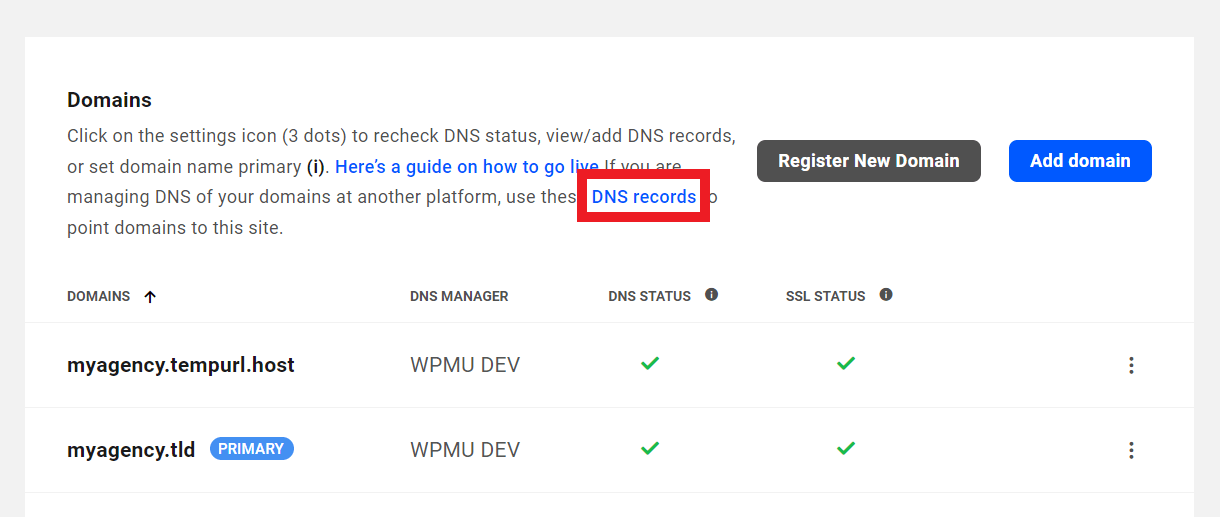
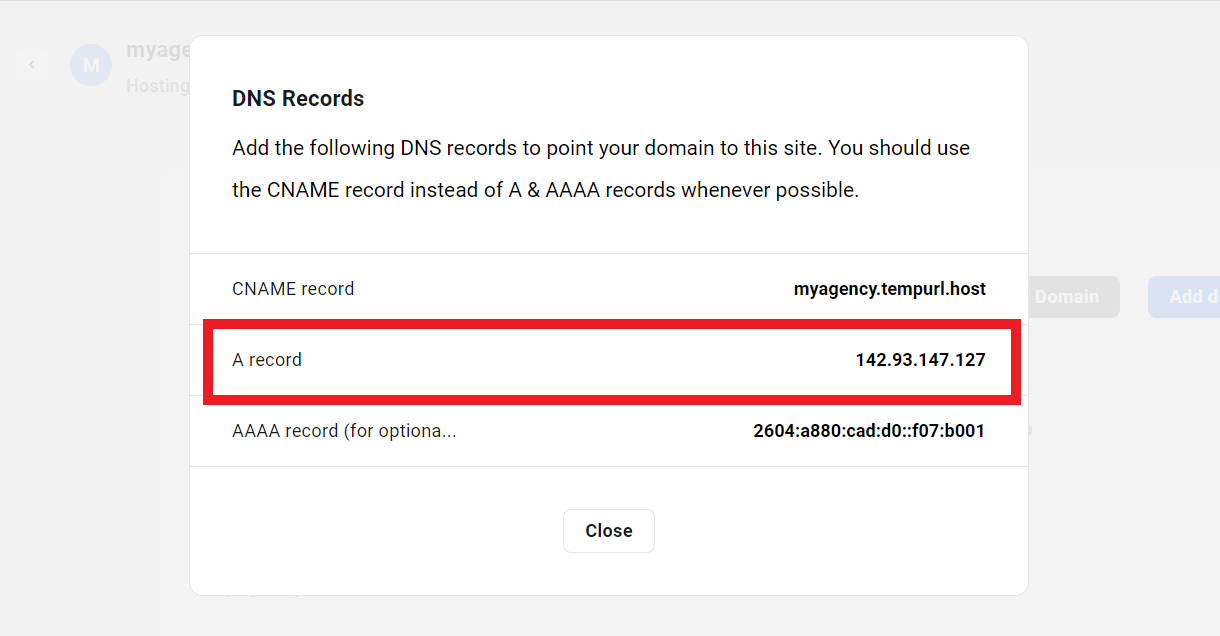
That will pop open a modal window where you can copy the A record for your site.
Next, click on Domains in the main menu of your Hub and locate the Registered or Connected domain for which you want to create a subdomain (myagency.tld). Then click Manage/Update DNS from the options under the ellipsis icon as noted at the beginning of this chapter.
In the Records section, click the Add Record button.

In the Add New DNS Record modal, enter the following information:
- Record type – Select A Record.
- Hostname – Enter the subdomain name exactly as you wish it to appear in the URL. For example, if you create a record with the hostname sub on the domain myagency.tld, the resulting URL will be sub.myagency.tld
- IPv4 Address – Paste the A Record you copied earlier into this field.
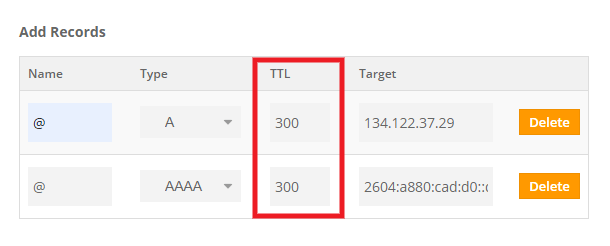
- TTL – We recommend always setting the TTL to the shortest available timeframe. 300 is a good value here.

Click the Add button, and the newly-added A record should appear in the list of DNS records.

Now go back to the Domains tab of the site where you copied the IP address earlier, and click the Add Domain button.
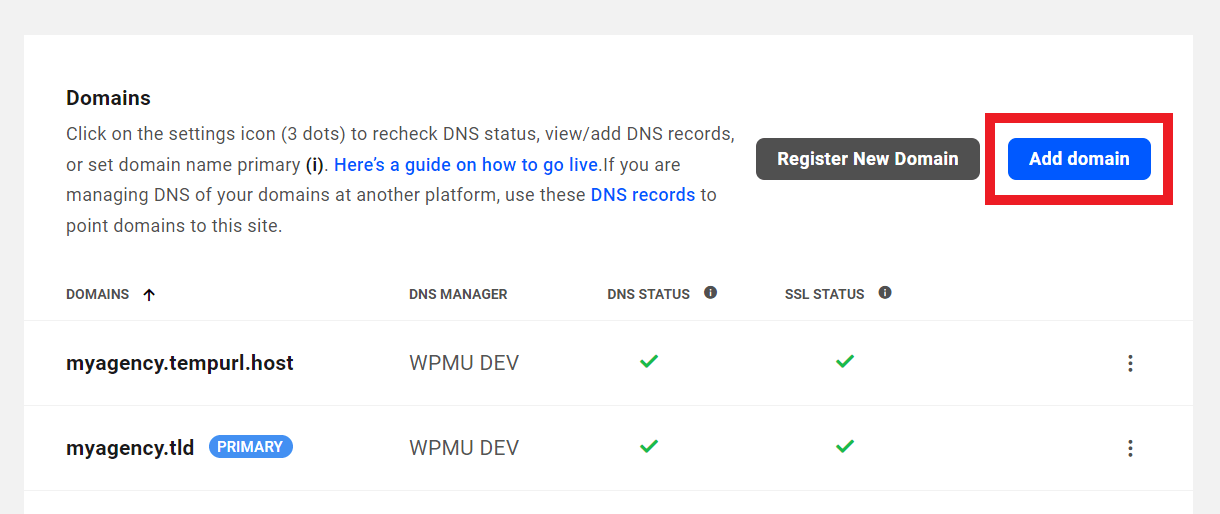
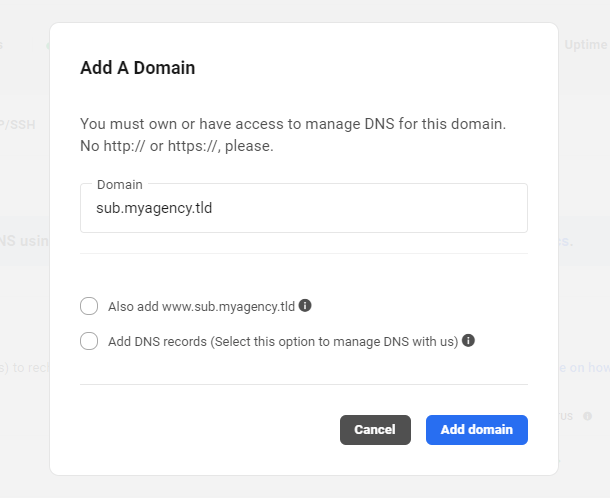
In the Add A Domain modal, enter the full URL of your newly created subdomain without the http:// or https:// and click Add Domain. Do not check the Add www or Add DNS records options.
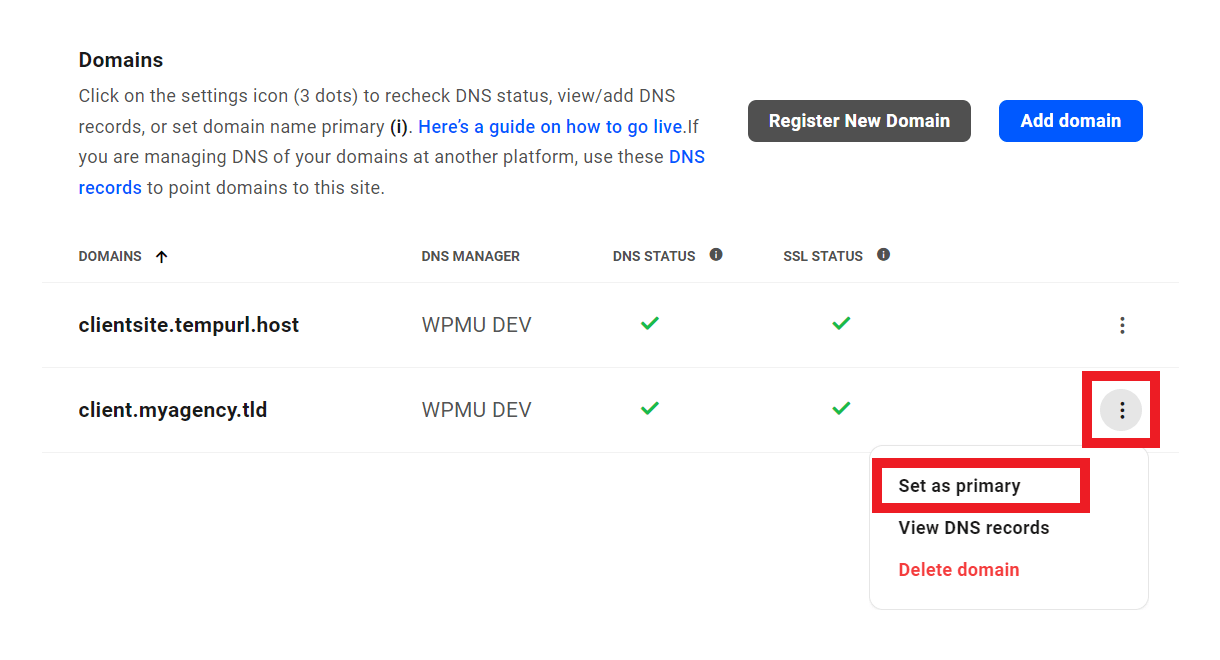
Once the DNS status is verified and the SSL certificate issued, indicated by green checkmarks, click the ellipsis icon next to the new subdomain, and select Set as primary to complete the setup. Your site will now load at your new subdomain.

White Label a tempurl.host Domain
As noted in the introduction above, you can use the subdomain method to white label the tempurl.host name of a completely different site, or have multiple single sites appear to be related subsites.
For example, if the design agency site you use to deal with your clients is myagency.tld, you could create a subdomain called client.myagency.tld, and set that as the primary domain of a different site so your client can review it, without ever seeing the tempurl.host address.
For more information about the pros & cons of this method, see How to Install WordPress on a Separate Subdomain Site on the blog.
The process is very similar to the above, with 2 exceptions: you’ll be using the IP address of the site where you want to add the subdomain (clientsite.tempurl.host), but you’ll be adding the subdomain A record to the main domain’s DNS records (myagency.tld).
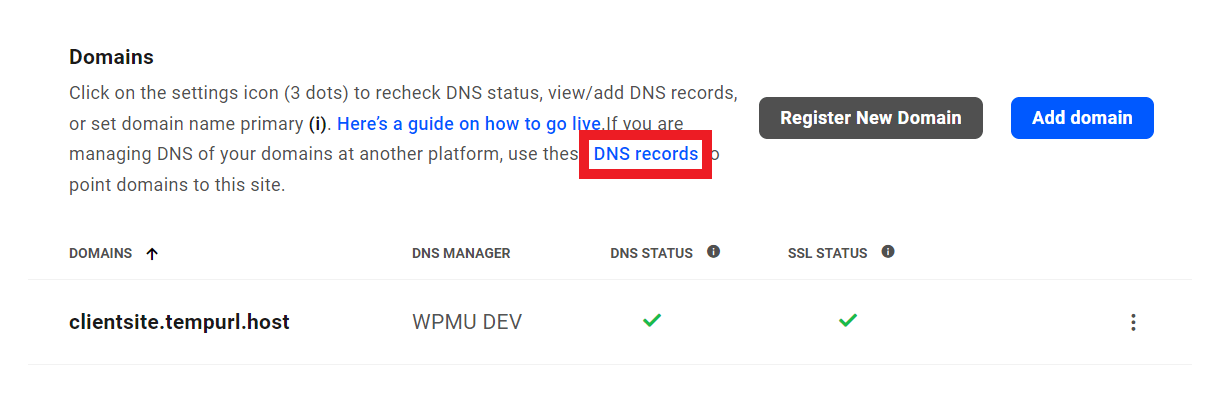
You first need to get the IP address of the site where you want to add your subdomain (clientsite.tempurl.host). Go to the Hosting section of that site in your Hub and click on the Domains tab.

Then click on the DNS records link in the description at the top of the screen.
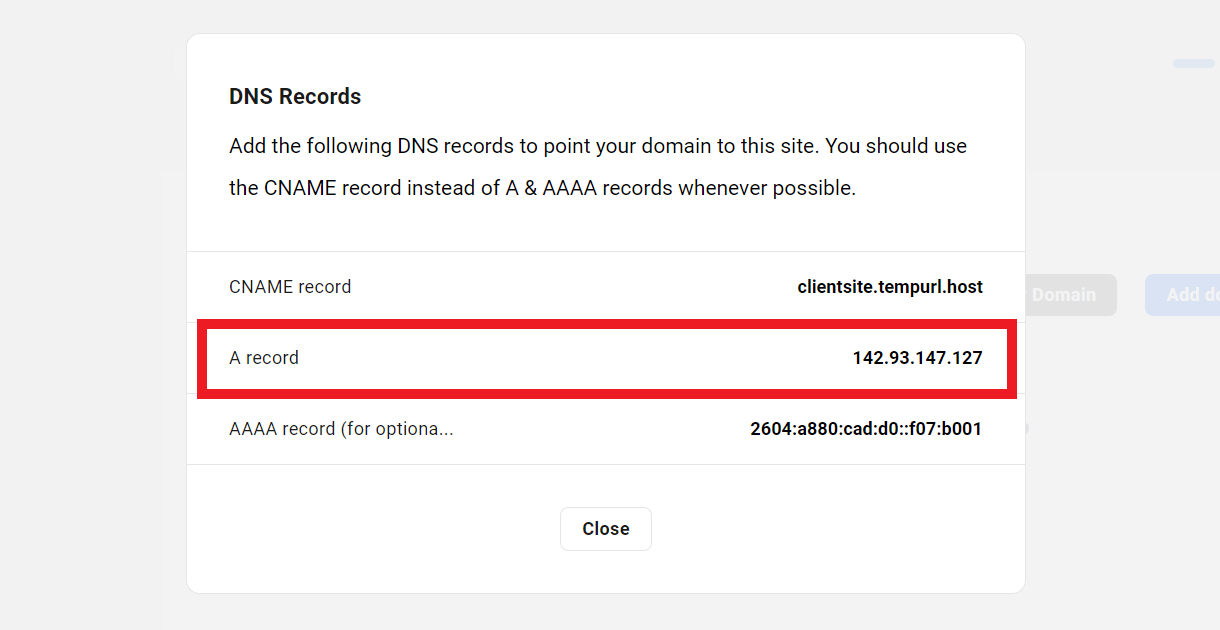
That will pop open a modal window where you can copy the A record for your site.
Next, click on Domains in the main menu of your Hub and locate the Registered or Connected domain for which you want to create a subdomain (myagency.tld). Then click Manage/Update DNS from the options under the ellipsis icon as noted at the beginning of this chapter.
In the Records section, click the Add Record button.
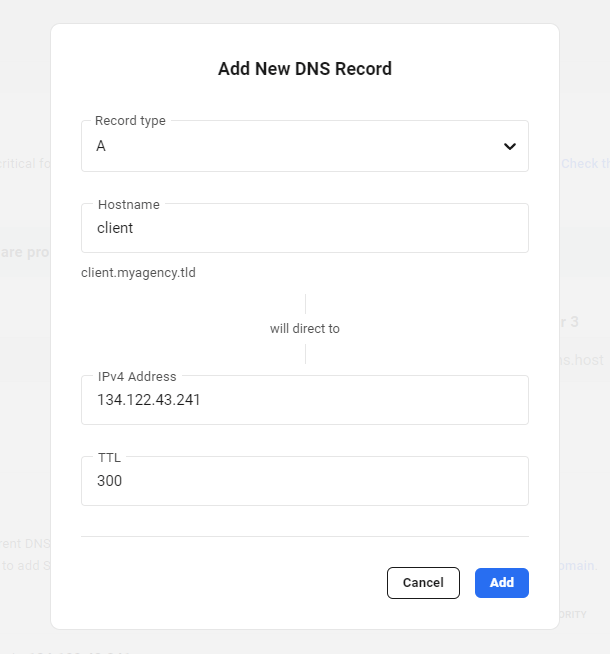
In the Add New DNS Record modal, enter the following information:
- Record type – Select A Record.
- Hostname – Enter the subdomain name exactly as you wish it to appear in the URL on the other site. For example, if you create a record with the hostname client on the domain myagency.tld, the resulting URL will be client.myagency.tld
- IPv4 Address – Paste the A Record you copied earlier from the other site into this field.
- TTL – We recommend always setting the TTL to the shortest available timeframe. 300 is a good value here.
Click the Add button, and the newly-added A record should appear in the list of DNS records.

Now go back to the Domains tab of the client site where you copied the IP address earlier, and click the Add Domain button.
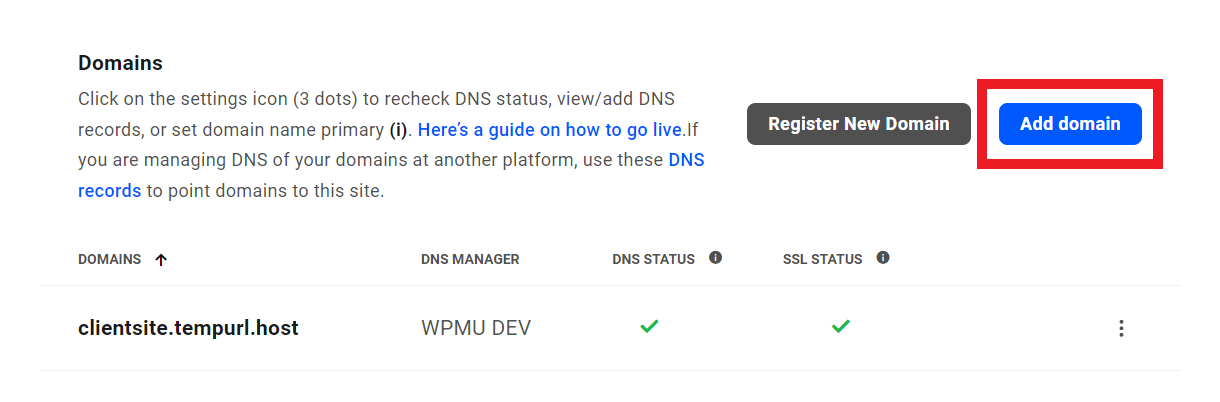
In the Add A Domain modal, enter the full URL of your newly created subdomain without the http:// or https:// and click Add Domain. Do not check the Add www or Add DNS records options.

Once the DNS status is verified and the SSL certificate issued, indicated by green checkmarks, click the ellipsis icon next to the new subdomain, and select Set as primary to complete the setup. Your client site will now load at the new subdomain so it appears to be a subsite of your myagency.tld site.
6.7 DNS Setup Tips & Troubleshooting
Copy chapter anchor to clipboardThis chapter provides tips and guidance to help resolve common issues with DNS setup and propagation.
Should you ever have problems, screenshots of your full DNS settings is the best way for our support team to help you diagnose them.
6.7.1 Tips for working with your DNS records
Link to chapter 7- When given the option, always change TTL (time to live) to as low as possible for any A, AAAA or CNAME record you add or edit. The TTL value tells ISPs how often their DNS cache should be cleared. So the lower this number is, the faster your changes will resolve around the world.
- Don’t change any other records that may be in your DNS – such as for email or otherwise – unless needed and you’re confident in making those changes.
- Use a DNS lookup service like DNSChecker.org to see if your updated DNS matches what you see under your Domains tab in the Hub.
- Once all DNS changes have fully propagated after a site migration, be sure to clear cookies and cache in any browsers you’ve used previously to connect to your site.
To help you configure your DNS records, we’ve created setup guides for some of the most popular domain registrars. See the Registrar guides chapter below for help if needed when you’re ready to update your DNS records.
6.7.2 What is DNS propagation?
Link to chapter 7DNS propagation is the time it takes for updated records to be in full effect across the internet.
DNS records usually update very quickly with some domain registrars and DNS managers like WPMU DEV or Cloudflare. However, some changes can take up to 48hrs, or even longer in rare cases, to propagate worldwide. This depends on the registrar and the nameservers used. This is not a process that we can resolve, as it is an automated communication between providers.
An important point to note is that when the DNS records are changed for a domain, both old and new records work until the propagation is complete. This means that a website might be served from both an old and a new IP address while the propagation is underway.
Delays in propagation can create some nasty headaches when performing migrations. If you don’t check that the propagation is complete before editing the site, you may end up editing your site on your old server while thinking that you are editing on the new one. Your changes would then be lost once the DNS propagation has completed.
Until you see those new records resolving correctly at all locations at your preferred DNS lookup service, it’s preferable to wait before making any changes to your site content. In general, it is recommended that the “origin” site is put under Maintenance and only the destination site is made live. This ensures that any users that might still end up on the old version of the site at the previous host will not be able to make any changes, which prevents any loss of data.
6.7.3 How to check propagation of nameserver records
Link to chapter 7If you’ve recently updated your nameserver records and have waited for some time, you might be wondering how to verify if the propagation is complete. Don’t worry if the nameservers haven’t fully propagated yet. Sometimes DNS propagation can take up to 48 hours or longer. It’s recommended to check frequently until you see the records have fully propagated.
Using a handy online tool like DNSChecker.org, you can see how your nameserver changes are propagating worldwide.
Enter your domain name in the search field, select the NS option from the dropdown, and click the Search button.

If you just changed your nameservers at your registrar to WPMU DEV nameservers, you may see the original ones still resolving at some locations, and the new ones resolving from other locations.
Once you see your new nameservers listed for all locations, you can be assured that propagation has completed.
6.7.4 How to check propagation of other DNS records
Link to chapter 7Using a handy online tool like DNSChecker.org, you can see how changes to any of your DNS records are propagating worldwide.
Enter your domain name in the search field, select the option from the dropdown that corresponds to record type you want to check. For example, A or AAAA or CNAME records. Then click the Search button.
As an example, if you check your A record, you may see something like the below image, where your main A record edit has propagated to some locations, but is still resolving to the old record in some others.
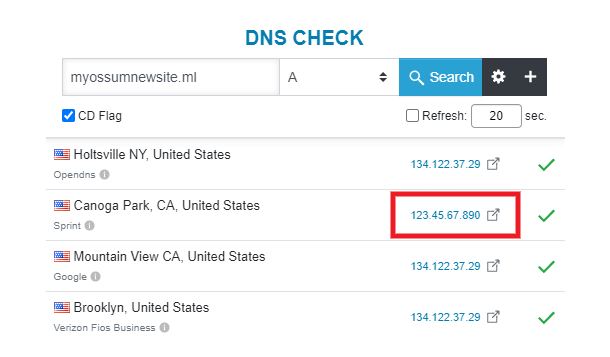
Once you see your new record listed for all locations, you can be assured that propagation has completed.
6.8 Registrar Guides
Copy chapter anchor to clipboardThis section provides guidance on editing DNS records at several popular registrars.
Each guide includes instructions for editing A, AAAA & CNAME records at the registrar, as well as instructions for changing nameservers there if you prefer to manage the records in the DNS Manager of your WPMU DEV Hub.
The only exception to the above is Cloudflare. If you’re routing your domain through Cloudflare, you must use their nameservers and manage DNS records there.
Don’t worry if your registrar is not among the guides below. Most registrars are similar in the way they organize their domain screens, and they may have a DNS Management guide available on their site.
Choose one and see if you can use it to guide you through the process. You can always contact our support superheroes for assistance if needed.
We strongly recommend using CNAMEs to point your custom domain name to your tempurl.host domain instead of A & AAAA records. The advantage of this method is that your DNS would not need to be edited if your site’s IP address changes for any reason (during a site migration for example). Instructions are provided for each registrar below where supported.
6.8.1 Cloudflare
Link to chapter 8Cloudflare’s network includes 155 data centers around the world where customers’ websites and any static resources are cached and delivered to visitors from the closest possible server, dramatically reducing latency.
Cloudflare offers a basic free plan that includes impressive site performance, broad security protection and powerful stats about your visitors. Plans start at $20 per month for your first website and $5 per month for each subsequent website.
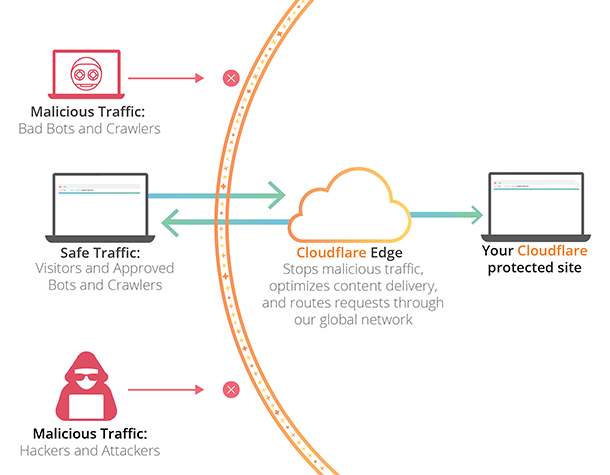
Traditional DNS configurations connect your domain directly to your host, in this case WPMU DEV, and your site’s visitors access your content by interacting directly with the host servers. A Cloudflare configuration, however, is different. Instead of connecting your domain to WPMU DEV, you will connect it to Cloudflare, and in a separate series of steps, you will tell Cloudflare where to find your hosted content.
Once configured, Cloudflare will begin pulling your content from our servers and caching it securely across its worldwide network. Your site’s visitors never actually connect to your host but are served content from the cached copies on the Cloudflare network. The graphic below illustrates this configuration, and the security benefits should be readily apparent.
If you haven’t already done so, you will need to create a Cloudflare account before proceeding.
Connect Your Domain
It is recommended that you locate your DNS records at your registrar or web host and have them handy before proceeding.
As soon as your Cloudflare account is created, you will be prompted to add a domain.
This has to be your actual domain (e.g. mydomain.com or mydomain.co.uk) and must not include any domain-specific hostnames (e.g. www.mydomain.com or similar). Furthermore, the domain has to be an immediate child of an official top-level domain (or one of its official second-level domains). For example, mydomain.co.uk is permitted, mydomain.someisp.co.uk is not.
Enter your domain (not your temporary WPMU DEV site URL) into the field provided and click Add Site.

You will be prompted to choose a plan. Do so and click Confirm Plan. If you choose a paid plan, a payment modal will appear. You will return to the setup process upon submitting your payment information.
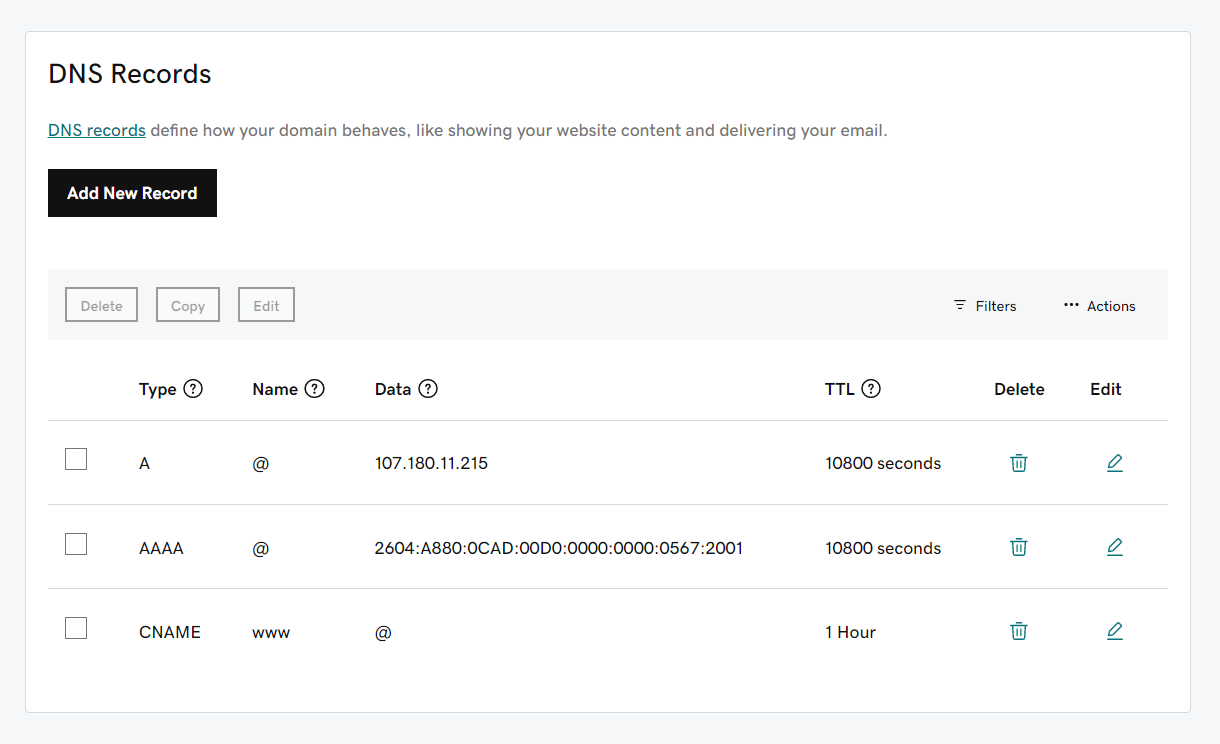
Cloudflare will automatically locate your domain’s DNS records. Compare the records found with those listed at your domain registrar to verify that they match, and add any that may be missing. If you skip this step, your website might not resolve.
Using CNAME Records
We strongly recommend using the CNAME method instead of A & AAAA records, as the CNAME would not need to be edited if your site’s IP address changes for any reason (during a site migration for example).
First, delete all A & AAAA records for your domain and the www subdomain if they exist. Then add a CNAME record for your site’s tempurl.host address, with @ or your domain name as the record Name, and another with www as the Name.
Finally, ensure that the CNAME records are Proxied so the original IPs are not discoverable.
Using A & AAAA Records
If you choose to use the A & AAAA records instead, ensure those are Proxied as well.

If you are adding the _acme-challenge CNAME record for a Wildcard Certificate in your CloudFlare account, be sure that record is NOT proxied; DNS verification records like this should be the grey DNS Only cloud icon.
Change Your Nameservers
You will be prompted to change your nameservers at your registrar. Cloudflare will provide two of its nameservers which should be cut and pasted to replace the existing records.
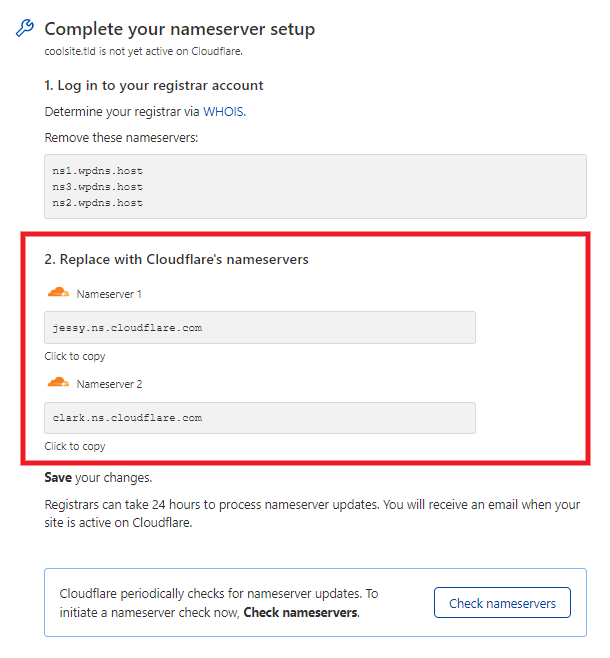
Once you have replaced your nameservers with those provided by Cloudflare, click Done! Check My Nameserver. Cloudflare will test the connection. If everything works, a success message will notify you that Cloudflare will begin caching your site’s content and serving it to visitors worldwide.
Verify and Configure SSL
Now you’ll want to ensure your domain is checking green in your Hub for SSL Status and DNS Status, as seen in the Domains Overview chapter of our Hosting > Domains document.
Under the SSL/TLS tab in your Cloudflare account, set that to either Off or Flexible. This ensures your Hub can connect to the domain via the plain HTTP URL to issue the domain-specific SSL certificate. If you encounter any issues, try the other modes, Full and Full (Strict).
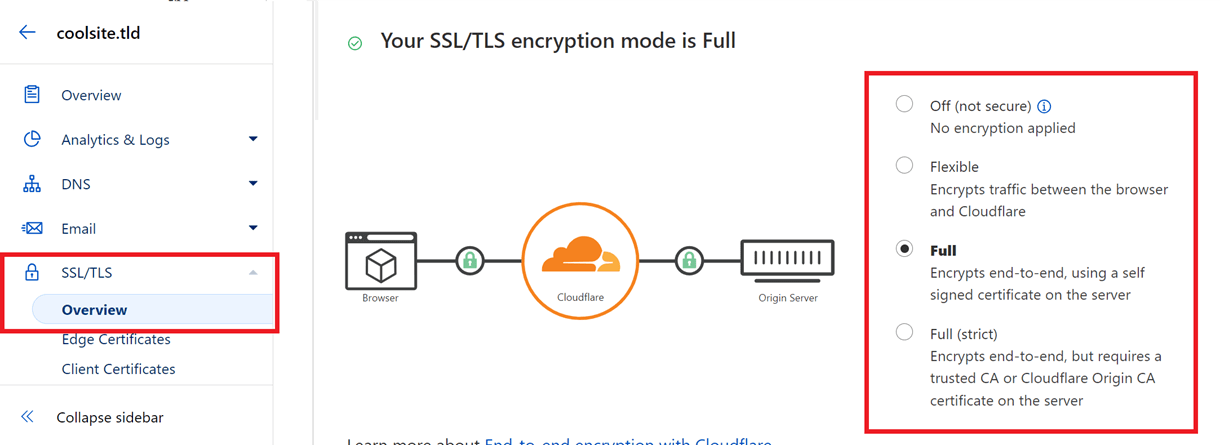
Once both statuses check green in your Hub, select Full (Strict) option to secure the domain with Cloudflare’s SSL. Full (Strict) ensures a secure connection between both your visitors’ devices and Cloudflare and between Cloudflare and our servers.

Allowlist WPMU DEV IP Addresses
While this step is not strictly required, we strongly recommend that you add WPMU DEV IP addresses to your Web Application Firewall (WAF) at Cloudflare. This is especially true if you have “Under Attack” mode enabled in your Cloudflare account as that can block the Hub API from connecting with the domain’s DNS records.
You’ll find the needed IP addresses along with instructions for adding them to your Cloudflare WAF in our WPMU DEV IP Addresses document.
6.8.2 GoDaddy
Link to chapter 8Jump to the section that corresponds to where you prefer to manage the DNS records for your GoDaddy domain:
Managing DNS for a GoDaddy domain at GoDaddy
Managing DNS for a GoDaddy domain in my WPMU DEV Hub
Managing DNS for a GoDaddy domain at GoDaddy
If you want to manage your domain’s DNS at GoDaddy, you’ll need to edit the A, AAAA & CNAME records for your domain there.
Log in to your GoDaddy account, and click My Products in your Account dropdown menu.

Scroll down to the Domains section on that page, and click the DNS link next to the domain whose DNS you want to manage.

This will lead you to the Records of your chosen Domain.
Using CNAME Records
While we strongly recommend using the CNAME method instead of A & AAAA records, GoDaddy does not allow CNAMEs for top-level domains. So you must set the A & AAAA records for your domain when using this registrar.
Using A & AAAA Records
Click on the “edit” icon beside the main A record of your domain and, in the Value field, enter the A record value of your site (your IPV4 is located in your site’s Domains tab).
After that, edit the CNAME record with the www Name and, in the Value field, enter @ or your domain name.
Lastly, if you do not see an existing AAAA record, click the Add New Record button and select AAAA from the menu of record types. In the Name field enter @ or your domain name, and in the Value field enter your AAAA record value.
Got this done? Excellent, the only thing left is to Set a new primary domain for your site.
Managing DNS for a GoDaddy domain in my WPMU DEV Hub
If you want to manage your domain’s DNS in the DNS Manager of your Hub, you need only change the nameservers at GoDaddy so they point to WPMU DEV instead.
Log in to your GoDaddy account, and click My Products in your Account dropdown menu.
Scroll down to the Domains section on that page, and click the DNS link next to the domain whose nameservers you want to change.
Scroll down to the Nameservers section, and click the Change button there.

On the next screen, select the I’ll use my own nameservers option. Then enter the 3 WPMU DEV nameservers provided, as seen in the DNS Manager in your Hub:
ns1.wpdns.host
ns2.wpdns.host
ns3.wpdns.host

Click the Save button and you’re done at GoDaddy.
Next, you’ll want to head over to the DNS Manager of your Hub, and click the Check Nameservers button as seen at the end of the Change Your Nameservers chapter in our DNS documentation.
Then follow the instructions in the Adding a Domain Name chapter in that same document to get your domain added and DNS records set up.
6.8.3 Namecheap
Link to chapter 8Jump to the section that corresponds to where you prefer to manage the DNS records for your Namecheap domain:
Managing DNS for a Namecheap domain at Namecheap
Managing DNS for a Namecheap domain in my WPMU DEV Hub
Managing DNS for a Namecheap domain at Namecheap
If you want to manage your domain’s DNS at Namecheap, you’ll need to edit the A, AAAA & CNAME records for your domain there.
Go to Namecheap, log in to your account and click on the Manage button beside your desired domain:

In the new window, navigate to the Advanced DNS tab.
Using CNAME Records
We strongly recommend using the CNAME method instead of A & AAAA records, as the CNAME would not need to be edited if your site’s IP address changes for any reason (during a site migration for example).
First, delete all A & AAAA records for your domain and the www subdomain if they exist. Then add a CNAME record with your site’s tempurl.host address as the Value, and @ or your domain name as the record Host. Then add another CNAME with your site’s tempurl.host address as the Value and www as the Host.

Using A & AAAA Records
If you prefer to use A & AAAA records instead, add one A record with @ or your domain name in the Host field (your IPV4 is located in your site’s Domains tab), one CNAME record with www in the Host field, and one AAAA record with @ or your domain name in the Host field.

Got this done? Excellent, the only thing left is to Set a new primary domain for your site.
Managing DNS for a Namecheap domain in my WPMU DEV Hub
If you want to manage your domain’s DNS in the DNS Manager of your Hub, you need only change the nameservers at Namecheap so they point to WPMU DEV instead.
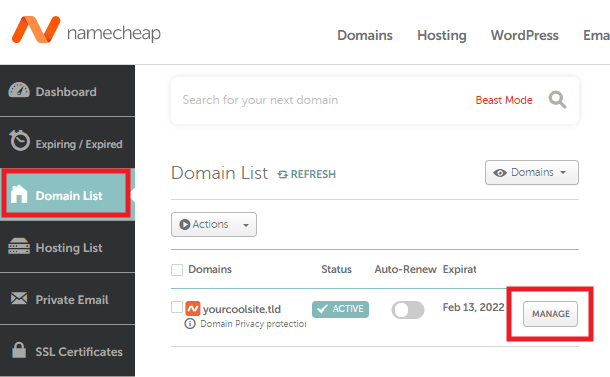
Log in to your Namecheap account. Then select Domain List from the left sidebar and click the Manage button next to your domain.
On the next screen, under the Domain tab, select Custom DNS in the Nameservers section.

Then enter the 3 WPMU DEV nameservers provided, as seen in the DNS Manager in your Hub.
ns1.wpdns.host
ns2.wpdns.host
ns3.wpdns.host

Click the green checkmark at the far right of that section to save the changes, and you’re done at Namecheap.
Next, you’ll want to head over to the DNS Manager of your Hub, and click the Check Nameservers button as seen at the end of the Change Your Nameservers chapter in our DNS documentation.
Then follow the instructions in the Adding a Domain Name chapter in that same document to get your domain added and DNS records set up.
6.8.4 Google Domains
Link to chapter 8Jump to the section that corresponds to where you prefer to manage the DNS records for your Google domain:
Managing DNS for a Google domain at Google Domains
Managing DNS for a Google domain in my WPMU DEV Hub
Managing DNS for a Google domain at Google Domains
Go to Google Domains, log in to your account and click on the Configure DNS button:

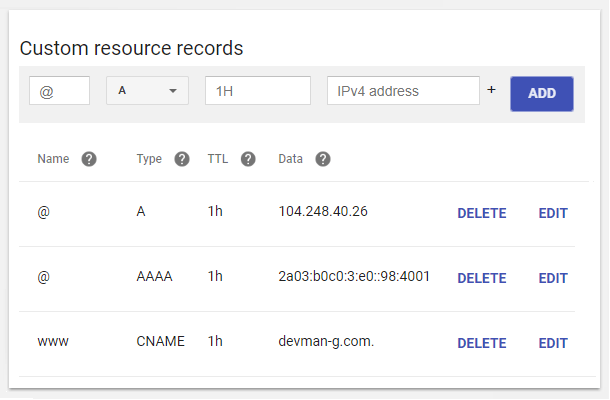
Navigate down to Custom resource records and add one A record with @ in the Name field while adding your IP in the IP field (your IPV4 is located in your site’s Domains tab, in our example 104.248.40.26), one CNAME record with www in the Name field and @ in the Domain name field, and one AAAA Record with IPV6 in the IPV6 field (in our example 2a03:b0c0:3:e0::98:4001) while keeping TTL Low (10 mins):
Got all this done? Excellent, the only thing left is to Set a new primary domain for your site.
Managing DNS for a Google domain in my WPMU DEV Hub
If you want to manage your domain’s DNS in the DNS Manager of your Hub, you need only change the nameservers at Google Domains so they point to WPMU DEV instead.
This chapter is an ongoing project, and we have not yet compiled our own guide on how to change nameservers at this registrar. In the meantime, you can review Google Domains’ guide here.
If you get stuck at any point in the process, please contact our support superheroes who will be happy to assist you.
6.8.5 Siteground
Link to chapter 8Jump to the section that corresponds to where you prefer to manage the DNS records for your Siteground domain:
Managing DNS for a Siteground domain at Siteground
Managing DNS for a Siteground domain in my WPMU DEV Hub
Managing DNS for a Siteground domain at Siteground
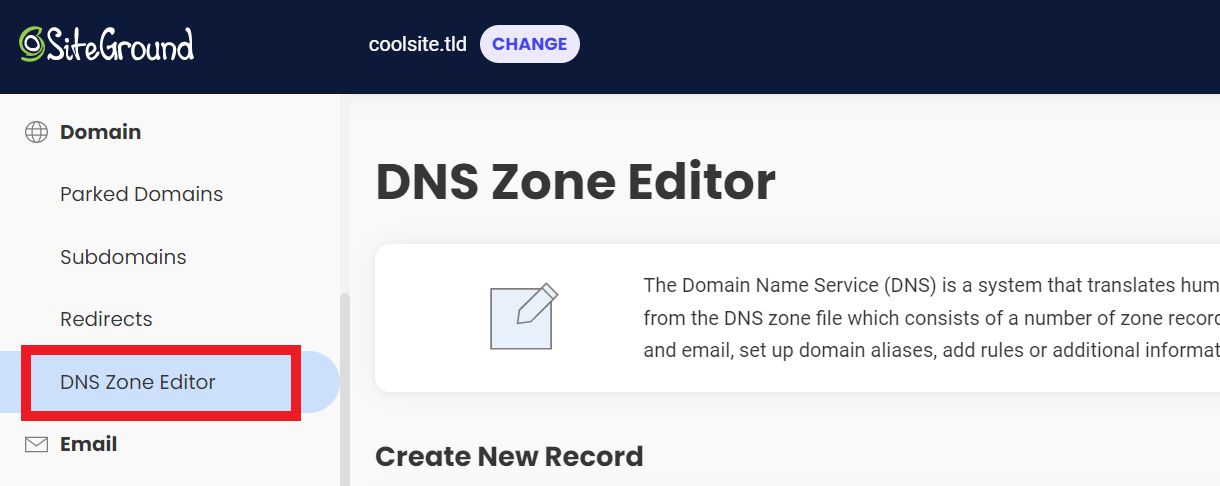
Go to Siteground, log in to your account. On the Websites page, click on the Site Tools button corresponding to your desired domain.

Then in the sidebar menu, click on Domain > DNS Zone Editor.
Using CNAME Records
We strongly recommend using the CNAME method instead of A & AAAA records, as the CNAME would not need to be edited if your site’s IP address changes for any reason (during a site migration for example).
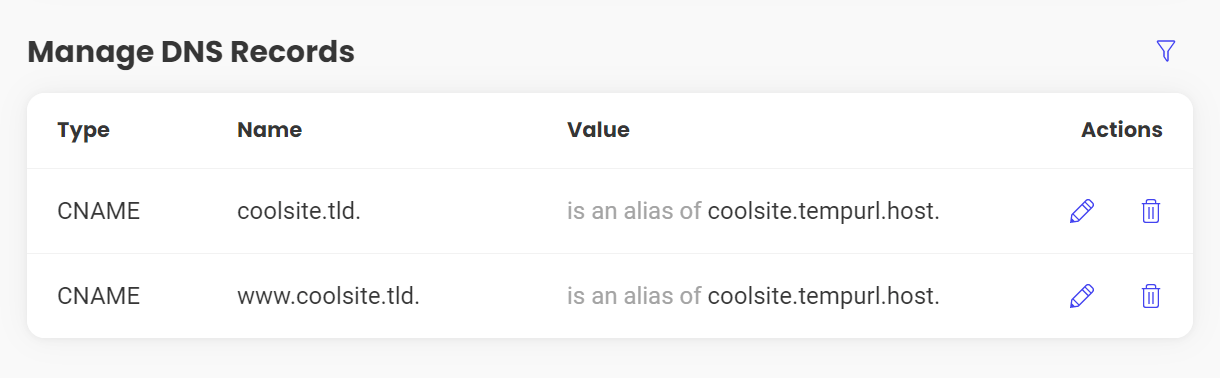
First, delete all A & AAAA records for your domain and the www subdomain if they exist. Then add a CNAME record with your site’s tempurl.host address as the Value, and @ or your domain name as the record Name. Then add another CNAME with your site’s tempurl.host address as the Value and www as the Name.
Using A & AAAA Records
If you prefer to use A & AAAA records rather than the CNAME method, click on the “edit” icon beside the main A record of your domain and, in the Value field, enter the A record value of your site (your IPV4 is located in your site’s Domains tab).
After that, edit the CNAME record with the www as the Name and, in the Value field, enter @ or your domain name.
Lastly, if you do not see an existing AAAA record, click the Add New Record button and select AAAA from the menu of record types. In the Name field enter @ or your domain name and in the Value field enter your AAAA record value.

Got this done? Excellent, the only thing left is to Set a new primary domain for your site.
Managing DNS for a Siteground domain in my WPMU DEV Hub
If you want to manage your domain’s DNS in the DNS Manager of your Hub, you need only change the nameservers at Siteground so they point to WPMU DEV instead.
This chapter is an ongoing project, and we have not yet compiled our own guide on how to change nameservers at this registrar. In the meantime, you can review Siteground’s guide here.
If you get stuck at any point in the process, please contact our support superheroes who will be happy to assist you.
6.8.6 Porkbun
Link to chapter 8Jump to the section that corresponds to where you prefer to manage the DNS records for your Porkbun domain:
Managing DNS for a Porkbun domain at Porkbun
Managing DNS for a Porkbun domain in my WPMU DEV Hub
Managing DNS for a Porkbun domain at Porkbun
Go to Porkbun, log in to your account, click on Details (under your desired domain) and then on the Edit button beside DNS RECORDS:
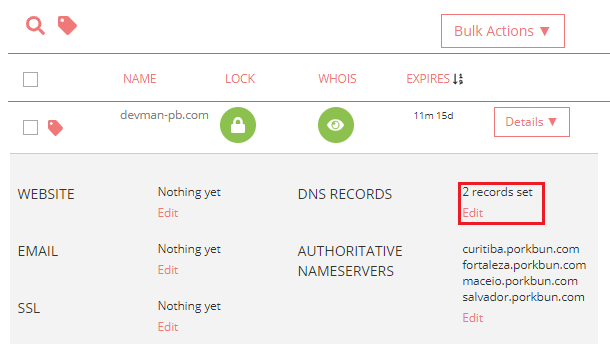
In the new window create one A record with a blank Host field and enter your IPV4 in the Answer field (your IPV4 is located in your site’s Domains tab, in our example, we used 104.248.40.26), one CNAME record with www in the Host field and enter @ in the Answer field (in our example this will resolve to devman-pb.com once saved) and one AAAA record with a blank Host field while adding your IPV6 in the Answer field (IPV6 in our example is 2a03:b0c0:3:e0::98:4001). Once saved you will get something like:

Got all this done? Excellent, the only thing left is to Set a new primary domain for your site.
Managing DNS for a Porkbun domain in my WPMU DEV Hub
If you want to manage your domain’s DNS in the DNS Manager of your Hub, you need only change the nameservers at Porkbun so they point to WPMU DEV instead.
This chapter is an ongoing project, and we have not yet compiled our own guide on how to change nameservers at this registrar. In the meantime, you can review Porkbun’s guide here.
If you get stuck at any point in the process, please contact our support superheroes who will be happy to assist you.
6.8.7 Hover
Link to chapter 8Jump to the section that corresponds to where you prefer to manage the DNS records for your Hover domain:
Managing DNS for a Hover domain at Hover
Managing DNS for a Hover domain in my WPMU DEV Hub
Managing DNS for a Hover domain at Hover
If you want to manage your domain’s DNS at Hover, you’ll need to edit the A, AAAA & CNAME records for your domain there.
Log in to your Hover account and select the Edit DNS option in the Edit menu of your chosen domain.
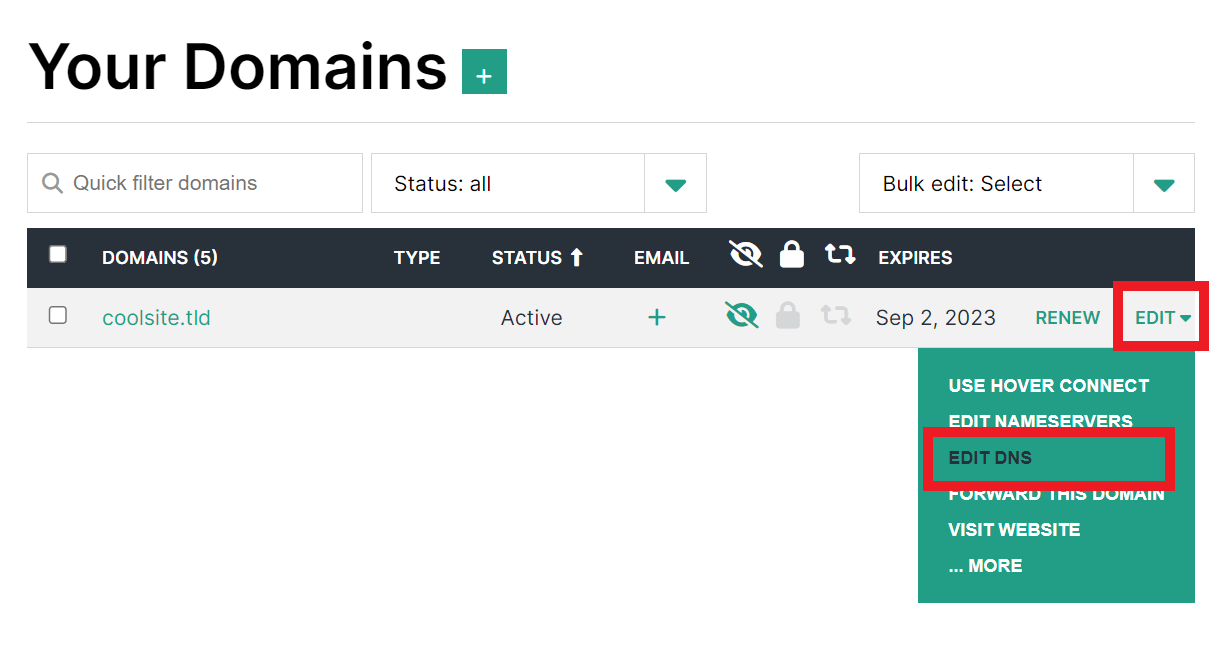
Using CNAME Records
While we strongly recommend using the CNAME method instead of A & AAAA records, Hover does not allow CNAMEs for top-level domains. So you must set the A & AAAA records for your domain when using this registrar.
Using A & AAAA Records
Click on the Edit link beside the main A record of your domain and, in the Value field, enter the A record value of your site (your IPV4 is located in your site’s Domains tab).
After that, edit the CNAME record with the www Host name and, in the Value field, enter your domain name.
Lastly, if you do not see an existing AAAA record, click the Add New Record button and select AAAA from the menu of record types. In the Name field enter @ or your domain name and in the Value field enter your AAAA record value.

Got this done? Excellent, the only thing left is to Set a new primary domain for your site.
Managing DNS for a Hover domain in my WPMU DEV Hub
If you want to manage your domain’s DNS in the DNS Manager of your Hub, you need only change the nameservers at Hover so they point to WPMU DEV instead.
Log in to your Hover account and select Control Panel from your Account menu at top-right.
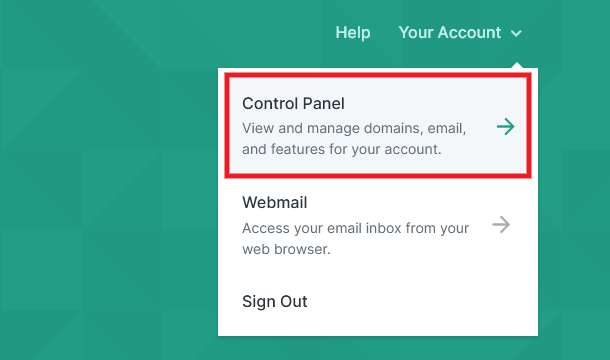
Then click Nameservers in the main menu.

Locate the Domain whose nameservers you want to change and, in the Edit dropdown, select Edit Nameservers.

In the modal window that pops open, you’ll want to enter the 3 WPMU DEV nameservers provided, as seen in the DNS Manager in your Hub..
ns1.wpdns.host
ns2.wpdns.host
ns3.wpdns.host
For each existing nameserver, simply paste in the new one to overwrite it. If you need an additional field, click the + Another Nameserver link.
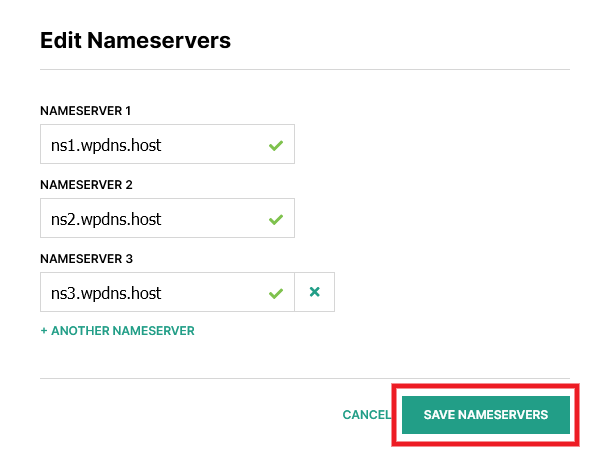
Once all 3 are added, click the Save Nameservers button, and you’re done at Hover.
Next, you’ll want to head over to the DNS Manager of your Hub, and click the Check Nameservers button as seen at the end of the Change Your Nameservers chapter in our DNS documentation.
Then follow the instructions in the Adding a Domain Name chapter in that same document to get your domain added and DNS records set up.
6.8.8 Dreamhost
Link to chapter 8Jump to the section that corresponds to where you prefer to manage the DNS records for your Dreamhost domain:
Managing DNS for a Dreamhost domain at Dreamhost
Managing DNS for a Dreamhost domain in my WPMU DEV Hub
Managing DNS for a Dreamhost domain at Dreamhost
Log into your account at Dreamhost and click on Manage Websites in the sidebar menu. Then click on the ellipsis icon for the site whose domain you want to edit, and select DNS Settings.
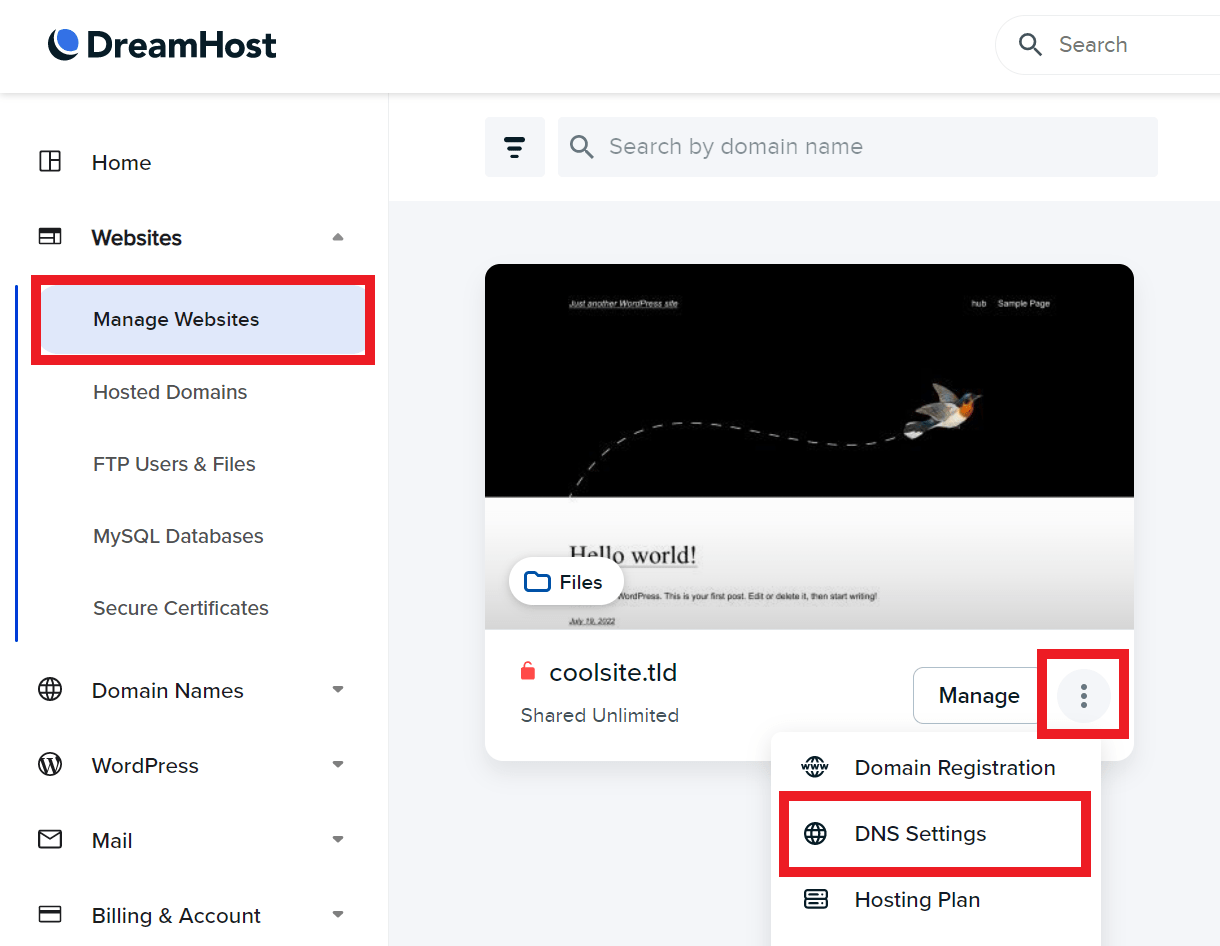
Using CNAME Records
We strongly recommend using the CNAME method instead of A & AAAA records, as the CNAME would not need to be edited if your site’s IP address changes for any reason (during a site migration for example).
First, delete all A & AAAA records for your domain and the www subdomain if they exist. Then, since Dreamhost doesn’t allow CNAMEs for top-level domains, add an ALIAS record (same thing really) with your site’s tempurl.host address as the Value, and @ as the record Name. Then add a CNAME with your site’s tempurl.host address as the Value and www as the Name.
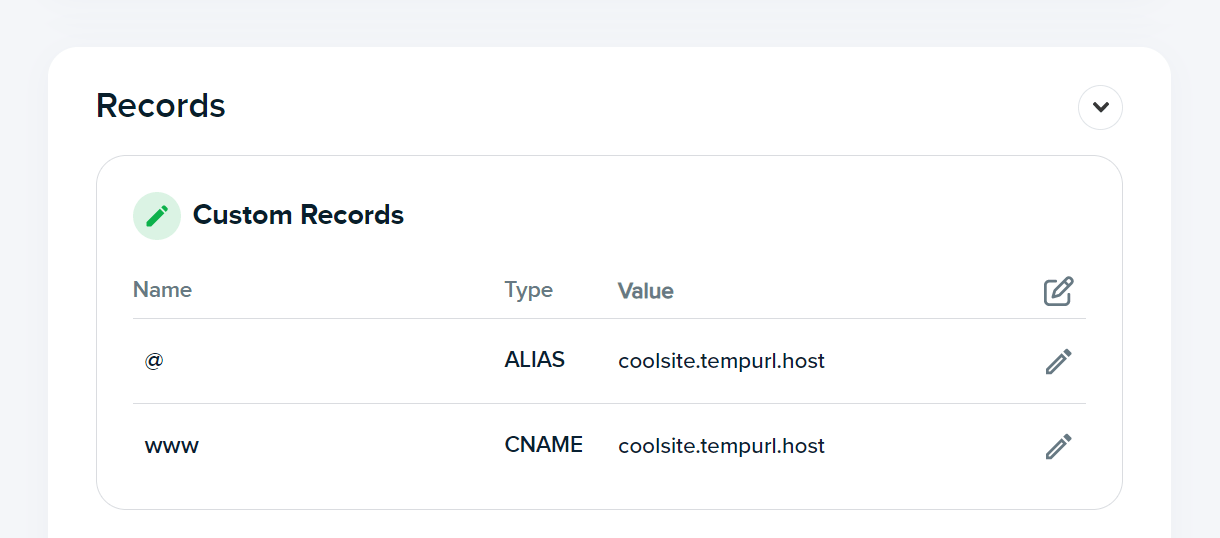
Using A & AAAA Records
If you prefer to use A & AAAA records rather than the CNAME method, click on the “edit” icon beside the main A record of your domain and, in the Value field, enter the A record value of your site (your IPV4 is located in your site’s Domains tab).
After that, edit the CNAME record with the www Name and, in the Value field, enter @ or your domain name.
Lastly, if you do not see an existing AAAA record, click the Add New Record button and select AAAA from the menu of record types. In the Name field, enter @ or your domain name and in the Value field, enter your AAAA record value.

Got this done? Excellent, the only thing left is to Set a new primary domain for your site.
Managing DNS for a Dreamhost domain in my WPMU DEV Hub
If you want to manage your domain’s DNS in the DNS Manager of your Hub, you need only change the nameservers at Dreamhost so they point to WPMU DEV instead.
This chapter is an ongoing project, and we have not yet compiled our own guide on how to change nameservers at this registrar. In the meantime, you can review Dreamhost’s guide here.
If you get stuck at any point in the process, please contact our support superheroes who will be happy to assist you.
6.8.9 iPage
Link to chapter 8Jump to the section that corresponds to where you prefer to manage the DNS records for your iPage domain:
Managing DNS for an iPage domain at iPage
Managing DNS for an iPage domain in my WPMU DEV Hub
Managing DNS for an iPage domain at iPage
If you want to manage your domain’s DNS at iPage, you’ll need to edit the A, AAAA & CNAME records for your domain there.
Go to iPage, log in to your account and click on the Domains tab. Then click the Manage button for the domain you want.

Then select DNS & Nameservers in the sidebar menu.

Using CNAME Records
We strongly recommend using the CNAME method instead of A & AAAA records, as the CNAME would not need to be edited if your site’s IP address changes for any reason (during a site migration for example).
First, delete all A & AAAA records for your domain and the www subdomain if they exist. Then add a CNAME record with your site’s tempurl.host address as the Content, and @ or your domain name as the record Name. Then add another CNAME with your site’s tempurl.host address as the Content and www as the Name.

Using A Record
If you prefer to use the A record rather than the CNAME method, click on the “edit” icon beside the main A record of your domain and, in the IP Address field, enter the A record value of your site (your IPV4 is located in your site’s Domains tab).
After that, edit the CNAME record with the www Name and, in the Content field, enter @ or your domain name.
iPage does not support AAAA records, so no need to worry about that.
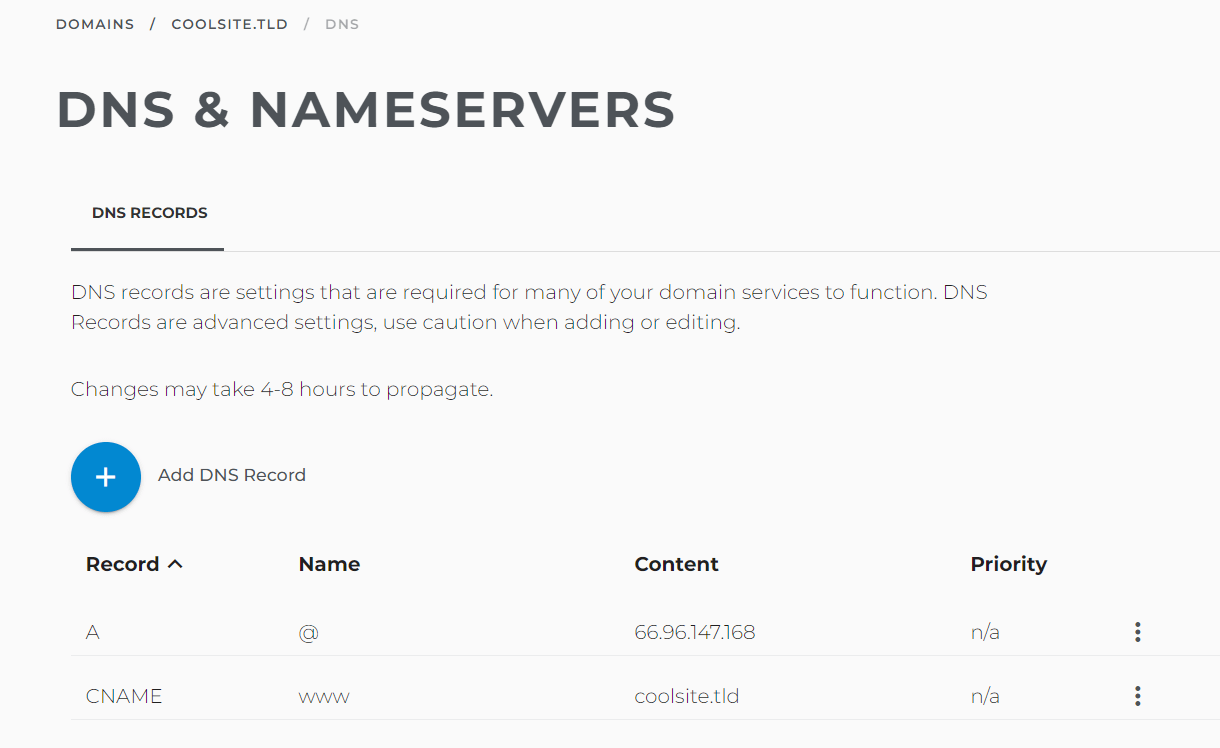
Got this done? Excellent, the only thing left is to Set a new primary domain for your site.
Managing DNS for an iPage domain in my WPMU DEV Hub
If you want to manage your domain’s DNS in the DNS Manager of your Hub, you need only change the nameservers at iPage so they point to WPMU DEV instead.
Log in to your iPage account and, under the Domains tab, click the Manage button for the domain whose nameservers you want to change.

On the next screen, click DNS & Nameservers in the sidebar menu.
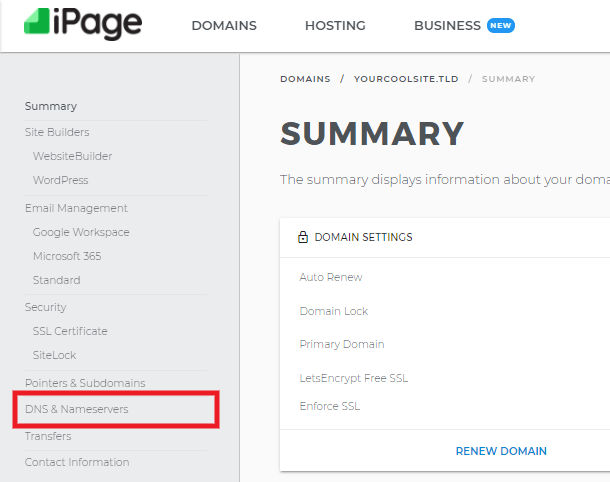
On the next screen, you’ll want to enter the 3 WPMU DEV nameservers provided, as seen in the DNS Manager in your Hub..
ns1.wpdns.host
ns2.wpdns.host
ns3.wpdns.host
For each existing nameserver, click the vertical ellipsis icon and select the Edit option. If you need an additional field, click the + Add Nameserver button.
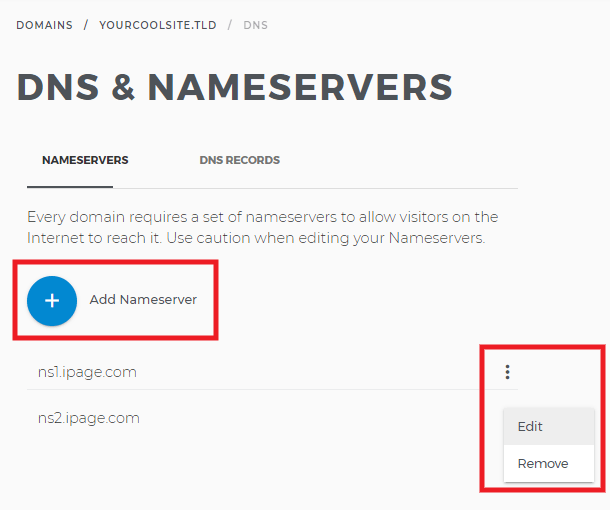
For each nameserver you edit or add, click the Submit your changes button.
Once all 3 WPMU DEV nameservers have been saved, and there are no others still in there, you’re done at iPage.
Next, you’ll want to head over to the DNS Manager of your Hub, and click the Check Nameservers button as seen at the end of the Change Your Nameservers chapter in our DNS documentation.
Then follow the instructions in the Adding a Domain Name chapter in that same document to get your domain added and DNS records set up.
6.8.10 Domain.com
Link to chapter 8Jump to the section that corresponds to where you prefer to manage the DNS records for your Domain.com domain:
Managing DNS for a Domain.com domain at Domain.com
Managing DNS for a Domain.com domain in my WPMU DEV Hub
Managing DNS for a Domain.com domain at Domain.com
If you want to manage your domain’s DNS at Domain.com, you’ll need to edit the A, AAAA & CNAME records for your domain there.
Go to Domain.com, log in to your account and click on the Domains tab. Then click the Manage button for the domain you want.
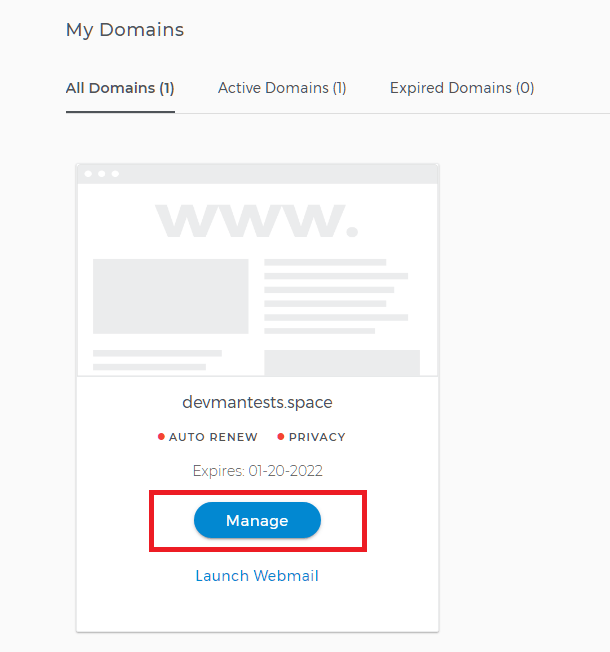
Then select DNS & Nameservers in the sidebar menu.

Using CNAME Records
We strongly recommend using the CNAME method instead of A & AAAA records, as the CNAME would not need to be edited if your site’s IP address changes for any reason (during a site migration for example).
First, delete all A & AAAA records for your domain and the www subdomain if they exist. Then add a CNAME record with your site’s tempurl.host address as the Content, and @ or your domain name as the record Name. Then add another CNAME with your site’s tempurl.host address as the Content and www as the Name.
Using A Record
If you prefer to use the A record rather than the CNAME method, click on the “edit” icon beside the main A record of your domain and, in the IP Address field, enter the A record value of your site (your IPV4 is located in your site’s Domains tab).
After that, edit the CNAME record with the www Name and, in the Content field, enter @ or your domain name.
Domain.com does not support AAAA records, so no need to worry about that.
Got this done? Excellent, the only thing left is to Set a new primary domain for your site.
Managing DNS for a Domain.com domain in my WPMU DEV Hub
If you want to manage your domain’s DNS in the DNS Manager of your Hub, you need only change the nameservers at Domain.com so they point to WPMU DEV instead.
Log in to your Domain.com account and, under the Domains tab, click the Manage button for the domain whose nameservers you want to change.
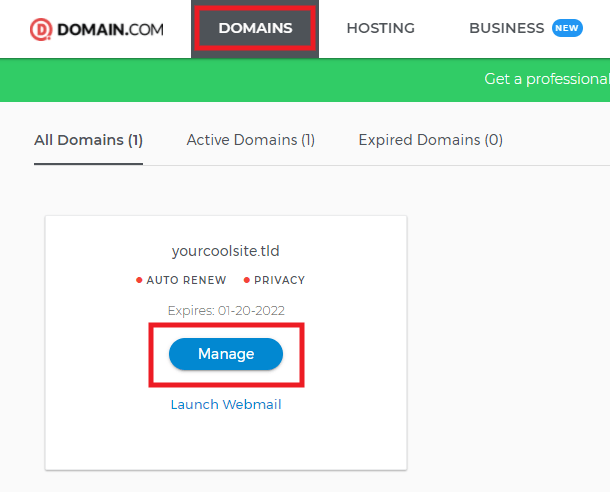
On the next screen, click DNS & Nameservers in the sidebar menu.
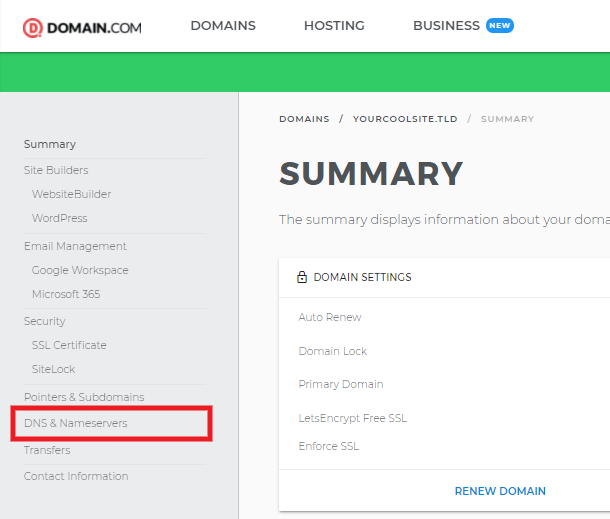
On the next screen, you’ll want to enter the 3 WPMU DEV nameservers provided, as seen in the DNS Manager in your Hub..
ns1.wpdns.host
ns2.wpdns.host
ns3.wpdns.host
For each existing nameserver, click the vertical ellipsis icon and select the Edit option. If you need an additional field, click the + Add Nameserver button.
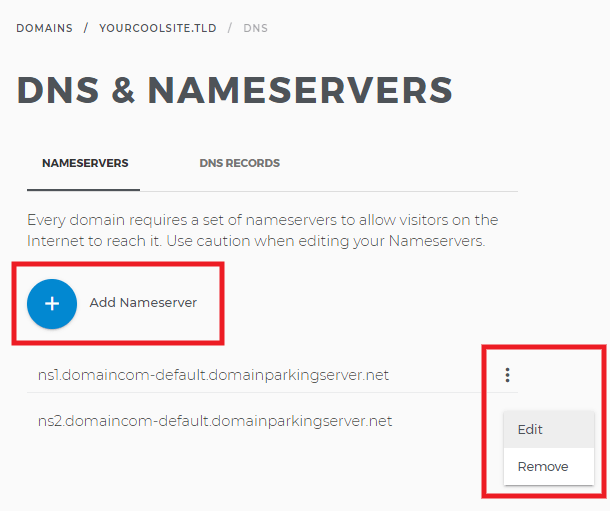
For each nameserver you edit or add, click the Submit your changes button.
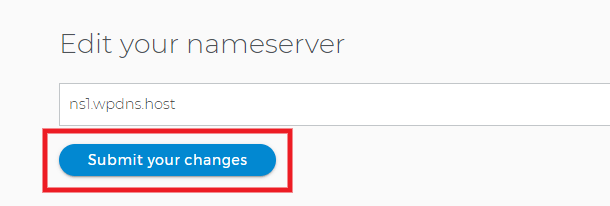
Once all 3 WPMU DEV nameservers have been saved, and there are no others still in there, you’re done at iPage.
Next, you’ll want to head over to the DNS Manager of your Hub, and click the Check Nameservers button as seen at the end of the Change Your Nameservers chapter in our DNS documentation.
Then follow the instructions in the Adding a Domain Name chapter in that same document to get your domain added and DNS records set up.
6.8.11 Bluehost
Link to chapter 8Jump to the section that corresponds to where you prefer to manage the DNS records for your Bluehost domain:
Managing DNS for a Bluehost domain at Bluehost
Managing DNS for a Bluehost domain in my WPMU DEV Hub
Managing DNS for a Bluehost domain at Bluehost
Go to Bluehost, log in to your account and then navigate to My Domains. Click Manage on the domain that you want to configure.
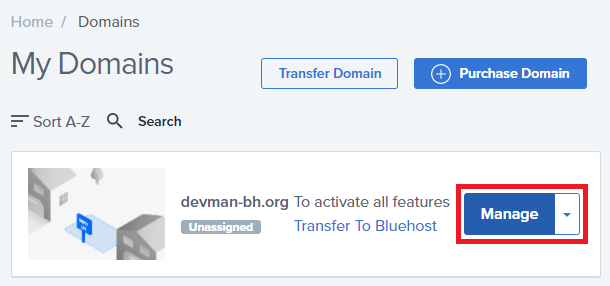
Then click on the DNS tab and scroll down to the DNS Manager area where you will either need to add new records (if this is a new domain) or edit existing ones (if you already used this domain previously for another hosting service).
Using CNAME Records
We strongly recommend using the CNAME method instead of A & AAAA records, as the CNAME would not need to be edited if your site’s IP address changes for any reason (during a site migration for example).
First, delete all A & AAAA records for your domain and the www subdomain if they exist. Then add a CNAME record with your site’s tempurl.host address as the Points to, and @ or your domain name as the Host Record. Then add another CNAME with your site’s tempurl.host address as the Points To and www as the Host Record.
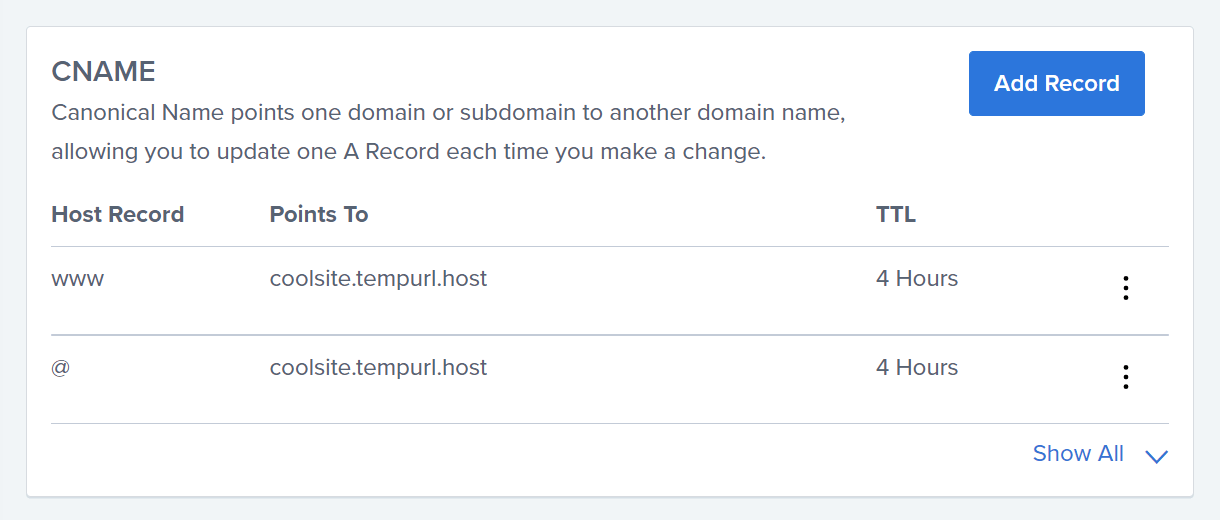
Using A & AAAA Records
If you prefer to use A & AAAA records rather than the CNAME method, click on the Edit option beside the main A record of your domain and, in the Points To field, enter the A record value of your site (your IPV4 is located in your site’s Domains tab).
After that, edit the CNAME record with the www Host Record and, in the Points To field, enter @ or your domain name.
Lastly, if you do not see an existing AAAA record, click the Add Record button in the AAAA section. In the Host Record field, enter @ or your domain name and in the Points To field, enter your AAAA record value.
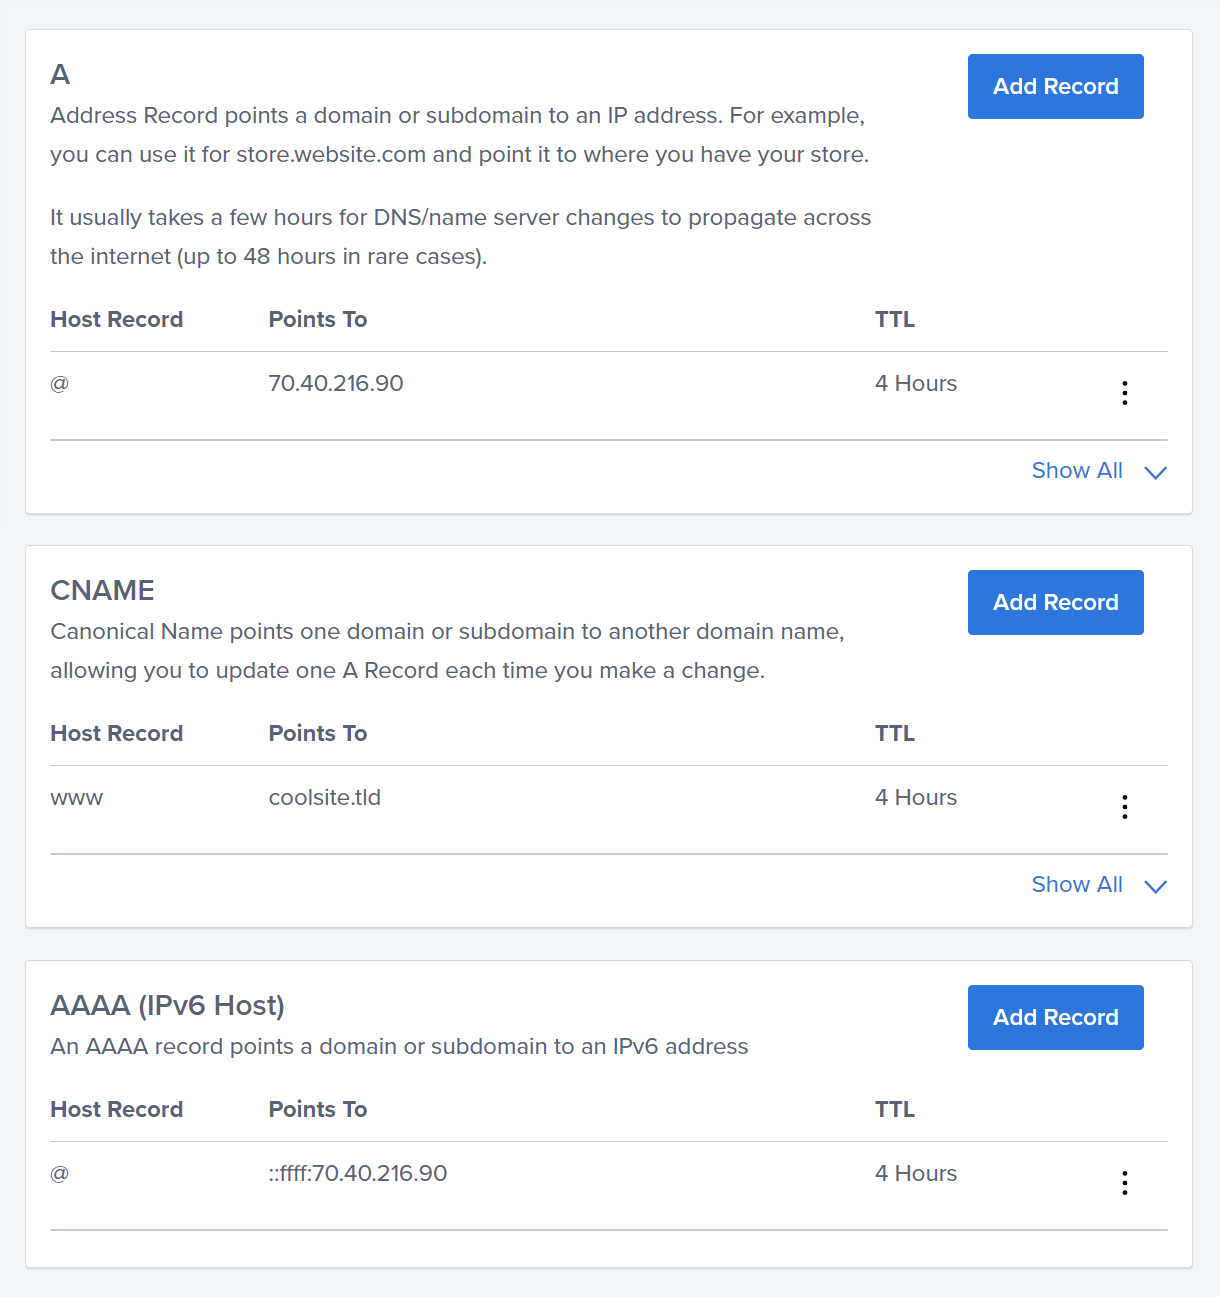
Got this done? Excellent, the only thing left is to Set a new primary domain for your site.
Managing DNS for a Bluehost domain in my WPMU DEV Hub
If you want to manage your domain’s DNS in the DNS Manager of your Hub, you need only change the nameservers at Bluehost so they point to WPMU DEV instead.
This chapter is an ongoing project, and we have not yet compiled our own guide on how to change nameservers at this registrar. In the meantime, you can review Bluehost’s guide here.
If you get stuck at any point in the process, please contact our support superheroes who will be happy to assist you.
6.8.12 eNom
Link to chapter 8Jump to the section that corresponds to where you prefer to manage the DNS records for your eNom domain:
Managing DNS for an eNom domain at eNom
Managing DNS for an eNom domain in my WPMU DEV Hub
Managing DNS for an eNom domain at eNom
Go to eNom, login to your account, navigate to Domain manager section and click on Registered domains:
Select your desired domain and in the Manage domain dropdown choose Host records. Once selected you will either need to add new records (if this is a new domain) or edit existing ones (if you already used this domain previously for another hosting service).
Add @ in the Address field for the CNAME Record type that has WWW as Host Name. Change the already present Record Type that has Host Name as @ from CNAME to A (Address) and enter your IPV4 in the Address field (in this example 46.101.107.111). Lastly, add another Record Type as AAAA (Address), enter @ in the Hostname field and enter your IPV6 in the Address field (in this example 2a03:b0c0:3:d0::db3:7001). The end result should look something like this:

Finally, you need to choose your nameservers. Open the Manage Domain drop-down menu again, and click DNS Server Settings.
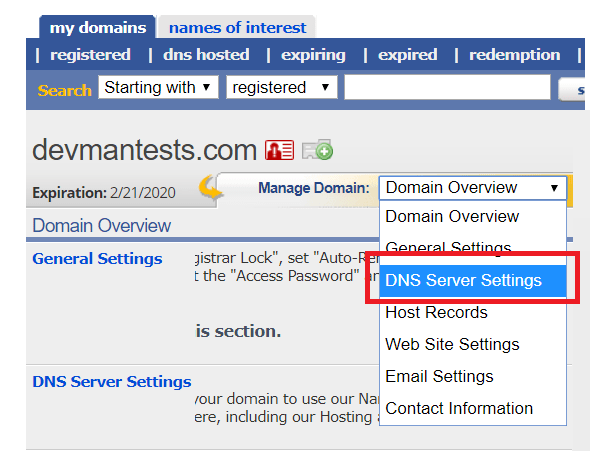
Most users can simply select the Our Servers radio button to use eNom’s default nameservers. If you are using custom nameservers, select Custom and enter the server’s address into the fields provided.

When ready, click Save to preserve the configuration, and return to the Hosting control panel in The Hub to set your new primary domain. See the Set a new primary domain section below if you need help doing so.
Managing DNS for an eNom domain in my WPMU DEV Hub
If you want to manage your domain’s DNS in the DNS Manager of your Hub, you need only change the nameservers at eNom so they point to WPMU DEV instead.
This chapter is an ongoing project, and we have not yet compiled our own guide on how to change nameservers at this registrar. In the meantime, you can review eNom’s guide here.
If you get stuck at any point in the process, please contact our support superheroes who will be happy to assist you.
6.8.13 Hostinger
Link to chapter 8Jump to the section that corresponds to where you prefer to manage the DNS records for your Hostinger domain:
Managing DNS for a Hostinger domain at Hostinger
Managing DNS for a Hostinger domain in my WPMU DEV Hub
Managing DNS for a Hostinger domain at Hostinger
If you want to manage your domain’s DNS at Hostinger, you’ll need to edit the A, AAAA & CNAME records for your domain there.
Go to Hostinger, log in to your account and click on the Manage button beside your desired domain.
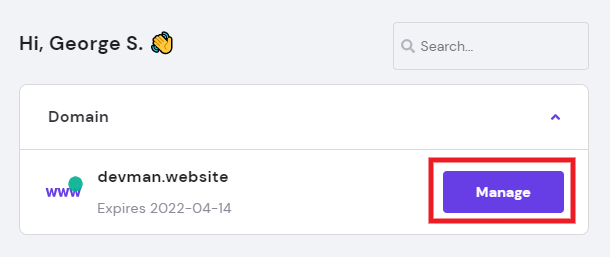
Then click DNS / Nameservers in the sidebar menu on the left.
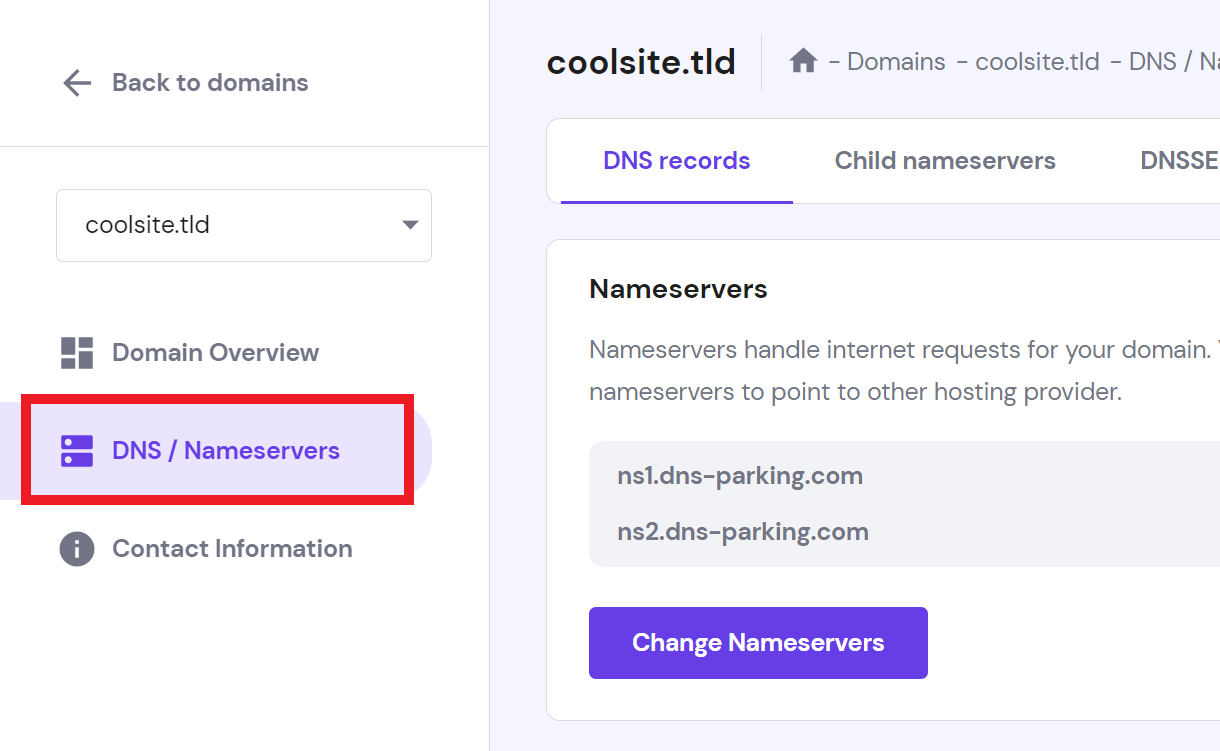
Using CNAME Records
We strongly recommend using the CNAME method instead of A & AAAA records, as the CNAME would not need to be edited if your site’s IP address changes for any reason (during a site migration for example).
First, delete all A & AAAA records for your domain and the www subdomain if they exist. Then add a CNAME record with your site’s tempurl.host address as the Target/Content, and @ or your domain name as the Name. Then add another CNAME with your site’s tempurl.host address as the Target/Content and www as the Name.
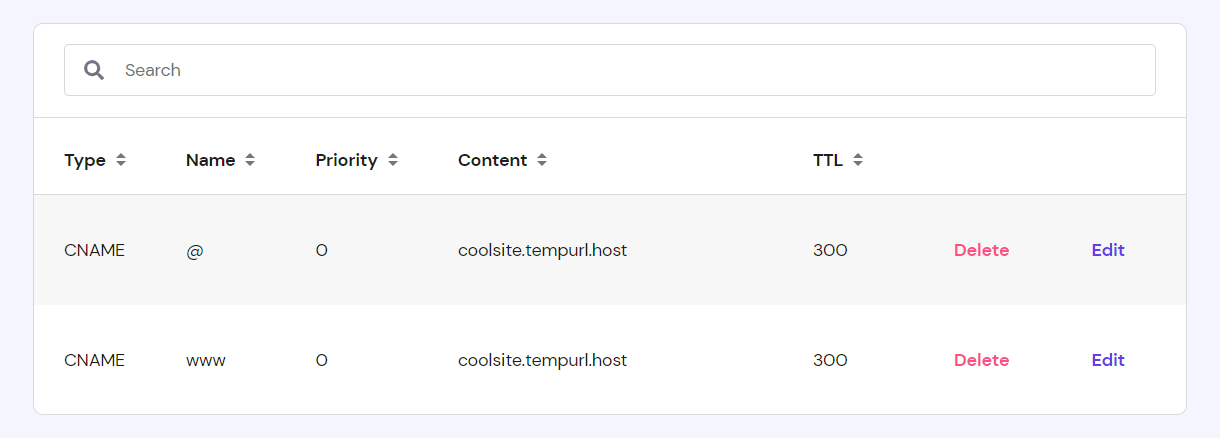
Using A & AAAA Records
If you prefer to use A & AAAA records rather than the CNAME method, click on the Edit option beside the main A record of your domain and, in the Points To field, enter the A record value of your site (your IPV4 is located in your site’s Domains tab).
After that, edit the CNAME record with the www Name and, in the Points To field, enter @ or your domain name.
Lastly, if you do not see an existing AAAA record, click the Add Record button, and select the AAAA option. In the Name field, enter @ or your domain name and in the Points To field, enter your AAAA record value.
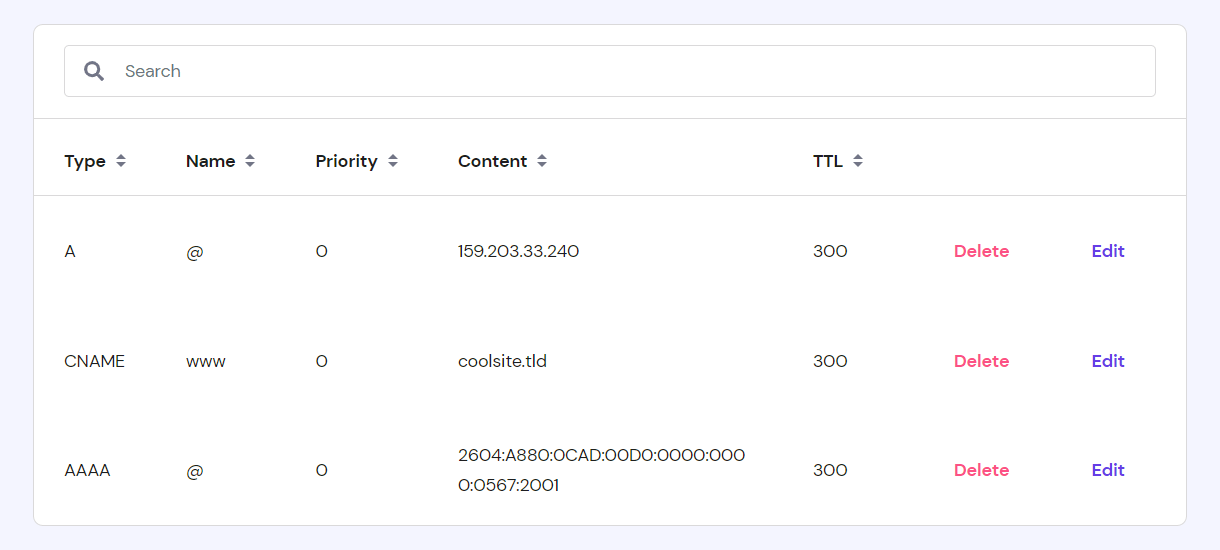
Got this done? Excellent, the only thing left is to Set a new primary domain for your site.
Managing DNS for a Hostinger domain in my WPMU DEV Hub
If you want to manage your domain’s DNS in the DNS Manager of your Hub, you need only change the nameservers at Hostinger so they point to WPMU DEV instead.
Go to Hostinger, log in to your account and click on the Manage button beside your desired domain.
Then click DNS / Nameservers in the sidebar menu on the left.

On the next screen, click the Change Nameservers button.
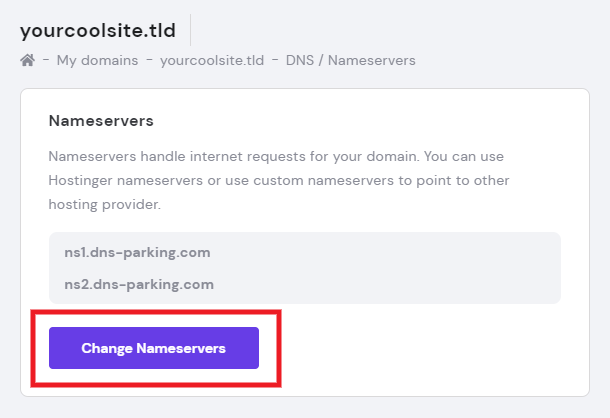
Then select the Change Nameservers option, and enter the 3 WPMU DEV nameservers provided, as seen in the DNS Manager in your Hub.
ns1.wpdns.host
ns2.wpdns.host
ns3.wpdns.host
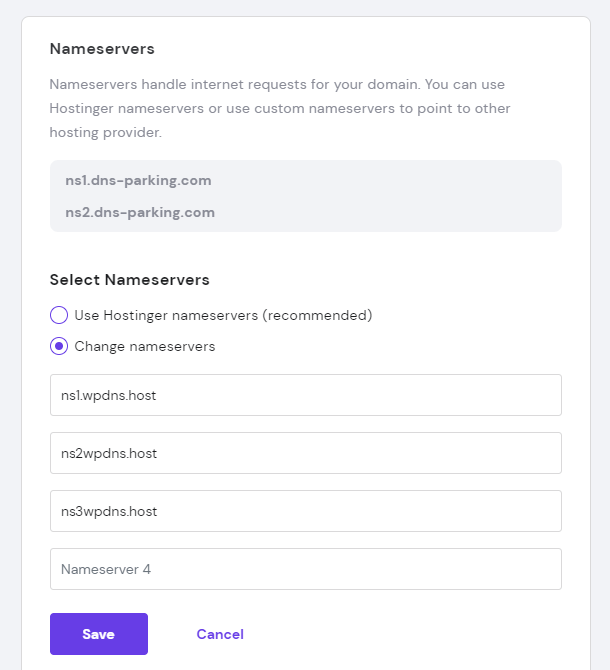
Click the Save button and you’re done at Hostinger.
Next, you’ll want to head over to the DNS Manager of your Hub, and click the Check Nameservers button as seen at the end of the Change Your Nameservers chapter in our DNS documentation.
Then follow the instructions in the Adding a Domain Name chapter in that same document to get your domain added and DNS records set up.
6.8.14 Network Solutions
Link to chapter 8Jump to the section that corresponds to where you prefer to manage the DNS records for your Network Solutions domain:
Managing DNS for a Network Solutions domain at Network Solutions
Managing DNS for a Network Solutions domain in my WPMU DEV Hub
Managing DNS for a Network Solutions domain at Network Solutions
If you want to manage your domain’s DNS at Network Solutions, you’ll need to edit the A, AAAA & CNAME records for your domain there.
Go to Network Solutions, log in to your account and, from your Account menu, click the Home option.
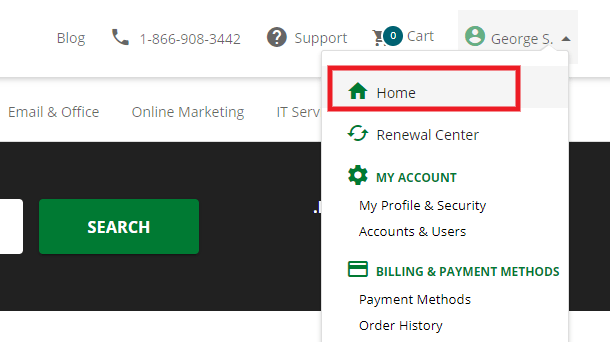
On your account Home screen, select the domain you want to manage from the dropdown in the Domains section, or just click My Domain Names if you have only one domain there.
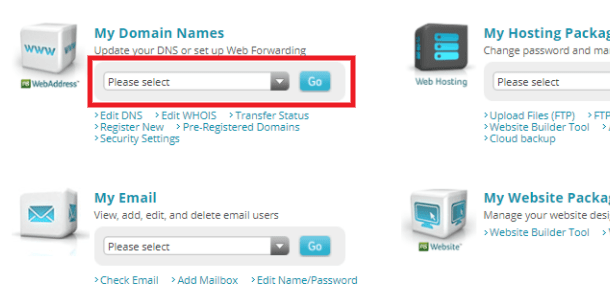
Scroll down and click on the Advanced Tools section to pop it open. Then click Manage where you see Advanced DNS Records.

In the modal window that pops open, edit the existing A record first. Leave @ as the Refers To value and enter your IP in the Points to field (your IPV4 is located in your site’s Domains tab, in our example we used 104.248.40.26). Next, you want to edit the A Record with www in its Name. Change that to a CNAME and enter your apex domain name as your Alias To name (in our example we used devman.us). Lastly, add one AAAA record, set @ as Name and enter your IPV6 as your Target name (in our example 2a03:b0c0:3:e0::98:4001). The end result should look something like this:
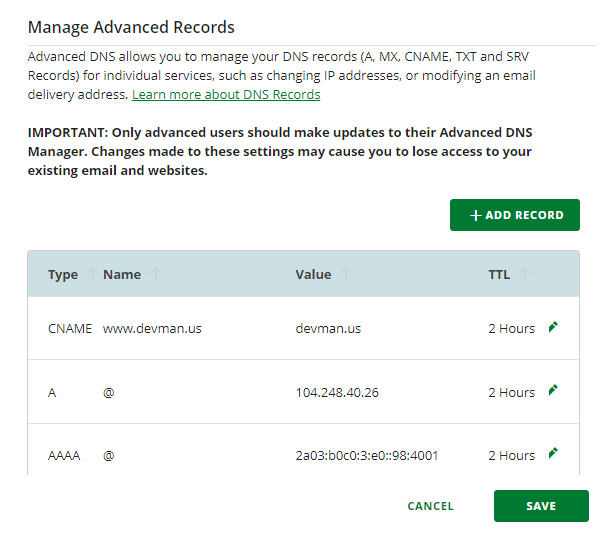
Got all this done? Excellent, the only thing left is to Set a new primary domain for your site.
Managing DNS for a Network Solutions domain in my WPMU DEV Hub
If you want to manage your domain’s DNS in the DNS Manager of your Hub, you need only change the nameservers at Network Solutions so they point to WPMU DEV instead.
Log in to your Network Solutions account. Then select Home from your Profile menu at the top-right.

On the next screen, go to the Domain Names tab and click the Change Where Domain Points button for the domain whose nameservers you want to change.
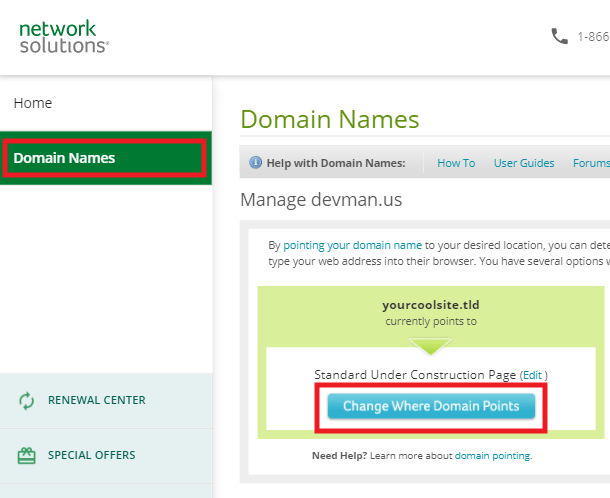
Then select the Domain Name Server (DNS) option and click the Continue button.
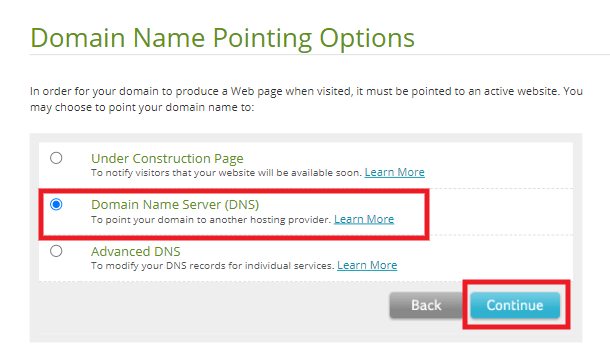
On the next screen, enter the 3 WPMU DEV nameservers provided, as seen in the DNS Manager in your Hub, and click the Continue button.
ns1.wpdns.host
ns2.wpdns.host
ns3.wpdns.host
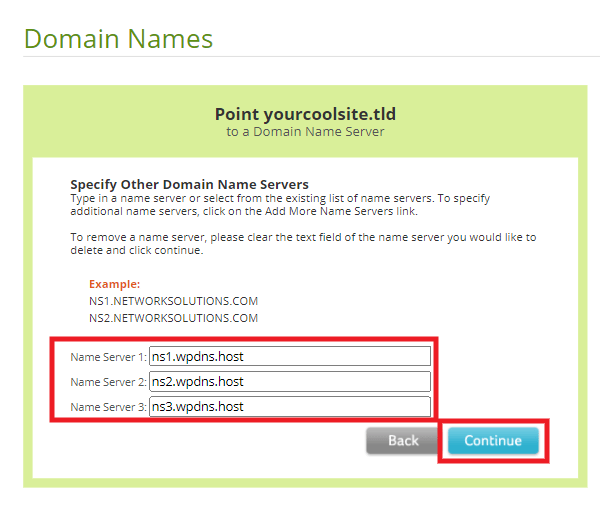
Finally, you’ll be prompted to verify and confirm the changes.
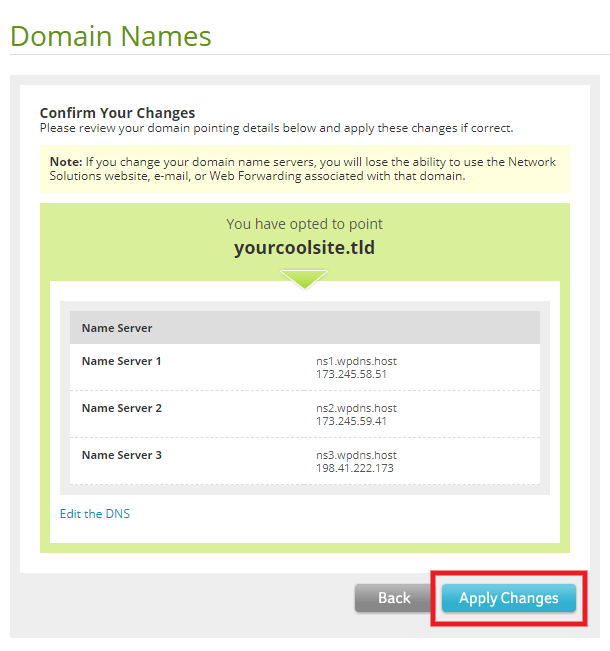
Click the Apply Changes button, and you’re done at Network Solutions.
Next, you’ll want to head over to the DNS Manager of your Hub, and click the Check Nameservers button as seen at the end of the Change Your Nameservers chapter in our DNS documentation.
Then follow the instructions in the Adding a Domain Name chapter in that same document to get your domain added and DNS records set up.
6.8.15 Crazy Domains
Link to chapter 8Jump to the section that corresponds to where you prefer to manage the DNS records for your Crazy Domains domain:
Managing DNS for a Crazy Domains domain at Crazy Domains
Managing DNS for a Crazy Domains domain in my WPMU DEV Hub
Managing DNS for a Crazy Domains domain at Crazy Domains
If you want to manage your domain’s DNS at Crazy Domains, you’ll need to edit the A, AAAA & CNAME records for your domain there.
Go to Crazy Domains, log in to your account, and click on the name of the domain whose DNS you want to manage.
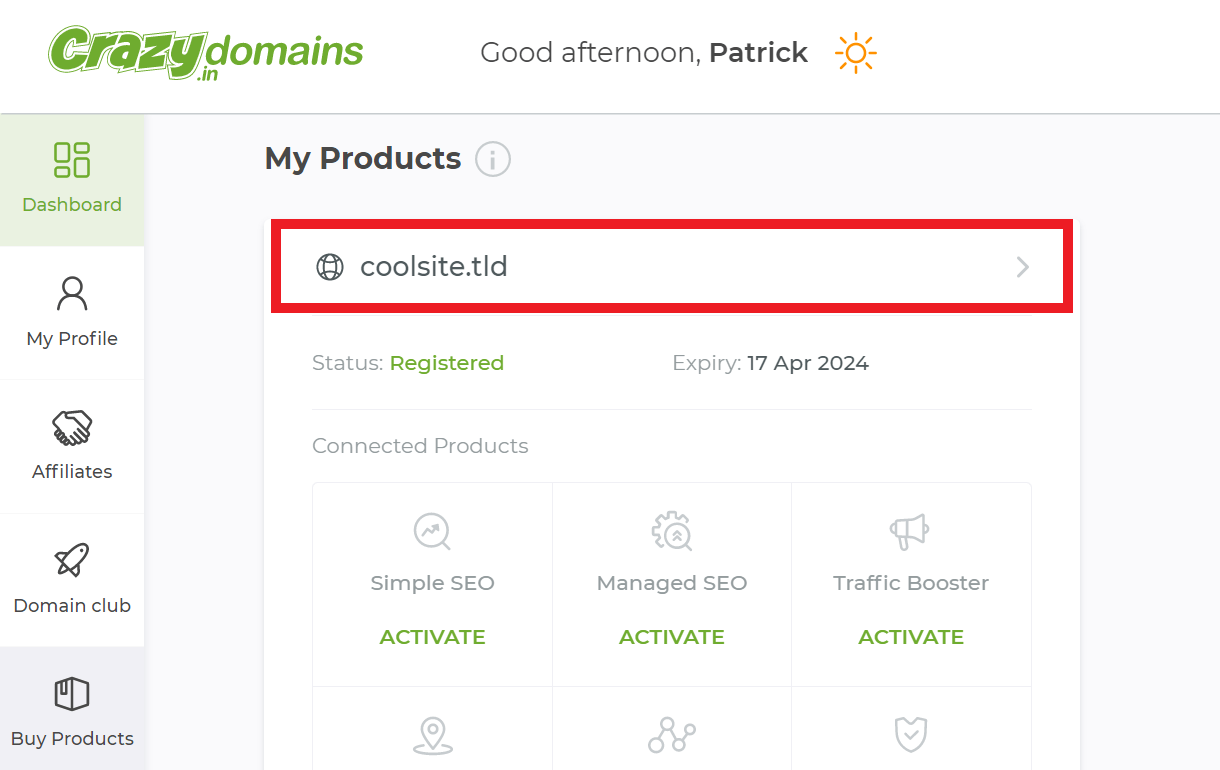
Using CNAME Records
While we strongly recommend using the CNAME method instead of A & AAAA records, Crazy Domains does not allow CNAMEs for top-level domains. So you must set the A & AAAA records for your domain when using this registrar.
Using A & AAAA Records
You should add 3 new records. One for A record (your IPV4 is located in your site’s Domains tab) with @ in the Sub Domain field, one for AAAA record (using your IPV6 address) with @ in the Sub Domain field, and one for CNAME with www in the Sub Domain field.
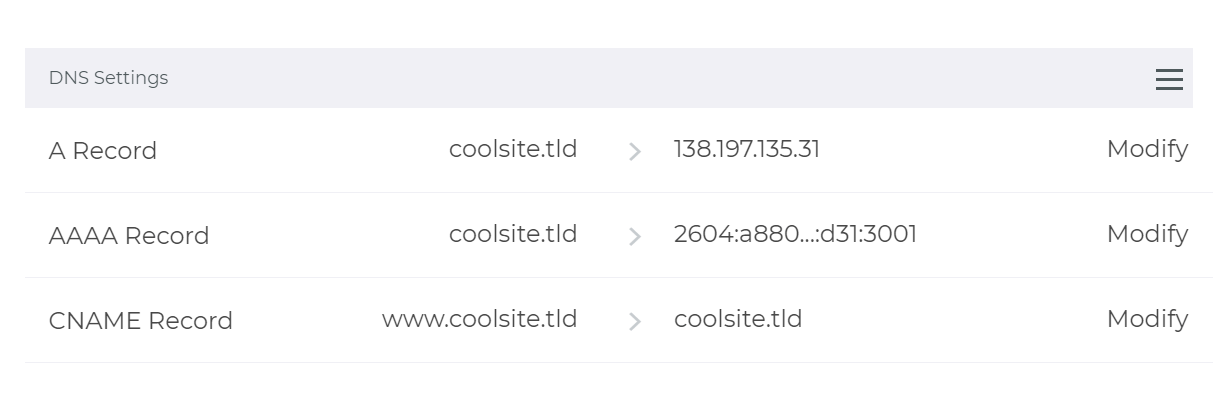
Got this done? Excellent, the only thing left is to Set a new primary domain for your site.
Managing DNS for a Crazy Domains domain in my WPMU DEV Hub
If you want to manage your domain’s DNS in the DNS Manager of your Hub, you need only change the nameservers at Crazy Domains, so they point to WPMU DEV instead.
Go to Crazy Domains, log in to your account, click Manage on the left sidebar, and click on the domain link you want to manage.

Scroll down to the Nameservers section, and click the Modify link corresponding to any of the existing name servers.

Delete the existing name servers by clicking on the Delete link next to each of the existing name servers.
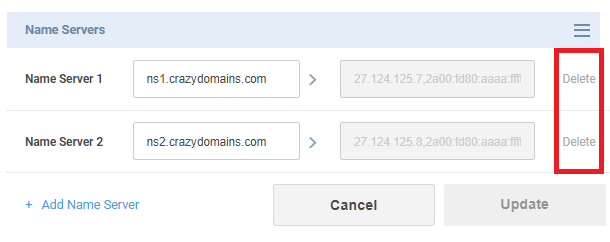
Click the + Add Name Server link to add a new name server field. Add the 3 WPMU DEV nameservers provided, as seen in the DNS Manager in your Hub:
ns1.wpdns.host
ns2.wpdns.host
ns3.wpdns.host

Click the Update button to save the changes, and you’re done at Crazy Domains.
Next, you’ll want to head over to the DNS Manager of your Hub, and click the Check Nameservers button as seen at the end of the Change Your Nameservers chapter in our DNS documentation.
Then follow the instructions in the Adding a Domain Name chapter in that same document to get your domain added and DNS records set up.
6.9 Domain FAQs
Copy chapter anchor to clipboardThis chapter aims to answer some commonly asked questions about domains registered with and/or transferred to WPMU DEV..
Which top-level domains do you support?
Currently, we support all general TLDs like .com, .org, .club, .co, .net, etc. See this page for additional details. To request support for additional TLDs, please use the link on the Register a new domain screen in your Hub.
Do you support premium domains?
No. At this time, we do not support or offer premium domains.
Is there a possibility for a change in domain pricing?
Yes, prices of the domains may be subject to change due to external registry updates. However, we will inform you in advance through email and our price updates page. You can secure current pricing for up to 10 years by registering/renewing domains in advance.
Do you support Internationalized Domain Names (IDN)?
No, at this time, we do not support Internationalized Domain Names.
Does WPMU DEV hosting support DNSSEC?
Currently, our DNS system does not support DNSSEC. However, if you had DNSSEC enabled with your previous registrar and transferred your domain to us, the DNSSEC records will get transferred as well.
If you face any issues with DNS propagation or want to remove the DNSSEC records of the previous registrar, contact our support team to manually remove the DNSSEC records.
Do you support domain transfers in and out of WPMU DEV?
Yes. To transfer a domain to WPMU DEV, see the Transferred Domains chapter above. To transfer a domain away from WPMU DEV, see the Transfer Lock section above. In both cases, please be sure to review the Domain Transfer Rules before proceeding.
Can a domain be transferred from one WPMU DEV account to another?
Currently, no. But we may support such transfers in the future.
Can I purchase a domain for more than one year?
Yes. Domains can be purchased and renewed for up to 10 years in advance. See the Registration Terms section above for more info.
When will my domain auto-renew?
Domains set to Auto-Renew will renew automatically 7 days before their expiry date.
What should I do if my domain expires and I want it back?
An expired domain will enter into a 40-day grace period and can be renewed during that time simply by paying the renewal cost for that domain. If the grace period also expires, the domain enters a 30-day redemption period during which a redemption fee will also apply if you wish to renew it. See this page for details.
Do you provide any refunds for domain purchases?
No. Refunds will not be provided for any of the following under any circumstances: Domain Registration, Renewal, Transfer & Redemption fees. Please see our Refund Policy for details.
Can WPMU DEV members resell domains?
Yes, members can resell domains just as they do for hosting. See our Reseller documentation for details.
Who does WPMU DEV partner with for domain reselling?
We have partnered with Tucows and their OpenSRS subsidiary to offer domain services. More information about Tucows can be found in their FAQ.
What happens if I cancel or downgrade my WPMU DEV membership?
DNS management along with domain registration and transfer are available to all WPMU DEV members including the free hub users.
If you have purchased/transferred one or more domains through/to WPMU DEV, and then cancel or downgrade your membership, you would still have access to the Registered Domains tab as a Free Hub user.
If you manage the DNS for one or more connected domains and cancel or downgrade your membership, DNS records for your domain will of course continue to resolve as usual. You would still have access to the DNS Manager for those connected domains as a Free Hub user, but the following features/options would be restricted:
- You will only be able to view the DNS records of your connected domains.
- You will not be able to edit, add or delete DNS records of any connected domains.
If you need to edit, add or delete DNS records for a connected domain as a Free Hub user, you would need to either upgrade your WPMU DEV membership or change the domain’s nameservers back to your registrar’s nameservers so you can manage DNS there instead.
Why is there a cost involved in transferring domains to WPMU DEV?
Upon successful transfer of a domain, its expiry date is automatically extended by one year. The price you pay for a successful domain transfer is for the one-year extension to the expiry date.
For example, if a domain was registered on January 6th, 2022 for a period of 1 year, its expiry date would be January 6th, 2023. Upon successful transfer to WPMU DEV, the expiry date for this domain would be updated to January 6th, 2024.
Is there any downtime when transferring a domain to WPMU DEV?
The domain is tied to an IP address and will resolve to that IP with no downtime even during a transfer. However, if you choose the option to keep the current nameservers at the first step of the transfer process, there could indeed be downtime as many registrars cut off access to their nameservers as soon as a transfer is initiated. See Keep Current Nameservers above for more info.
6.10 Get Support
Copy chapter anchor to clipboardIf you still have questions or need assistance after reading this document, please don’t hesitate to contact our support superheroes using the available options under the Support tab in your Hub or via the Support tab in your WPMU DEV Dashboard.


