5. Shipper
This guide is an in-depth look at the migration features of Shipper Pro and how to duplicate/clone a single website or multisite network to a new location, or copy a subsite to a single website.
Shipper’s migration options do not affect the source site in any way; it creates an exact duplicate of your site at the new destination. Once you are satisfied that the migration has completed successfully, you will need to remove the source site manually. Unless, of course, you use the plugin to clone a site, in which case you’d keep both sites.
Shipper provides two simple options for site migration.
- API Migration – One-click automated export/import through secure server-to-server communication.
- Package Migration – Package and download a website in a format for easily moving to a new server location.
Use the Index on the left to quickly locate usage guidance on specific features.
If you haven’t installed Shipper yet, then you should visit the Shipper Pro page where you can explore the plugin’s many features and WPMU DEV members can install it directly to any connected site.
Shipper requires PHP 7.4 or greater. See WPMU DEV Minimum Requirements for details.
If you’re moving a site from somewhere else to WPMU DEV hosting, try the migration tool available in the Hosting tab of the Hub. If you need help migrating a site or network, contact our 24/7 Support.
Every WPMU DEV hosted site comes fully loaded with Pro versions of the following plugins automatically installed for you: Smush, Hummingbird, Defender, SmartCrawl, and Forminator. Not hosting with us yet? Check out our Hosting page to see if we might be a good fit for your projects.
5.1 Shipper Dashboard
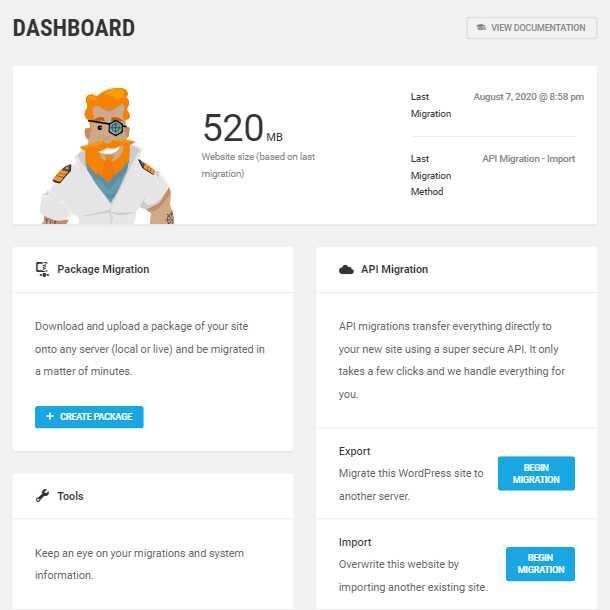
Copy chapter anchor to clipboardThe Shipper Dashboard provides you with a quick overview of previous migrations, information about both available forms of migration (API & Package migration), as well as handy links to the most used settings screens.
5.2 Package Migration
Copy chapter anchor to clipboardThe Package Migration module creates a zip file of your WordPress website, Multisite network, or subsite for manually moving to a new location.
The Package Migration option has two menu items:
- Package
- Settings
5.2.1 Package
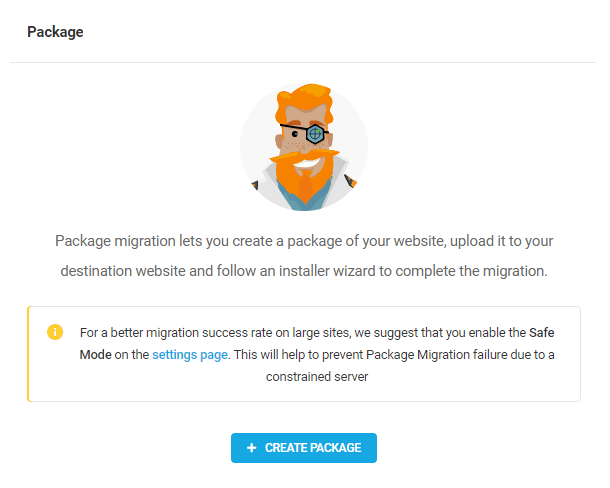
Link to chapter 2When visiting the Package menu option for the first time, click Create Package to open the Shipper Package wizard modal.
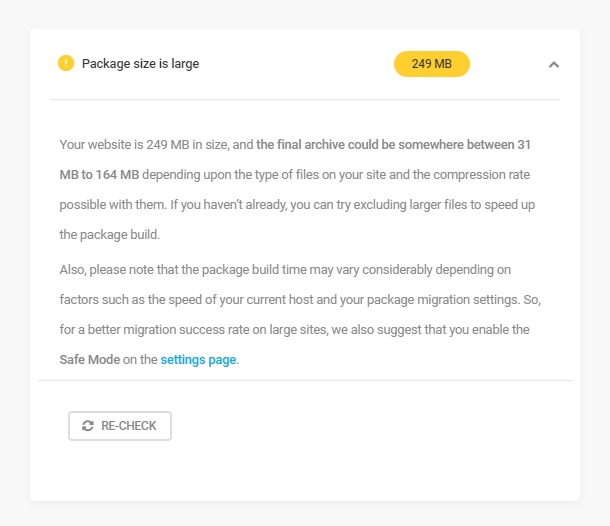
You’ll notice there is a reminder on this screen to enable Safe Mode on the Package Settings page to help to prevent Package Migration failure due to a constrained server on large sites. See Safe Mode for more info on that feature.
From the Create Package modal, you can use the default name or create a custom package name in the Package Name field.
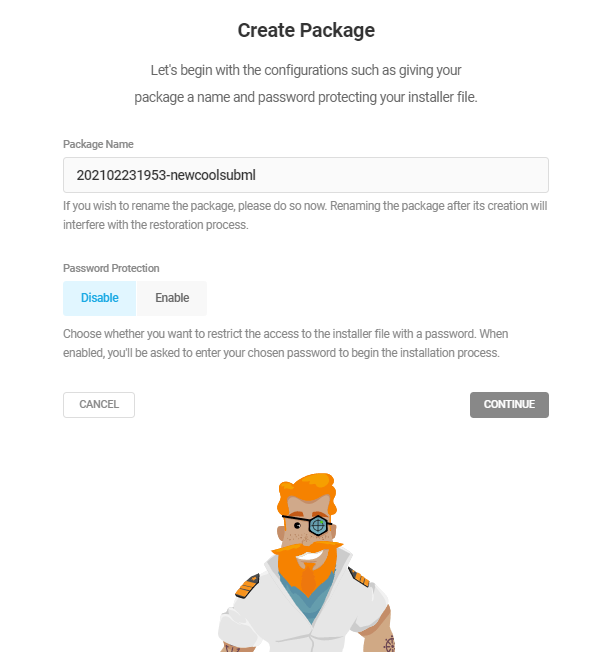
Once you have downloaded your migration package as seen in the Ready to Migrate step below, do not rename the file. That will cause the migration deployment to fail because the installer file will look for an archive with the name you set here.
In multisite installations, you will see an additional option in the Create Package modal where you can choose to package the entire multisite or just one subsite.

Choose whether you want to restrict access to the installer file with a password. When enabled, you’ll be asked to enter your chosen password into the Installer Password field before beginning the packing process. Click Continue to advance to the next step.

By default, the package includes your entire website. However, if you don’t want to migrate any specific files, folders, or database tables, you can use the Filter Exclusion Field to exclude them from the package.
To learn more about filter exclusion rules, click the How to apply the Exclusion filters? tab in the Create Package modal, or visit Migration Filters in the Export section of this usage doc.
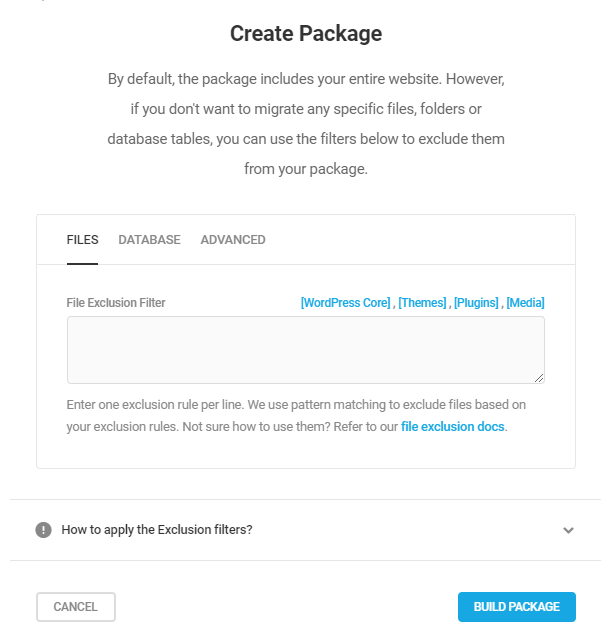
Click Build Package to run your pre-flight check and automatically begin building your site archive.
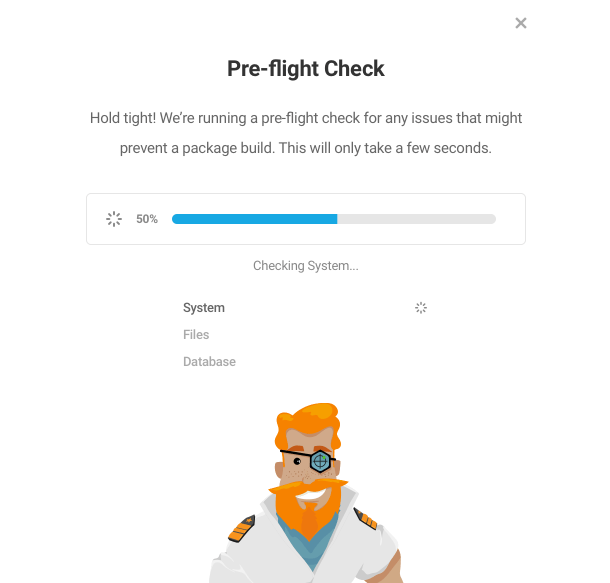
This may take anywhere from a few seconds to a couple of minutes, depending on the size of your site.
If Shipper finds any potential issues with your package during the Pre-flight Check, it will notify you before proceeding with the package build.

Click on any issue title there to expand it and view details about the issue, and get recommendations on how to resolve it before proceeding with the package build.
Click the Continue button when you’re ready to proceed. Shipper will display a progress bar while it’s building your package, with a live scrolling update of the logs. Click the View Logs button if needed to open the full logs screen in a new tab.
Keep this Building Package modal open during the build process. Do not close or refresh the page, or visit this same page in another tab, or the build may fail.
Ready to Migrate
Once your package is finished you will be given instructions for downloading and migrating your site.

- Download package archive and installer – The first step is to download both the archive ZIP file and the installer.php file. You’ll need both of these to complete the migration. Click the provided icons to download both files.
- Upload both files to your destination server – The next step is to upload both the package archive and installer files to the root directory of your destination server. We recommend uploading them via SFTP using an FTP client such as FileZilla. You’ll need an FTP account to connect to your destination server, and if you are not sure how to create an FTP account, please contact your hosting support.
- Visit installer.php on your destination server and follow the instructions – Once you’ve uploaded both the archive and installer files to your new server, visit the installer.php in your browser. To do this, open up your web browser and type in your new website domain along with /installer.php. i.e., https://example.com/installer.php. Follow the instructions on the installer wizard to complete the migration.
Additional Details about the package size can be accessed by using the arrow to spin open more information about the package, including:
- Package Name
- Date the package was created
- Size of the package
- File exclusions (if any)
- Database Exclusions (if any)
- Advanced Exclusions (if any)
- If the package is password protected

You can also Delete the file or jump to the logs by clicking the View Logs button.
Use the New Package button if you would like to rebuild the package before migrating the site.
Some web browsers, including Safari, by default extract ZIP files automatically upon download to simplify the process for users who frequently download and open ZIP archives. You can follow the steps mentioned in this blog post to change this behavior.
Migration Wizard
When uploading a package to a new site, the package wizard will guide you through the process.
Installer Password
If a password was added when building the package you will be required to enter the password to move forward. The package password is listed under the Additional Details section when the site was packaged. Click next to proceed.

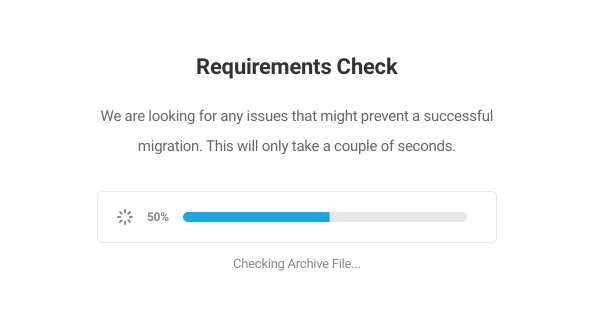
Requirements Check
The Shipper installer will run a check to ensure the new server meets the requirements to unpackage the site.
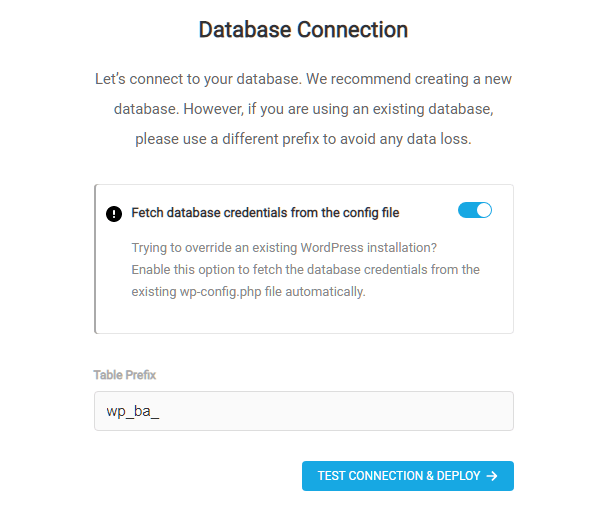
Database Connection
If you are migrating to an existing WordPress install and wish to override it, toggle on the option to Fetch database credentials from the config file to automatically use the database info from the wp-config.php file of the existing site.
Shipper will create a new set of tables in the existing database so you will still have the original tables on the destination site just in case you need them. You can always delete those original tables later if you wish to.
Note that the Table Prefix that shows there will be the table prefix from the source site. You can change that if you wish.
Important: If you are restoring on Flywheel hosting, do not add a different prefix. After running the installer.php script, please add a prefix that matches the prefix of your database on Flywheel (i.e. the default given by Flywheel). A warning will be shown that the prefix already exists. Please choose “Click here to proceed using the set prefix” and continue with the restoration.
However, if you are migrating to a fresh WordPress install, or have created a new database on an existing site, you will need to enter the following information in the corresponding fields:
- Database hostname
- Port
- Database name
- Database username
- Database password
- Database prefix
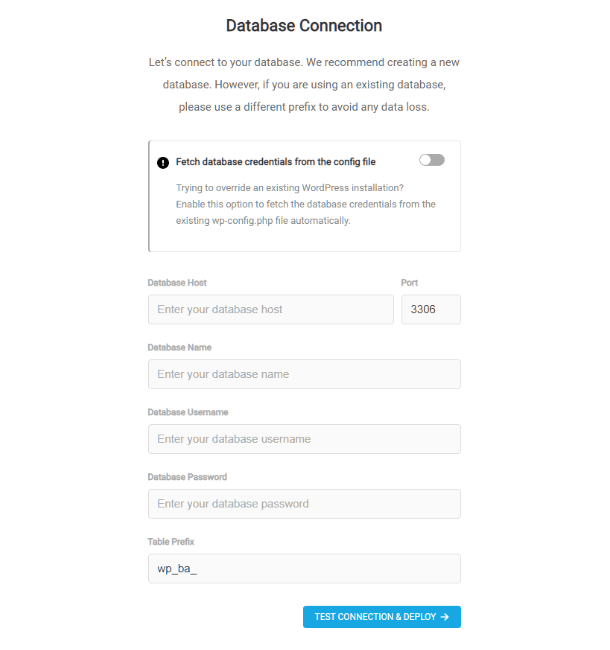
Where these details are located will vary from host-to-host. Contact your hosting provider if you need assistance finding information about your database connection.
Click the Test Connection & Deploy button to proceed.
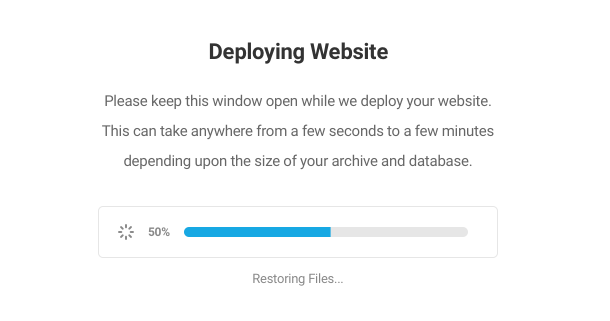
Deploy Website
A progress bar will appear while the site files are unpackaged and the database is installed. You will need to keep the browser window open while this process completes. This can take some time depending on size.
Update Data
By default, the site URL, site path, and site title included in the package will be used. You can customize them here.

Finish & Cleanup
Use the Admin Login button to check your site. If the migration looks successful, use the Run Cleanup button to remove the installer files. It is highly recommended that you remove installer files as soon as the migration is complete and verified because they contain sensitive information.

5.2.2 Settings (Package)
Link to chapter 2Some of the Package Migration settings are slightly different for sites hosted by WPMU DEV compared to those hosted by 3rd-party providers. So let’s go over those differences first.
WPMU DEV Hosted
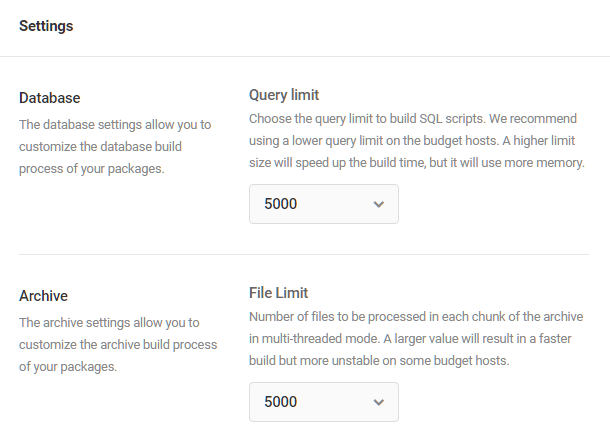
The Database and Archive settings are much simpler for WPMU DEV hosted sites.
- Database – You can optionally adjust the Query Limit for the package build here. A higher number here will speed up the build but will consume more memory. If in doubt, leave it at the default setting.
- Archive – Optionally adjust the number of files to be processed per archive chunk. A higher number here will speed up the build but may be a bit unstable on our lower hosting plans. If in doubt, leave it at the default setting.
3rd-Party Hosted
On 3rd-party hosted sites, the Database and Archive settings each have an additional option enabling you to select the most efficient one according to your hosting plan.
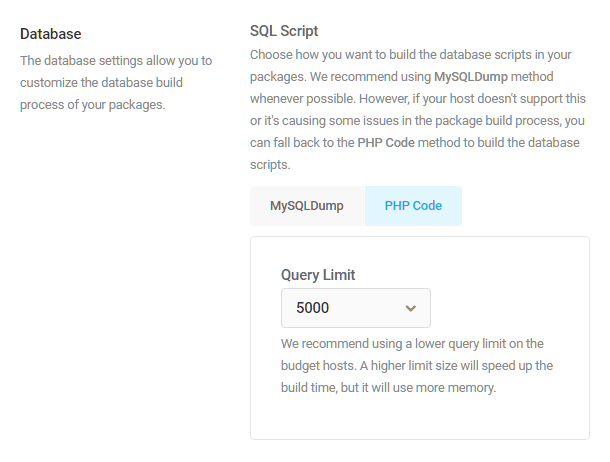
Database
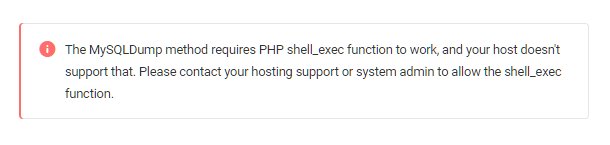
Select either the MySQLDump or PHP Code option for the database build. We recommend the MySQLDump method where possible as that’s the more efficient method.
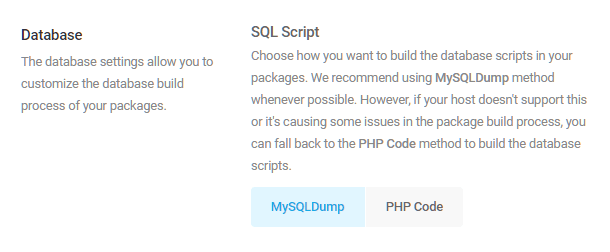
However, that option requires the PHP shell_exec function to work. If your host does not support that, you’ll see this message and may need to use the PHP Code option instead.
If you select the PHP Code option, you can adjust the Query Limit for the package build as seen above for WPMU DEV hosted sites.
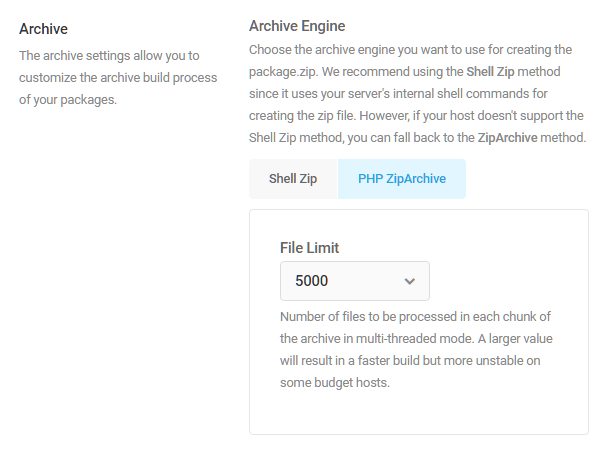
Archive
Select either the Shell Zip or PHP ZipArchive option for the package archive. We recommend the Shell Zip method where possible as that’s the more efficient method.

However, that option requires the PHP shell_exec function to work. If your host does not support that, you’ll see this message and may need to use the PHP Code option instead.

If you select the PHP ZipArchive option, you can adjust the File Limit for the package build as seen above for WPMU DEV hosted sites.
All Hosts
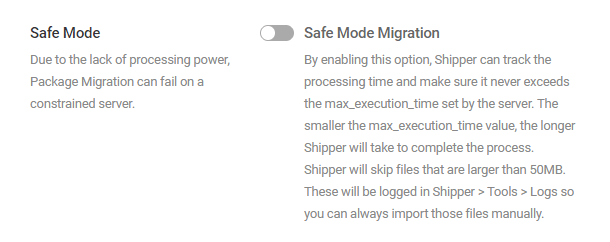
Safe Mode
If your hosting plan offers only limited resources, you can enable the Safe Mode option to ensure Shipper never exceeds what is set for max_execution_time on your server. This should not be an issue with WPMU DEV hosted sites as max_execution_time is set to 300 for all hosting plans.
Enabling Safe Mode will also force Shipper to skip any files larger than 50Mb in size. Skipped files will be logged in Shipper > Tools > Logs so you can always import those files manually.
5.3 API Migration
Copy chapter anchor to clipboardThe API Migration tool allows you to import or export from either the source or destination site:
- Export – Send a single website, multisite network, or subsite to a new location. Unwanted files and database tables can be excluded.
- Import – Receive a complete single website, multisite network or subsite from another location.
Note that, unlike the export function, files and databases tables cannot be excluded when importing with API Migration. Sites/networks must be moved in their entirety.
Single site to subsite and subsite to subsite migrations are not supported by the plugin. These types of migrations are best accomplished manually. If you need help with this type of migration, see our blog post on How to Move a Site Into a Multisite Network. You’ll find instructions for all other types of migrations below.

Preparing for Migration
A few things need to be in place before using the API Migration tool to ship your website.
To get started you need:
- One Destination site
- One Source site
- Both sites connected to your Hub via WPMU DEV Dashboard
- Shipper installed on both sites
Local installation notes:
- Shipper will work with local installations, but if you’re using Local by Flywheel it needs to be on NGINX
- You can’t trigger an import of the source site from your local installation
- You can’t trigger an import from the destination site of your local installation
5.3.1 Export Single Site to Single Site
Link to chapter 3To export the content of your existing single site to a new single site location, from the API Migration screen, select Export.
You’ll be prompted to enter your WPMU DEV password as a security measure before proceeding with the migration.
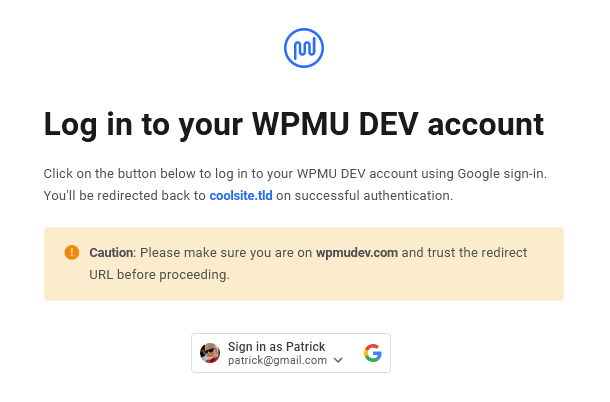
Note that if you signed up to WPMU DEV using your Google account and have not yet set a WPMU DEV password on your Hub Account page, you can authenticate the migration using your Google account instead.

If you select to authenticate with your Google account, you’ll be prompted to select and confirm the account you wish to use for this action.
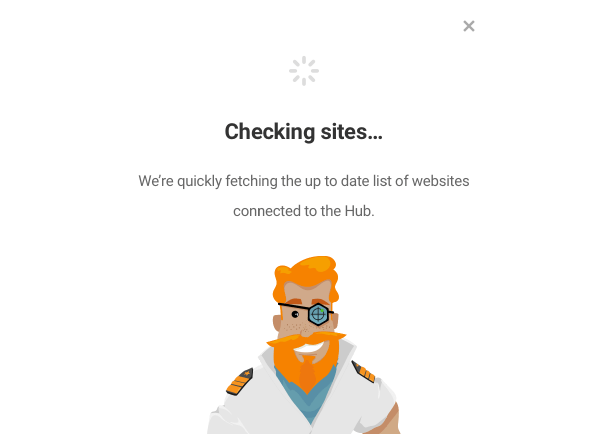
Shipper will fetch a list of your connected sites, but unless you have many, many sites connected to the Hub, the image below may appear on screen for only a split second.
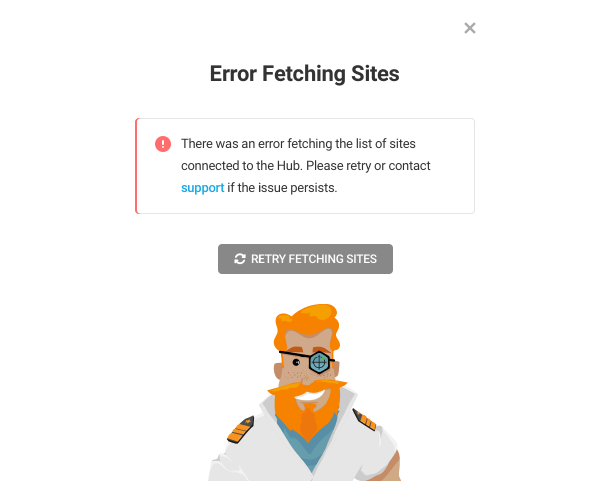
If something prevents Shipper from fetching your sites, the error screen below will appear. Click Support to contact support, and our support superheroes will help resolve the issue.
Choose Destination
Click the dropdown arrow to reveal a a list of your connected sites. Select the single site you wish to export to, then click the blue arrow to proceed.
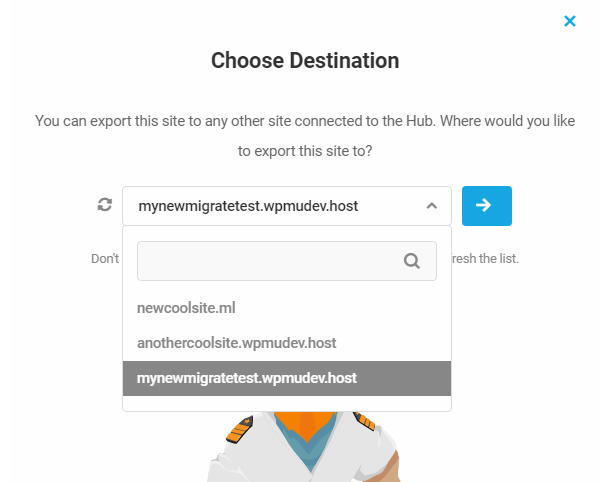
If you created or connected a new site for this migration and it isn’t showing in the list, click the Refresh button to reload the list. If the site is still not present after refreshing, then it is likely that the site is not connected to the Hub. Click Add a new site to do that before proceeding.

If Shipper is not yet active on the destination site, no worries, the plugin will be auto-installed there for you and readied for the migration. You’ll see this screen for a few seconds while that is being done.

Migration Filters
By default, the export process includes the entire selected website, but depending on your goal, you may not want to migrate every file associated with a site. You can use filters to exclude specific files.
If you wish to migrate your entire site, click Next to run the pre-flight check, which is discussed below in the Pre-flight section of this document. Otherwise, continue to the File Exclusion section for guidance on applying filters to an export.

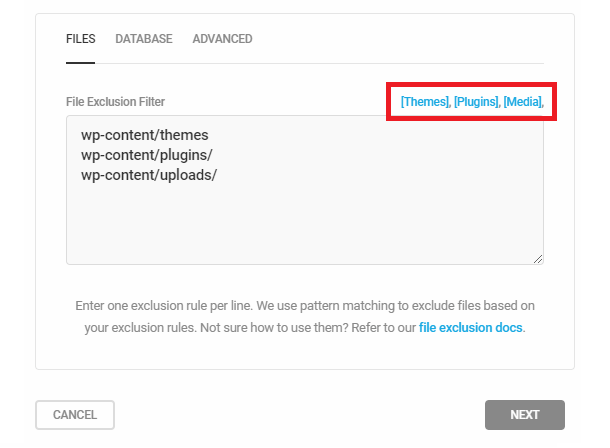
File Exclusion
You can exclude specific files from being migrated using the “File Exclusion Filter” tool. Add the path to the folder or files or directories you don’t want to include in your migration. Place only one exclusion rule per line.
Shortcut buttons are present that, when clicked, will add the correct path for the Themes, Plugins, or Uploads folders to the exclusion list. If you wish to exclude inactive theme or plugin files but want to keep those which are active, see the applicable options available under the Advanced tab.
The exclusion filter uses pattern matching to exclude files based on your rules, and wildcards ( * ) can be used here as well. So the following examples would work just fine in this field:
- .zip – will exclude all files with the ZIP extension.
- /entire-folder/ – will exclude the folder with this specific name.
- /folder/file.zip – will exclude this specific file in this specific folder.
- /folder/*.txt – will exclude all files with the TXT extension at the end, but only in the directory named FOLDER.
- /folder/sub-folder/*.* – will exclude all files with any extension in the directory SUB-FOLDER which is a subdirectory of FOLDER, but other directories inside FOLDER/SUB-FOLDER would not be affected.
- */IgnoreDir/*.* – will exclude all files inside any directory called IGNOREDIR.
Database Exclusion
Select the Database tab to access a series of dropdown menus that allow you to selectively exclude tables. Uncheck the box next to All to exclude the entire database.

Advanced
Select the Advanced tab to access a list of options that allow you to exclude some seldom-used files maintained by WordPress. These include:
- Exclude spam comments
- Exclude post revisions
- Exclude inactive themes
- Exclude inactive plugins

Pre-Flight Check
The Pre-Flight check scans for issues that will prevent a successful migration and server differences. If any issues are found, a Pre-flight Issues screen will appear with dropdown screens that detail the issue(s) and the recommended solution.
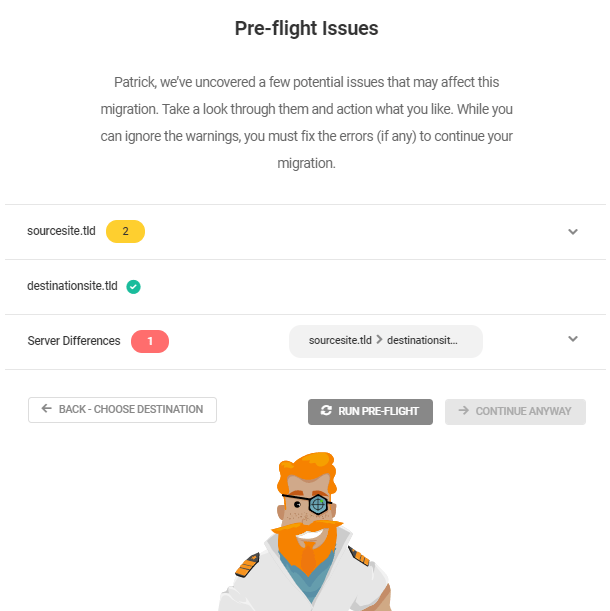
Issues in yellow are warnings that may or may not cause export issues and can be ignored if you wish. Issues in red, on the other hand, are errors that will definitely prevent a successful export and must be addressed before Shipper will allow the export to proceed.

Note that the Continue button is disabled while errors exist.

The Continue Anyway button will become available once all issues are resolved. If you leave the site open while addressing warnings and errors, you can return to this screen and proceed by clicking Continue. If you wish to select a different destination site, click the Back – Choose Destination button.
Pre-flight check includes:
- Shipper version is compatible on sending and receiving site (see Troubleshooting chapter below if you get a mismatch warning)
- File system writable (working, storage, log, and temp directories)
- Password protection is disabled
- AWS SDK loads successfully
- ZIP support is available
- Package size
- File size is valid
- Data is valid
- Long filename validity
- PHP v5.5 or newer is available
- PHP version difference – sending and receiving website use same version of PHP
- Server operating systems match
- Server type compatibility
- Max Execution Time is 120 or above
- MySQL/MariaDB versions
- DB charset acceptable differences
- Multisite check (Shipper does not export multisite to single or single to multisite)
- Multisite compatibility (Shipper does not convert from subdomain to subfolder or vice versa)
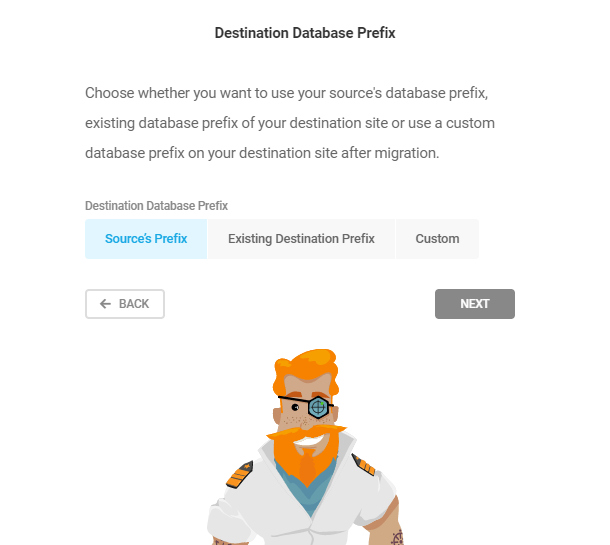
Destination Database Prefix
Database tables have a default prefix added to the beginning of the name. By default, the WordPress database table prefix is wp_ . This prefix is sometimes customized.
When migrating tables with Shipper, you can migrate tables with:
- Source’s prefix – Migrate tables with the shipping sites prefix
- Existing destination prefix – Use the existing destination prefix
- Custom – A new custom prefix
If you wish to create a Custom prefix, use the Choose custom database prefix field for customizing the prefix during migration.
We recommend including an underscore to the end of your prefix for finding and managing database tables example newprefix_.
Click Next, the Shipper export setup wizard will close, and you will be given the option to begin the migration.
Shipper overwrites any existing files or database tables on your destination website. Make sure you have a backup.
Begin Migration
Click Begin Migration, and your site will be cloned to the new location.

A progress bar will display with a time estimate.
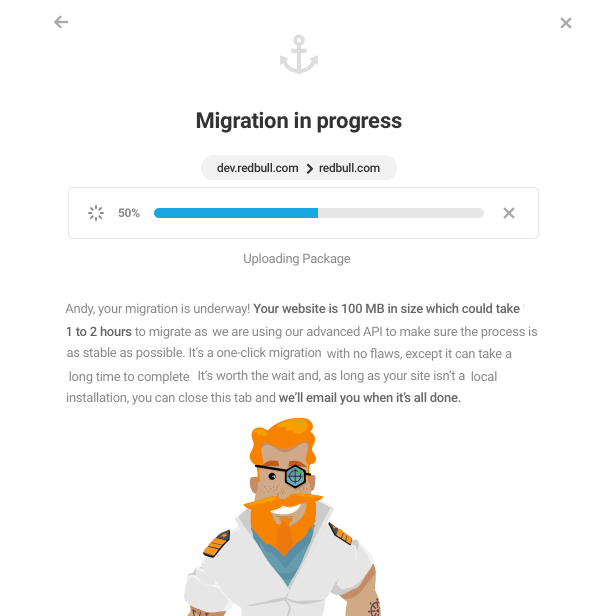
Shipper uses our advanced API to make sure the process is as stable as possible. It can take a long time to complete. It’s worth the wait. You can close the tab, and Shipper will send you an email when it is done migrating. Note, If you are migrating from a local to live the email notification is not available.
Migration Complete
If your migration is successful, you will get the message, “Your website has been successfully migrated.” along with a link to visit the site.
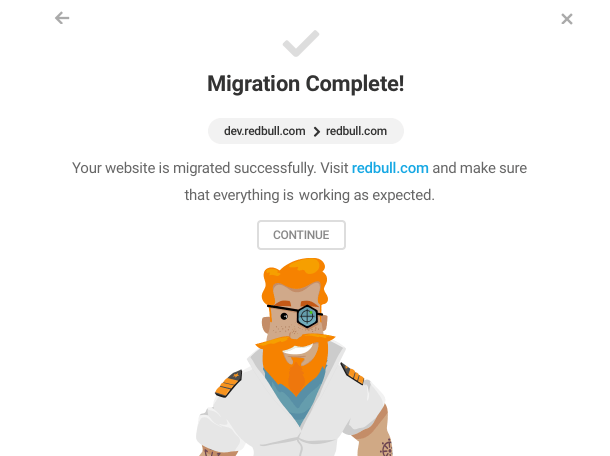
Clicking the Refresh button will return you to the beginning of the API Migration modal.
Migration failed
If your migration fails, you will receive a notification that, “Something went wrong with your migration.”

Clicking the Try Again button will allow you to rerun the migration.
Clicking the Check logs button will open your migration logs. More information about logs can be found under the Migration Logs section below.
Troubleshooting Tips
If your migration fails because you ignored a pre-flight check warning, or if the auto-install of Shipper on the destination site fails, you can try and resolve the warnings and rerun the migration.

Migrating between two different hosts often causes migrations to fail. We recommend contacting support before attempting to migrate between hosts.
Canceling a migration after it begins can break the destination site, although in most cases it can be fully recovered. Be sure you are ready to begin before initiating the process.

Members with access to our 24/7 live support also get unlimited site migration support at no additional cost. If you are experiencing issues with Shipper, talk with our support team or try the package method for a more reliable migration experience.
5.3.2 Export Multisite to Multisite
Link to chapter 3When using Shipper to migrate a Multisite network, you are given the option to migrate the whole network or migrate only a Subsite to a Single site. This chapter of this usage guide deals with migrating the entire network. To migrate only a subsite, see the Export Subsite to Single Site or Import Subsite to Single Site chapters below.
Choosing Whole Network in the Migration Type modal will migrate your entire Multisite to the new location.
It’s important to note here that this will not merge the source network with the destination network; the migration will overwrite the entire destination network. So if you want to keep any data from the existing destination network, be sure to create and save a backup of it before continuing with the migration.

You will then be prompted to enter your WPMU DEV password as a security measure.
From this point on, the wizard steps are the same for Multisite as they are for exporting a single site, so see that section of this guide for guidance on the following:
The notification processes for successful and failed migrations are also identical as when exporting a single site, so please see the following sections for details on those if needed:
5.3.3 Export Subsite to Single Site
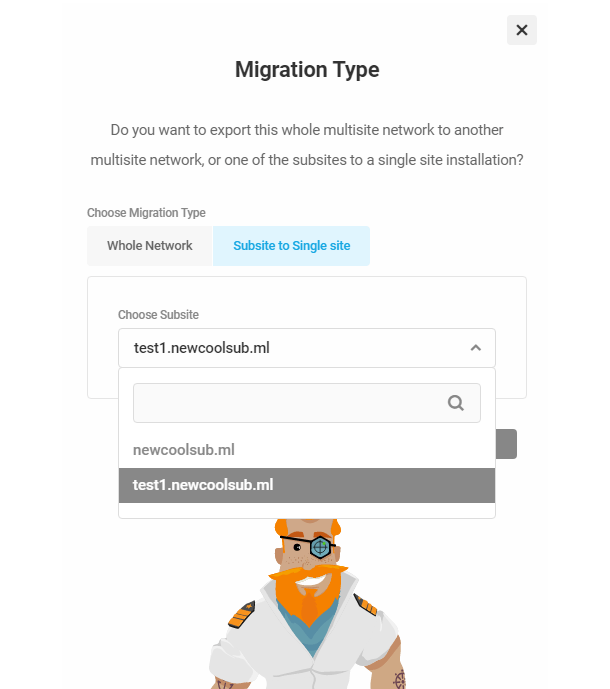
Link to chapter 3When using Shipper to migrate a Multisite network, you are given the option to migrate the whole network or migrate only a Subsite to a Single site. This chapter of this usage guide deals with migrating only a subsite. To migrate the entire network, see the Export Multisite to Multisite or Import Multisite to Multisite chapters.
If you’re wanting a speedy walk-through of how to migrate a subsite to a single site, you can check out our blogs. Particularly, how to Migrate a WordPress Multisite Subsite to a Single WordPress Site is a fantastic source of information.
When you select Subsite to Single Site in the Migration Type modal, a list of subsites will appear in the dropdown. Select a subsite to migrate and then click Next.
You will then be prompted to enter your WPMU DEV password as a security measure.
On the next screen, select the single site you wish to migrate this subsite to. Be careful here as all your connected sites still appear in this list, including any multisites you may have, and you wouldn’t want to overwrite a multisite in error.

From this point on, the wizard steps are the same for a subsite as they are for exporting a single site, so see that section of this guide for guidance on the following:
The notification processes for successful and failed migrations are also identical as when exporting a single site, so please see the following sections for details on those if needed:
5.3.4 Import Single Site to Single Site
Link to chapter 3To import the content of another single site to your site, from the API Migration screen, select Import.
Just as with the export process, you’ll be prompted to enter your WPMU DEV password as a security measure.
Choose Source
Click the dropdown arrow to reveal a list of your connected sites. Select the single site you wish to import, then click the blue arrow to proceed
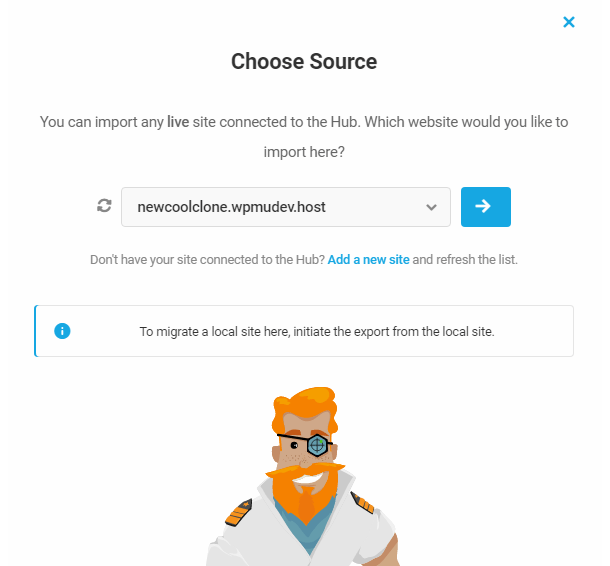
As noted at the beginning of this document, you cannot import a local install. If that is what you need to migrate, you’ll need to run the process as an export instead.
From this point on, the wizard steps are the same for importing a single site as they are for exporting a single site, so see that section of this guide for guidance on the following:
The notification processes for successful and failed migrations are also identical as when exporting a single site, so please see the following sections for details on those if needed:
Files and database tables cannot be excluded during import, but they can be excluded during export. See the Export Single Site to Single Site chapter for more info.
5.3.5 Import Multisite to Multisite
Link to chapter 3When using Shipper to migrate a Multisite network, you are given the option to migrate the whole network or migrate only a Subsite to a Single site. This chapter of this usage guide deals with migrating the entire network. To migrate only a subsite, see the Export Subsite to Single Site or Import Subsite to Single Site chapters below.
It’s important to note here that this will not merge the source network with the destination network; the migration will overwrite the entire destination network. So if you want to keep any data from the existing destination network, be sure to create and save a backup of it before continuing with the migration.
To import the content of another multisite to your multisite, from the API Migration screen, select Import.
Just as with the export process, you’ll first be prompted to enter your WPMU DEV password as a security measure.
Choosing the source multisite is the same as when choosing the source site for importing a single site to another single site. So see that section above for details: Choose Source
From this point on, the wizard steps are the same for importing a multisite as they are for exporting a single site, so see that section of this guide for guidance on the following:
The notification processes for successful and failed migrations are also identical as when exporting a single site, so please see the following sections for details on those if needed:
Files and database tables cannot be excluded during import, but they can be excluded during export. See the Export Single Site to Single Site chapter for more info.
5.3.6 Import Subsite to Single Site
Link to chapter 3When using Shipper to migrate a Multisite network, you are given the option to migrate the whole network or migrate only a Subsite to a Single site. This chapter of this usage guide deals with migrating only a subsite. To migrate the entire network, see the Export Multisite to Multisite or Import Multisite to Multisite chapters.
To import the content of a subsite in another multisite to your single site install, from the API Migration screen, select Import.
Just as with the export process, you’ll first be prompted to enter your WPMU DEV password as a security measure.
Choosing the source multisite is the same as when choosing the source site for importing a single site to another single site. So see that section above for details: Choose Source
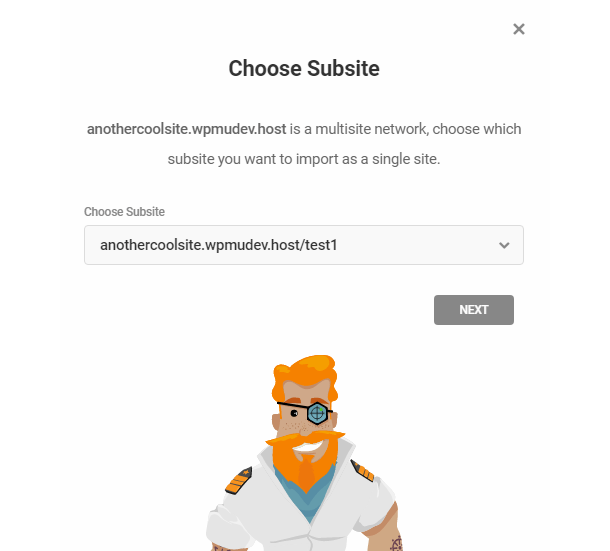
Once selected, Shipper will recognize your selection as a multisite and will prompt you to select the subsite you wish to import into your single site.
From this point on, the wizard steps are the same for importing a subsite as they are for exporting a single site, so see that section of this guide for guidance on the following:
The notification processes for successful and failed migrations are also identical as when exporting a single site, so please see the following sections for details on those if needed:
Files and database tables cannot be excluded during import, but they can be excluded during export. See the Export Single Site to Single Site chapter for more info.
5.4 Settings
Copy chapter anchor to clipboardThe settings module provides additional configuration options for Shipper and your default site migration options.
5.4.1 API
Link to chapter 4The API Migration section gives you a few extra options for managing how your migration should be handled by Shipper when using the API option.
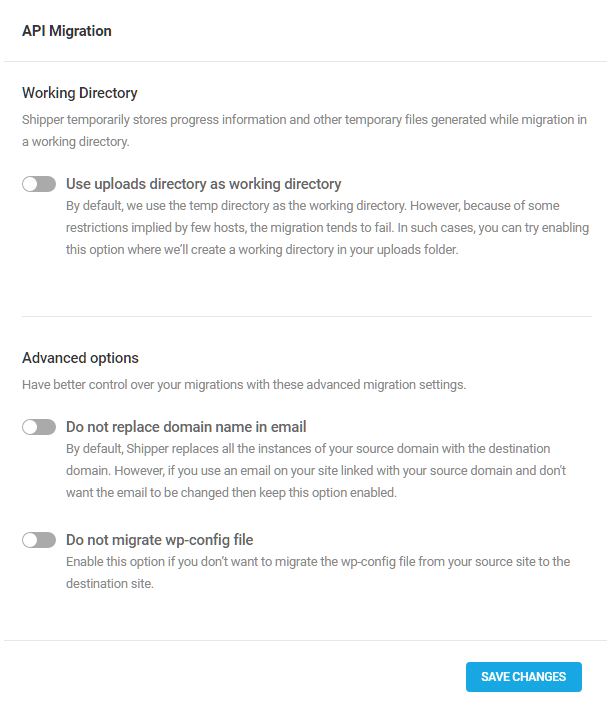
Working Directory
Shipper temporarily stores progress information and other temporary files generated while migration in a working directory.
By default, we use the temp directory as the working directory. However, because of some restrictions implied by a few hosts, the migration tends to fail. In such cases, you can try enabling the use uploads directory as working directory option, and Shipper will create a working directory in your uploads folder.
Advanced Options
- Do not replace domain name in email – By default, Shipper replaces all the instances of your source domain with the destination domain. However, if you use an email on your site linked with your source domain and don’t want the email to be changed, then keep this option enabled.
- Do not migrate wp-config file – Enable this option if you don’t want to migrate the wp-config file from your source site to the destination site.
Click save changes after making any changes to the API Migration settings.
5.4.2 Accessibility
Link to chapter 4Shipper offers a High Contrast Mode to increase the visibility and accessibility of the elements and components of the plugin to meet WCAG AAA requirements.
High Contrast Mode
To enable high contrast mode, toggle Enable high contrast mode and click the Save Changes button.

5.4.3 Data
Link to chapter 4This gives you control over how Shipper data is managed and stored when uninstalling your plugin.
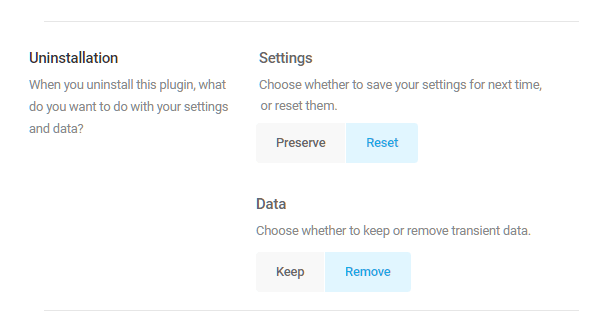
Uninstallation
Choose whether to keep or remove transient data. Select the Keep option to save and Remove to delete the data.
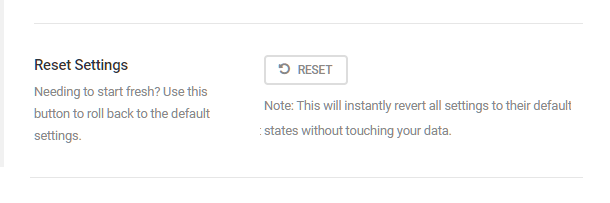
Reset Settings
Need to start fresh? Use the Rest button to roll back to the default Shipper settings.
Remember to click save changes after adjusting Shipper data settings.
Rest will instantly revert all settings to their default states without touching your data.
5.4.4 Notifications
Link to chapter 4Shipper sends email notifications when a migration completes or fails.
You can turn off these notifications by toggling the “Send an email when migration completes” option off.

Email Notifications
By default, only the site admin will receive notifications. Use the Add Recipient button to send notifications to additional users.
You can also choose only to send emails when a migration fails by using the checkbox next to “Only emails when migration fails.”
Remember to click save changes after adjusting Shipper notification settings.
5.4.5 Pagination
Link to chapter 4Pagination lets you choose the number of entries per page for the pre-flight results, such as large files and files with large path listings. By default, Shipper displays 10 entries.

5.4.6 Permissions
Link to chapter 4Permissions
By default, only the user who authenticated the WPMU DEV Dashboard can access Shipper. The permissions settings allow you to Enable other users to access Shipper.
To add new users, click the Add User button. In the search user field, type your username, add click the Add button.
To delete a user, click the trashcan icon.

Remember to click save changes after adjusting Shipper permissions settings.
5.5 Tools
Copy chapter anchor to clipboardThe Tools section has two menu items:
- Logs
- System Information
5.5.1 Logs
Link to chapter 5This shows Shipper’s latest logs and can be used to debug any issues you are having. Logs list the date and time of each migration action. If you also want to view which table was exported, you can add define( 'SHIPPER_DEBUG', true ); to your wp-config.php file.
Use the Download option to download your logs as a text file.

Logs will be automatically refreshed each time you initiate a new migration.
5.5.2 System Information
Link to chapter 5The system information provides critical information about your server setup. It will give you the most up to date information about your site.

Use the dropdown to switch between:
- PHP
- MySQL
- Server
- WordPress
PHP
- max_execution _time
- open_basedir
- upload_max_filesize
- post_max_filesize
- memory_limit
- zip_archive
- version
- version_major
- has_suhosin
- aws_support
MySQL
-
- max_allowed_packet
- version
- charset
- collate
Server
-
-
- type
- os
- working_directory
- working_directory_writable
- working_directory_visible
- working_directory_accessible
- temp_directory
- temp_directory_writable
- temp_directory_visible
- temp_directory_accessible
- storage_directory
- storage_directory_writable
- storage_directory_visible
- storage_directory_accessible
- log_directory
- log_directory_writable
- log_directory_visible
- log_directory_accessible
- access_protected
-
WordPress
-
- WP_CONTENT_DIR
- WP_PLUGIN_DIR
- MULTISITE
- SUBDOMAIN_INSTALL
- version
- shipper_version
- UPLOADS
5.6 Tutorials
Copy chapter anchor to clipboardThis module gives you direct access to Shipper tutorials to help you get the most out of the plugin. Click on any of the articles to read the full blog or click on the View All button to jump to our complete Tutorial blog page.
5.7 FAQ
Copy chapter anchor to clipboardCan I migrate a whole WordPress multisite from one location to another?
Yes, with Shipper you can migrate a whole WordPress multisite from one server to another. And you can migrate a subsite from a multisite network to a single WordPress installation.
If you are migrating a subdomain multisite with the package migration method, we recommend setting up a subdomain multisite on your destination first, just in case. A barebone destination will do – no need to set up any sort of theme or plugins. We are working on a solution to this so that you don’t need to do this step in the future. However, until the solution is complete, please ensure that you include this step.
If I’m using API migration, do I need to pre-install plugins on the destination site before migration?
No, Shipper will do all the work and migrate all plugins, themes, and settings. However, please ensure that you have installed both the WPMU DEV Dashboard and Shipper plugin on the destination site.
Can I migrate my site to localhost?
Yes, you can migrate your site to localhost (XAMPP, MAMP, Flywheel, or other apps) using the Package Migration method.
Can I migrate a site without accessing my host files?
Yes, a site can be migrated without accessing your host to retrieve files. This can be done with the API Migration method.
What are the differences between API Migration and Package Migration?
Both methods have different migration processes. API migration will connect two different sites and will transfer, file by file, your site from one server to another. This saves you from doing all the manual work. With the Package Migration method, a package file needs to be downloaded and uploaded manually to a new destination. After that, as a final step, you need to run an installer.php file to restore it.
5.8 Troubleshooting
Copy chapter anchor to clipboardOur awesome support team is always on call, should you need any help. However, sometimes it is helpful to troubleshoot issues yourself first. Below is a list of some known troubleshooting cases and their appropriate responses to help you along.
If you require any assistance, or if the issue you’re having is not covered here, don’t hesitate to contact our 24/7 live support.
5.8.1 API Migration (Troubleshooting)
Link to chapter 8Possible issue – WPMU DEV API servers busy
Message in Shipper log: Backoff cooldown: 3600 (3568 remaining) / Too many communication errors, cooldown 3125
This can happen when our API Servers are busy and need time to cool down. In cases when it takes a lot of time or the cooldown counter appears stuck, deactivate and reactivate the Shipper plugin.
Possible issue – Insufficient server resources
Message in Shipper log: Service error: status: 508
Your server resources are exhausted. We suggest using the Package Migration method instead, and enable Safe Mode in Shipper > Package Migration > Settings.
Possible issue – API connection interrupted
Message in Shipper log: Service error: Unable to start migration on the target site: Unable to resolve the domain to site ID: site.com; status: 534;
Something went wrong with API connection to your destination site. Be sure the destination site has the WPMU DEV Dashboard installed and it is connected. Deactivate and reactivate Shipper plugin on the destination site.
Possible issue – API cache
Message in Shipper log: Shipper was unable to receive or process your destination’s system info.
This is related to the API cache. Please deactivate and reactivate Shipper on both sites; source, and destination.
Possible issue – API Migration too slow
In cases where much more time has actually passed than is estimated on the API Migration in Progress screen, the API Migration has become stuck (possibly at about 51-99% progress).
The package has been already uploaded to the cloud, but something has prevented the import to the destination site from completing.
Go to the destination site and manually start the Import process there. That will start importing the package that has already been uploaded.
5.8.2 Package Migration (Troubleshooting)
Link to chapter 8Possible issue – Package download fails
This can happen when there is not enough PHP memory. We suggest downloading the file via FTP or cPanel/File Manager instead.
The package file is located in the following directory: .../wp-content/uploads/shipper/package/
Note that the file will have a very long hashed name composed of a series of random alphanumeric characters. So once you have downloaded that file, you’ll need to rename it with the same name you entered when creating the package, and use this as the file extension: .shipper.zip
For example, the package file you download via FTP could have a name like this: g4r23ufo843fgo3tf92f4822yty22y0jhg34ug346h34lhiou6hip34toiuoty87y.zip. You’d want to rename that like this: name-you-gave-your-package.shipper.zip
For reference, the package name can be seen on the Ready to Migrate screen.
Possible issue – Gateway Timeout
If your server is too slow or your internet connection is not fast enough, you may encounter Gateway Timeout issues.
Enable Safe Mode in Shipper > Package Migration > Settings and try again.
Possible issue – Open_basedir restriction in effect
Shipper cannot bypass an open_basedir restriction and it must be disabled. In the php.ini file, comment out the open_basedir line, or disable the restriction in your hosting control panel.
Possible issue – Fatal Error: Out of memory
The server does not have enough memory to run the package creation. Go to Shipper > Package Migration > Settings, set the Query limit and Archive limit to the lowest value, and try Package Migration again.
If the error persists, enable Safe Mode in Shipper > Package Migration > Settings and try again.
Possible issue – Package creation failed with no info
If the Package creation failed in the middle of the process, and there is not enough information, you can enable and use SHIPPER_DEBUG_LOG for a more detailed log.
Add the following define in the wp-config.php file, just above the “That’s all, stop editing…” line, and run new Package Migration:
define( 'SHIPPER_DEBUG_LOG', true );
The define will cause details about every file and db table that is included inside the package to be logged to the current migration log in Shipper > Tools > Logs.
5.8.3 Package Deployment
Link to chapter 8Possible issue – Missing user
Connection with the database on the destination site is not possible. Make sure the database is created there and the credentials are correct.
Possible issue – The file wp-config.php already exists
If you see “The file wp-config.php already exists” when visiting the wp-admin of the migrated site, it may be a permalink issue. Locate the .htaccess file and remove it.
Or it could simply be a browser cache issue. Try clearing browser cache.
Possible issue – Missing images after migration
Most of the time, this is caused by a CDN. Check for CDN plugins, deactivate them and clear all caches to see if the images are shown. Note that some CDN plugins need to be set up from scratch on a new destination.
Possible issue – No content restored with Oxygen builder installed
First, ensure all caches are cleared, the PHP version on the destination site is at least 7.4, and permalinks are set to the same as the source site.
Then refer to the Oxygen Troubleshooting guide for info on how to “Re-sign Oxygen shortcodes” and “Regenerate Oxygen’s CSS cache”.
Possible issue – Corrupted package
Message in Shipper log: AJAX: Unable to open archive / AJAX: Unable to extract [sqls/dump.sql]
The migration Package is corrupted likely due to a connection issue during creation, download or upload.
Also, if a package file is zipped twice, you will receive this error: AJAX: Unable to find manifest at: …/public_html/shipper-working/meta/migration_manifest.json
Try the restore process again on the destination site. If that fails, create a new package on the source site, and try again.
5.8.4 Other Issues
Link to chapter 8Incorrect Character Encoding
If on-page characters are unreadable after migration, it is due to an issue with character encoding in the database that can happen when migrating to a new server and the PHP version is less than 7.4.
To resolve the issue, open the wp-config.php file on the destination site, and comment out the following lines:
define('DB_CHARSET', 'utf8');
define('DB_COLLATE', '');
404 Pages after migration
This is rather common and can be resolved by refreshing permalinks on the destination site. Go to Settings > Permalinks, and set them to anything other than what they are now. Save. Then set them back to what you had before, and Save again.
Pre-flight Check stuck
This can happen if there are very large files and/or the server’s resources are insufficient to process large files.
It usually only occurs with the API Migration though, so we recommend using the Package Migration option instead.
- Check for large 3rd-party directories and exclude them.
- Exclude backup files/directories as you don’t need to migrate those (each backup would be the same size as your site, so you should download them instead if you want to keep them).
- Check for any directories that don’t belong to the site being migrated and exclude them. For example, additional sites on the same server in their own directories should be excluded from the migration (you’d want to migrate each site individually).
Shipper version mismatch in Pre-flight Check
For a successful API migration, you must have the same version of Shipper installed on both the source and destination sites.
- If you have ensured both sites do have the same version installed, but are still getting a version mismatch warning, it is most likely due to server-side cache on one or both of the sites. Clear all server cache on both sites, and try again.
Migration fails on Siteground hosting
If you are hosting with Siteground, please ensure you are using their Standard PHP mode, not Ultrafast PHP, which imposes performance limits that prevent Shipper migrations from completing.
5.9 Get Support
Copy chapter anchor to clipboardIf you still have questions or need assistance after reading this document, please don’t hesitate to contact our support superheroes using the available options under the Support tab in your Hub or via the Support tab in your WPMU DEV Dashboard.


